Table of Contents
Advertisement
Available languages
Available languages
Quick Links
Download this manual
See also:
Owner's Manual
AGATEC
21 Boulevard Littré
00 Le Mesnil le Roi - France
: +33(0)1 34 93 36 31
x: +33(0)1 34 93 35 89
AGL
ATEC Construction Lasers
2202 Redmond Rd.
acksonville, AR 72076
Phone: 800.643.9696
Fax: 501.982.0880
ail: sales@agl-lasers.com
QBL
Liegnitzer Str. 1-3
D- 42489 Wülfrath
l :+49-(0)2058-7881 0
: +49-(0)2058-7881 52
nfo@quante-baulaser.de
PRIM'TOOLS
orecrown Commercial Building,
Electric Road - North Point
Hong Kong
Tel: 852 2566 3667
Fax: 852 2566 9968
Automatic self-levelling laser
Niveau laser automatique
Instruction Manual
Manuel d'utilisation
Advertisement
Table of Contents

Related Manuals for Agatec LT 300


Summary of Contents for Agatec LT 300
- Page 1 Automatic self-levelling laser Niveau laser automatique AGATEC 21 Boulevard Littré 00 Le Mesnil le Roi - France : +33(0)1 34 93 36 31 x: +33(0)1 34 93 35 89 ATEC Construction Lasers 2202 Redmond Rd. acksonville, AR 72076 Phone: 800.643.9696 Fax: 501.982.0880...
-
Page 2: Table Of Contents
LT300 Instruction Manual LT300 Manuel d’utilisation Table of Content Sommaire GENERAL INFORMATION GENERALITES Description Page 3 Description Page 21 Specifications Page 3 Spécifications Page 21 Laser Overview Page 4 Vue du laser Page 22 Keypad Overview Page 4 Vue du clavier Page 22 HOW TO USE THE LT300 UTILISATION DU LT300... -
Page 3: General Information
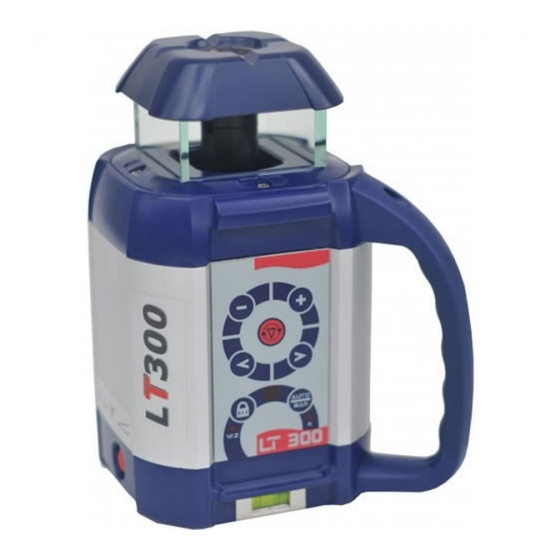
GENERAL INFORMATION Thank you for buying the LT300 laser! Although the LT300 is very simple to use, we recommend that you read this manual before operating the laser. Description The LT300 is a visible laser that can be used for levelling, vertical alignment & squaring. It’s totally waterproof and also has scanning and constant squaring for interior jobs. -
Page 4: Laser Overview
Laser Overview HOW TO USE THE LT300 Setup 2. Non-rotating laser beam for plumb, 1. Rotating laser beam squaring, or pipeline Horizontal (head enclosed in glass lighthouse) The laser can be used on a 5/8-11 tripod, on a wall mount, or directly on a solid, stable surface. -
Page 5: Rotation
It will function only when selected. To activate this safeguard feature, press the Manual Grade H.I. key (1). It is possible to make manual grade on X and Y axis up to 5° on both axis. Caution: H.I. Alert will function only 30 sec. after the laser is levelled, to let the LT300 finishing his self-levellling. -
Page 6: Checking And Adjusting The Lt300
3) Charge for 15 hours. Each end of each axis must be checked for calibration. If needed, the axis can be calibrated using the remote control. When LT300 is charging, a red LED appears on the charger. You can also take the laser to a service center for calibration. The LT300 can be charged while working. -
Page 7: Calibrating X Axis
Calibrating X axis 4) When the beam is levelled, mark the location of the beam center near the first mark. The laser must be calibrated to bring the beam to the center of the two X (-X +X) marks. Calibration is electronic, using the keys on the keypad or in 5) This has to be within the stated accuracy of ±... -
Page 8: Final X To Y Check
Final X to Y Check 3) If you have not moved the laser, use the Z marks made on previous steps. As a final check of the horizontal axes, compare X and Y axes to each other to 4) Use the arrows on the laser keypad to move the beam up or be sure that your adjusted calibration is within the specs of ±... -
Page 9: Care And Handling
ACCESSORIES Laser detectors Detectors are recommended when it is difficult to see the laser beam (outdoor, bright light,…) MR50 Detector Care and Handling • Overview of the detector CAUTION Use of control or calibration procedures other than those specified here in may result in hazardous radiation exposure. -
Page 10: Using The Mr50 Detector
• Using the MR50 detector MR80S Detector / Remote control : 1. Press the On/Off button to turn on the detector The MR80S can be used as a remote control as well as a laser detector. 2. Press on the middle button to select the detection mode of the detector. The coarse mode is the default mode when the MR50 is turned on. -
Page 11: Mr80S Specifications
• Using the MR80S in detector mode • MR80S Specifications : Operating distance in detector mode 180 meters 1. Press the On/Off button to turn the detector on. Operating distance in remote mode 30 meters inside 2. Press on the middle button (2) to select the detection mode (fine or Sound 3 sound levels –... -
Page 12: Tripods
Tripods GENERALITES Nous vous remercions d’avoir choisi le niveau laser automatique LT300. Bien The LT300 laser can be mounted on a 5/8-11 flat head tripod. You can also use que très simple à utiliser, nous vous recommandons vivement de lire les a tripod with an elevating column to adjust the height of the laser. -
Page 13: Vue Du Laser
Vue du laser UTILISATION DU LT300 Mise en station 2. Point laser pour équerrage Horizontale 1. Point laser rotatif Le laser peut être fixé sur un trépied standard ou à colonne possédant une fixation 5/8’’ ou peut être positionné directement sur le sol (surface stable). 7. -
Page 14: Fonction Tilt
Fonction Tilt Fonction Scanning La fonction Tilt stoppe le laser automatiquement si l’altitude de ce dernier La fonction scanning vous permet de mieux voir le rayon laser à des distances change ou si celui-ci est bousculé et ce, afin d’éviter toute fausse lecture du plus importantes. -
Page 15: Batteries
Ce rayon peut être aligné sur la gauche ou la droite et conservera un équerrage Contrôle et calibrage du LT300 permanent avec le plan rotatif. Lorsque le LT300 s’est calé en mode vertical, appuyer sur les touches < ou >. Votre LT300 possède trois axes : les axes X et Y pour le plan horizontal et l’axe Z Le point laser d’équerrage bougera dans la direction voulue tout en conservant pour le plan vertical. -
Page 16: Contrôle De L'axe X
X, en appuyant sur la touche + (11 sur la MR80, 2 sur la 3) En utilisant une cellule de détection, marquer sur le mur le centre du TL25, ou 4 sur le LT 300) ; la LED 9 clignote. rayon laser (ou sans cellule de réception si la visibilité le permet). -
Page 17: Calibrage De L'axe Y
Le laser doit être calibré de telle manière à ce que le plan de rotation Z soit par- sur la MR80, 2 sur la TL25, ou 4 sur le LT 300). La LED 8 clignote. faitement parallèle au fil à plomb. -
Page 18: Contrôle D'erreurs Conique
5) Déplacer lentement le plan laser le long du fil à plomb afin de réaliser le Soins et transport contrôle final. ATTENTION 6) Après avoir effectué la calibrage de l’axe Z, appuyer sur la touche Auto/Man Le contrôle ou le calibrage de votre appareil suivant des procédures autres que pour sauvegarder les données. -
Page 19: Accessoires
Accessoires • Utiliser la cellule de détection MR50 Les cellules de déctection sont recommandées lorqu’il devient difficile Appuyer sur la touche Marche / Arrêt pour mettre la cellule en fonction. d’observer le laser à l’oeil nu (exemple : en plein air, en lumière vive...). Appuyer sur la touche F/C pour sélectionner le mode de précision le plus adapté... - Page 20 Cellule de détection / Télécommande MR80S • Utiliser la MR80S en mode détecteur La MR80S peut être utilisée comme télécommande ou cellule de réception. 1. Appuyer sur le bouton Marche / Arret pour activer le mode ‘Détecteur’ . 2. Appuyer sur la touche du milieu pour sélectionner le mode de précision le plus adapté...
-
Page 21: Changer La Pile De La Mr80S
• Changer la pile de la MR80S Vue de la télécommande Pour installer une nouvelle pile 9 volts, ouvrez le logement de la pile situé sur le dos de la cellule. Soulevez tout d’abord la partie gauche puis la partie droite du capuchon. - Page 22 GARANTIE Les fabricants garantissent les instruments de mesure qu’ils fabriquent contre tous vice de production pour une période de un an à compter de la date d’achat. Si pendant cette péri- ode de garantie un instrument est prouvé comme étant défectueux, il sera réparé...
Need help?
Do you have a question about the LT 300 and is the answer not in the manual?
Questions and answers