
Subscribe to Our Youtube Channel
Related Manuals for Monogram ZSGS420D


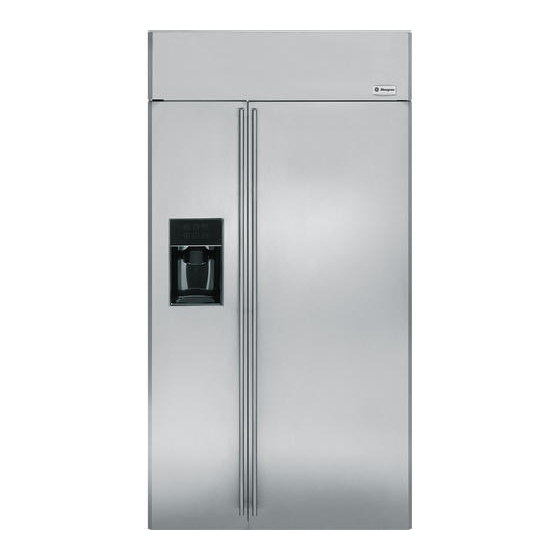
Summary of Contents for Monogram ZSGS420D
-
Page 1: Installation Instructions
Installation Instructions Side by Side Refrigerators Models ZSGS420D ZSGW420D ZSGB420D Design Guide With Installation Instructions Monogram. ®... -
Page 2: Table Of Contents
Safety Information Skill Level BEFORE YOU BEGIN — Installation of this refrigerator requires basic mechanical, electrical, carpentry Read these instructions completely and carefully. and plumbing skills. Proper installation is the responsibility of the installer. Product failure due IMPORTANT • — Save these instructions to improper installation is not covered under the for local inspector’s use. -
Page 3: The Installation Space
483 mm for a full 130° door or back wall. The water line should be 1/4" O.D. swing and to allow for pan removal. copper tubing or GE SmartConnect ™ kit between the cold water line and water connection location,... -
Page 4: 130° Door Swing
Design Guide Frameless Cabinets: The case trim overlaps cabinets at the top and sides. Therefore, frameless cabinets may require filler strips to prevent interference with cabinet door swing. Refrigerator The opening must allow for filler strips. 6060 mm From Rear of Refrigerator 25 mm 51 mm... -
Page 5: Door Swing
Design Guide Frameless Cabinets: The case trim overlaps cabinets at the top and sides. Therefore, frameless cabinets may require Refrigerator filler strips to prevent Case Trim interference with cabinet door swing. The opening must allow for filler strips. 606 mm From Rear of Refrigerator 6 mm... -
Page 6: Customization Basics
CUSTOMIZATION BASICS: Framed Or Overlay Panels, Custom Handles and Accessory Kits Stainless Steel Wrapped Models Overlay panels 42" wide models – ZSGS420D You may also choose to install custom overlay panels from your cabinet manufacturer. This design provides Trimmed Models a seamless appearance which integrates smoothly with 42"... -
Page 7: Mm Framed Panel Dimensions
Design Guide 6 mm FRAMED PANEL DIMENSIONS 8 mm Trim Door Reveal If you choose to install framed panels, they must be cut to the dimensions shown. The panels will slide into the frame on the door and grille. 6 mm Non-Dispenser Models Panel If the custom panel is less than 6 mm thick and it fits... -
Page 8: Mm Overlay Panel Dimensions
Design Guide 19 mm OVERLAY PANEL DIMENSIONS Overlay Panel Door 19 mm For a more custom appearance, overlay panels may be Spacer Panel Overlay installed on trimmed models. The overlay panel must be Panel secured to a 6 mm thick backer panel which slides into the trim. -
Page 9: Raised Overlay Panel Design
Design Guide DISPENSER MODELS: RAISED OVERLAY PANEL DESIGN 6 mm Backer Panel 3 mm Spacer When a raised panel design is to be used, a 19 mm Overlay Panel custom wide middle rail is required to accept the dispenser trim. •... -
Page 10: Side Panels
• 900 mm x 50 mm x 100 mm wood block for is accessible for service and repairs. Anti-Tip support • 1/4" copper water line tubing or GE SmartConnect™ Refrigerator Tubing kits • Water shut-off valve (optional but recommended) • Custom panels for doors and grille panel •... -
Page 11: Step 1, Remove Packaging
The water pressure must be Copper Tubing or between 40 and 120 p.s.i. GE SmartConnect Tubing • Route 1/4" OD copper or GE SmartConnect™ plastic tubing between house cold water line and Shut off the main water supply. the water connection location. -
Page 12: Step 2A, Ro Water Line
Installation Instructions STEP 4 INSTALL ANTI-TIP BRACKETS STEP 2A INSTALLATION WITH HOUSEHOLD WATER WARNING: ANTI-TIP PRECAUTIONS FILTRATION SYSTEMS The refrigerator is top-heavy and must be secured to Skip this step if you do not have a household prevent the possibility of tipping forward. water filtration system. -
Page 13: Connect Power
Installation Instructions STEP 5 OPEN GRILLE PANEL, STEP 6 LEVEL REFRIGERATOR CONNECT POWER All models have 4-point leveling. The front is supported by leveling legs, the rear is supported by The grille panel is secured to prevent access to the adjustable wheels. -
Page 14: Step 7 Secure Refrigerator To Cabinetry
Installation Instructions STEP 7 SECURE REFRIGERATOR STEP 9 INSTALL GRILLE PANEL TO CABINETRY To insert framed or overlay panel into the grille: • Raise the grille panel to stop position. Whenever possible, perform this step for anti-tip security, or when anti-tip brackets cannot be used. The refrigerator must be secured to prevent tipping. -
Page 15: Step 10 Install Framed Panels
Installation Instructions STEP 10 INSTALL FRAMED PANELS Go to Step 10A for Overlay Panels Handle Door Trim Trim Refrigerator Door Supplied Handle Shown in 6 mm Panel Position Install door panels: • Open door to 90°. Remove the 6 Phillips head screws from the door handle. -
Page 16: Step 10A, Install Overlay Panels
Installation Instructions STEP 10A INSTALL OVERLAY PANELS Door Trim Handle Trim Refrigerator Door Move Forward For 19 mm Panel Supplied Handle Shown in Overlay Panel Position Install door panels: • Open door to 90°. Remove the 6 Phillips head screws from the door handle. -
Page 17: Step 11, Install Dispenser Trim
• Turn on the water to check for leaks. correct panel thickness. See pages 7 and 8 for panel construction information. GE SmartConnect™ Tubing: • Insert the molded end of the tubing into the refrigerator connection. Tighten the compression nut until it is just hand tight. -
Page 18: Step 13, Connect Power
Installation Instructions STEP 15 INSTALL TOEKICK STEP 13 CHECK POWER, SECURE GRILLE PANEL • Locate the supplied toekick (shipped taped to the side of the refrigerator). Install with 2 screws • Check to be sure the power cord is plugged into provided, adjust to desired height and tighten the receptacle. - Page 19 Notes...
- Page 20 NOTE: While performing installations described in this book, safety glasses or goggles should be worn. NOTE: Product improvement is a continuing endeavor at General Electric. Therefore, materials, appearance and specifications are subject to change without notice. Monogram. ® Pub. No. 49-60302 Dwg.
Need help?
Do you have a question about the ZSGS420D and is the answer not in the manual?
Questions and answers