Table of Contents
Advertisement
Advertisement
Table of Contents

Related Manuals for Performax M-628900


Summary of Contents for Performax M-628900
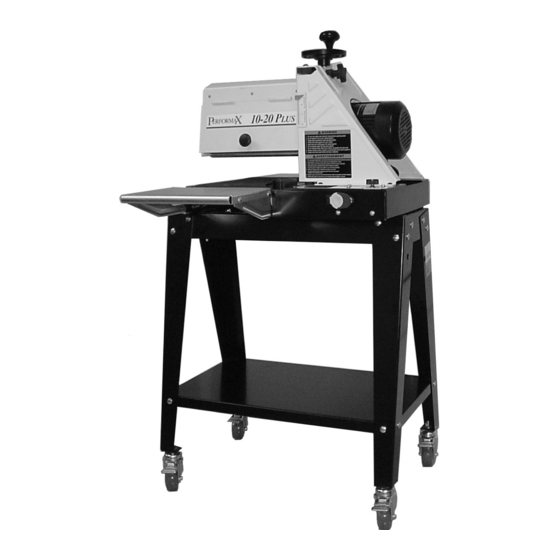
- Page 1 Operating Instructions and Parts Manual Drum Sander Model: 10-20 PLUS (shown with optional accessories) WMH Tool Group 2420 Vantage Drive Part No.: M-628900 Elgin, Illinois 60123 Revision: B 11/03 Phone: 800-274-6848 Copyright © WMH Tool Group www.wmhtoolgroup.com...
-
Page 2: Warranty & Service
To obtain maximum life and efficiency from your Drum Sander and to aid in using it safely, please read this manual thoroughly and follow instructions carefully. -
Page 3: Table Of Contents
Tension Roller Alignment... 18 Tension Roller Pressure Adjustment ... 18 Drum Height Control Adjustment ... 18 Troubleshooting Guide ... 19 Exploded View – 10-20 PLUS Sander ... 20 Parts List for the 10-20 PLUS Sander ... 21 Wiring Diagram... 23... - Page 4 8. Wear ear protectors (plugs or muffs) during extended periods of operation. 9. This drum sander is to be used with wood and wood products only. Use of this drum sander and a dust collector with metal products is a potential fire hazard.
- Page 5 29. Stand to one side of the conveyor and make sure no one else is standing in line with the conveyor while feeding into the machine. The drum sander operates at high speed and should a part slip, it will exit the machine at a high rate of speed and may result in injuries to anyone standing directly in front of the infeed.
-
Page 6: Introduction
This manual is provided by Performax covering the safe operation and maintenance procedures for a Model 10-20 Plus Drum Sander. This manual contains instructions on installation, safety precautions, general operating procedures, maintenance instructions and parts breakdown. This machine has been designed and constructed to provide years of trouble free operation if used in accordance to instructions set forth in this manual. -
Page 7: Grounding Instructions
115 Volt Operation As received from the factory, your sander is ready to run at 115-volt operation. This sander, when wired for 115 volts, is intended for use on a circuit that has an outlet and a plug that looks the one illustrated in Figure A. -
Page 8: Contents Of The Shipping Carton
TUF Tool Abrasive Strip (wrapped on the drum) Conveyor Belt (attached to the base) Owner's Manual Warranty Card Hardware Bag (for attaching the Sander to the Optional Open Stand) — containing: 3/8”-16x5/8” Hex Cap Screws 3/8” Flat Washers Read and understand the... -
Page 9: On/Off Switch
The On/Off Switch (Figure 2, Item A) is located on the front of the sander. To turn the sander on, pull the switch to the on position. To turn the sander off, push the switch to the off position. - Page 10 This Page Intentionally Left Blank...
-
Page 11: Conveyor Belt Tracking
Conveyor Belt Tracking Belt tracking adjustment may be necessary during the break-in period and normal operation to compensate for belt stretching. Abrasive belt tension must be properly adjusted before adjusting the tracking. Adjust the belt tracking while the conveyor belt is running at its fastest speed. -
Page 12: Checking Drum Alignment
Always check it on a piece of scrap wood, as follows, before sanding the work piece. Run a piece of scrap wood approximately 6” wide by 16” to 18“ long through the sander sideways so that the end of the board extends past the end of the drum. -
Page 13: Wrapping Abrasive Strips
“Ready to Cut” abrasives, not all of the steps below are necessary. You can use the original abrasive belt that came with the sander as a template for cutting your own strips. 1. Mark and cut a taper at one end of the roll, as shown in Figure 8. -
Page 14: Using The Tuf Tool Tm
Using the TUF Tool The Tuf Tool (Figure 13) can also be used to hold the take-up fastener in place while you feed the sandpaper through the slot. 1. Clip the sandpaper into the outboard fastener. Wrap the drum, being careful not to overlap the windings. -
Page 15: Connecting Sander To A Dust Collector
Note: The sanding drum should still rotate by hand. Without changing the drum height, finish feeding the stock under the sander. Start the sanding drum and sand the board at that same position. Figure 17... -
Page 16: Abrasives
The abrasive material you choose will have a substantial effect on the performance of your sander. Variations in paper type, weight, coating and durability all contribute to achieving your desired finish. For the best sanding results, Performax offers premium abrasives that have been tested and certified for lowest overall cost and maximum performance. -
Page 17: Performax 10-20 Abrasives
It is very important to have the proper abrasive contact when doing this type of sanding. If the sander is set to take an excessive depth of cut, the result can be a gouge, or dip as the drum goes from sanding the rails at full width to... -
Page 18: Conveyor Belt Replacement
Conveyor Belt Replacement To replace the conveyor belt: 1. Disconnect the machine from the power source. 2. Raise the drum to its highest position using the handwheel (Figure 19, Item A). 3. Remove the belt tension by loosening both take-up nuts (Figure 19, Item B). 4. -
Page 19: Troubleshooting Guide
1. Tension rollers are too high. Board slips on conveyor 2. Excessive feed rate. belt. 3. Dirty or worn conveyor belt. 1. Improper conveyor belt tension. Sander motor slows or 2. Excessive depth of cut. stalls 3. Excessive feed rate. Rippled sanded surface A. Non-uniformly A. -
Page 20: Exploded View - 10-20 Plus Sander
Exploded View – 10-20 PLUS Sander... -
Page 21: Parts List For The 10-20 Plus Sander
Parts List for the 10-20 PLUS Sander Item Part No. 1020-101 Handwheel, Height Adjustment 1020-102 Socket Head Button Screw TS-0680031 Flat Washer 1020-104 Main Support 1020-105 Lock Nut TS-0680061 Flat Washer 1020-107 Nylon Washer 1020-108 Washer, Oilite TS-0267051 Set Screw... - Page 22 Parts List for the 10-20 PLUS Sander Item Part No. 10-4010-04 Set Screw 1020-154 Guide Plate 10-4010-08 Socket Head Cap Screw 3237359 Conveyer Gear Motor 1020-157 Cover, Base-Control Housing 72-2004 Switch, On/Off-Drum 1020-159 Overload 1020-160 Pan Head Machine Screw 12-9001...
-
Page 23: Wiring Diagram
Wiring Diagram... - Page 24 WMH Tool Group 2420 Vantage Drive Elgin, Illinois 60123 Phone: 800-274-6848 www.wmhtoolgroup.com.
Need help?
Do you have a question about the M-628900 and is the answer not in the manual?
Questions and answers