Table of Contents
Advertisement
Advertisement
Table of Contents

Related Manuals for Branson DHA-1000


Summary of Contents for Branson DHA-1000
- Page 1 Operator’s Manual DHA-1000 Tabletop Ultrasonic Cleaner CPN-214-160...
- Page 2 Warranty This ultrasonic Cleaner, when used in accordance with manufacturer’s instructions and under normal use, is guaranteed for two years after date of shipment. Within the period guaranteed, we will repair or replace free of charge, at our sole discretion, all parts that are defective because of material or workmanship, not including costs for removing or installing parts.
-
Page 3: Table Of Contents
Contents Front Warranty Cover Safety Precautions Introduction DHA-1000 General Information Accessories Unpacking Your Cleaner Installing Your Cleaner Equipment Specifications How Ultrasonic Cleaning Works Operating Your Cleaner Before You Start Explanation of Controls Getting Ready Cleaning Items Optimizing Your Cleaner Application Hints... -
Page 4: Safety Precautions
Safety Precautions Before using your Ultrasonic Cleaner, please read and thoroughly understand these safety precautions. Failure to follow them may result in serious personal injury or property damage. To avoid electrical shock: • Do unplug from power source before filling or emptying the tank. •... - Page 5 To prevent damage to the cleaner: • Do change your solution regularly. • Do not operate the cleaner dry. • Do not place parts or containers directly on the bottom of the cleaning tank; use a basket or other device to suspend items. Failure to comply may cause transducer damage and will void your warranty.
-
Page 6: Introduction
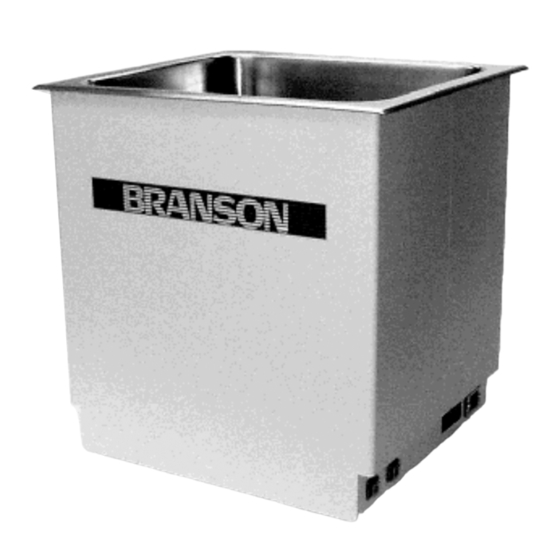
Introduction DHA-1000 General Information This DHA-1000 ultrasonic cleaner is a self-contained unit which consists of a powerful ultrasonic generator, a stainless steel cleaning tank and an array of durable industrial style 44 kHz transducers. These transducers provide increased cleaning power and ensure uniform cleaning activity throughout the bath. -
Page 7: Accessories
Accessories For Your Cleaner A stainless steel cover and a parts cleaning basket are available for your DHA-1000. Description Part Number Stainless Steel Cover 100-246-802 Stainless Steel Parts Basket CPN-916-032 Consult your distributor for price and delivery. Unpacking Your Cleaner Please check your cleaner and its carton carefully for any external or internal damage. -
Page 8: Equipment Specifications
Equipment Specifications Model Tank Tank Overall Weight Heater Input Capacity Size Size Power Power DHA-1000R 10.0 gal. L: 16” L: 19” 46 lbs. 117 V 1000 watts 000-914-506 (38 l)) W: 14” W: 19” (20.9Kg) 60 Hz H: 17” 11.5 A 10.5”... -
Page 9: How Ultrasonic Cleaning Works
How Ultrasonic Cleaning Works Ultrasonic sound is sound transmitted at frequencies generally beyond the range of human hearing. In your ultrasonic cleaner, ultrasonic sound (sonics) is used for cleaning materials and parts. This is how it works: As the sound waves from the transducer radiate through the solution in the tank, they cause alternating high and low pressure... -
Page 10: Operating Your Cleaner
Operating Your Cleaner If this is the first time you are using the cleaner, please read this whole section before proceeding. Before You Start Cleaning CAUTION • Do not place parts or containers directly on the bottom of the cleaning tanks;... -
Page 11: Getting Ready
Getting Ready Step Action Select your cleaning chemistry (check with your chemical supplier for solution effects on metals). Allowing for the volume of the parts you will be cleaning and cleaning chemistry, fill the tank with warm tap water to the operating level (two to four inches from the top). -
Page 12: Optimizing Your Cleaner
Optimizing Your Cleaner Tanks Cleaning - check the tank for contamination whenever you change solution. If necessary, remove contaminants with a nonabrasive cloth and water. Emptying - always unplug the cleaner before emptying the tank. Empty the solution into a proper waste disposal unit. Filling - always unplug the line cord before filling the tank. -
Page 13: Application Hints
Application Hints First time cleaning - first experiment with one piece, then proceed with the remainder. Solution level - Be sure to maintain solution level within one or two inches of the tank top. Surface activity can vary with liquid level. Load size - It is faster and more efficient to run several small loads rather than a few big loads. -
Page 14: Cleaning Solutions
Cleaning Solutions CAUTION Do not use alcohol, gasoline, bleach, mineral acids, solutions with a flash point, semi-aqueous or combustible liquids in ultrasonic tanks, or you will void the warranty. Only use non-flammable and water-based solutions. Solution Types Water-based solutions are either slightly acidic or alkaline. They include detergents, soaps and industrial cleaners designed to remove specific soils. - Page 15 Change the cleaning solution periodically. Cleaning solutions can become contaminated with soil particles which coat the tank bottom. This coating dampens the ultrasonic action and reduces cleaning efficiency. Certain solutions will cavitate better than others. Contact your local distributor for further information. Heat and cavitation: increase the chemical activity of cleaning solutions.
-
Page 16: Troubleshooting
Troubleshooting If your cleaner does not operate satisfactorily, please check the tables below for possible causes before calling your authorized service center. WARNING High voltage inside - dangerous shock hazard. DO NOT attempt to disassemble or repair the cleaner. Problem Cause What to do Cleaner... -
Page 17: Performance
Performance Check your cleaner periodically to test the level of activity of the ultrasonic cavitation. Frequency of testing will depend on your use of the cleaner, however, we suggest running this test monthly. Glass Slide Test You will need the following equipment: •... -
Page 18: Service
The ultrasonics will begin immediately to remove the lead from the slide. All lead should be removed within 10 seconds. If your cleaner passes this test, its ultrasonic cavitation is acceptable. NOTE: To ensure consistency from test to test, be sure to repeat test conditions - use the same solution concentration, liquid level, temperature, type of pencil, length of degassing, etc. - Page 19 BRANSON ULTRASONICS CORPORATION 41 Eagle Road, Danbury, CT 06813-1961 • (203) 796-0400 • FAX (203) 796-2240 Branson Southeast Asia Branson Europe Branson Japan Hong Kong Geneva, Switzerland Tokyo, Japan Branson United Kingdom Branson Canada Branson de Mexico London, England Markham, Ontario Nuevo Laredo, Mexico ©...
Need help?
Do you have a question about the DHA-1000 and is the answer not in the manual?
Questions and answers