
Related Manuals for Branson 1510; 2510; 3510; 5510; 8510


Summary of Contents for Branson 1510; 2510; 3510; 5510; 8510
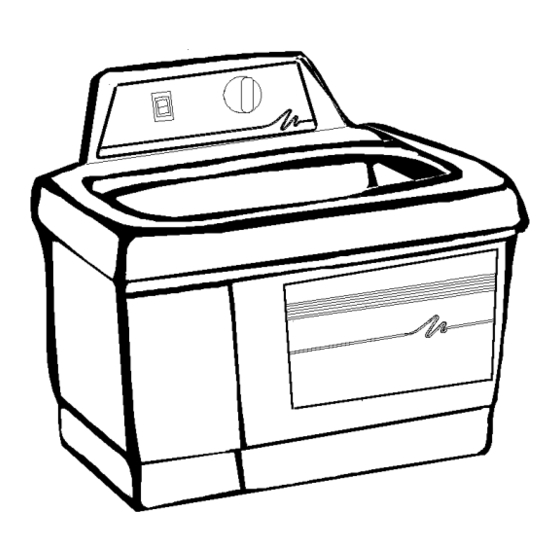
- Page 1 CPN-214-142 Rev. A Ultrasonic Cleaners Models 1510, 2510, 3510, 5510, 8510 Operator’s Manual...
- Page 2 Warranty Ultrasonic Cleaners, when used in accordance with manufacturer’s instructions and under normal use, are guaranteed for two years after date of shipment. Within the period guaranteed, manufacturer will repair or replace free of charge, at its sole discretion, all parts that are defective because of material or workmanship, not including costs for removing or installing parts.
-
Page 3: Table Of Contents
Contents Front WARRANTY Cover Safety Precautions Introduction Ultrasonic Cleaners Accessories Unpacking Your Cleaner Installing Your Cleaner Equipment Specifications How Ultrasonic Cleaning Works Operating Your Cleaner Operating Your MT or MTH Cleaner Operating Your DTH Cleaner Draining Your Cleaner Optimizing Your Cleaner Application Hints Cleaning Methods Cleaning Solutions... -
Page 4: Safety Precautions
Safety Precautions Before using your Ultrasonic Cleaner, please read and thoroughly understand these safety precautions. Failure to follow them may result in serious personal injury or property damage. To avoid electrical shock: Do unplug from power source before filling or emptying the tank. Do keep the control panel and the area around the cleaner clean and dry -- wipe up solution which spills over the tank brim. - Page 5 To prevent damage to the cleaner: Do change your solution regularly. Do not cover vents on the cover. Do not operate the cleaner dry. Do not place parts or containers directly on the bottom of the cleaning tank; use a tray or wire to suspend items. Failure to comply may cause transducer damage and will void your warranty.
-
Page 6: Introduction
Introduction Ultrasonic Cleaners This line of ultrasonic cleaners include five models with sizes ranging from 1/2 gallons, 3/4 gallons, 1-1/2 gallons, 2-1/2 gallons and 5-1/2 gallons. Each model is constructed using durable industrial style 40kHz transducers. These provide increased cleaning power along with built in sweep frequency to ensure uniform cleaning activity throughout the bath. -
Page 7: Accessories
Accessories For Your Cleaner Accessories include regular and beaker positioning covers, solid and perforated insert trays, mesh baskets and beakers. Unpacking Your Cleaner Please check your cleaner and its carton carefully for any external or internal damage. If you find damage, contact your shipping carrier immediately, before contacting your distributor. -
Page 8: Equipment Specifications
Equipment Specifications Tank Tank Overall Weight Max. Heater Capacity Size Size Input Draw Power Power Power Req. (Watts)* 1/2 gal. L: 6” L: 10” 7 lbs. (1.91 L) W: 5.5” W: 12” (3.2KG) D: 4” D: 11.5” 3/4 gal. L: 9.5” L: 13.5”... -
Page 9: How Ultrasonic Cleaning Works
How Ultrasonics Cleaning Works Ultrasonic sound is sound transmitted at frequencies generally beyond the range of human hearing. In your ultrasonic cleaner, ultrasonic sound (sonics) is used for cleaning materials and parts. This is how it works: As the sound waves from the transducer radiate through the solution in the tank, they cause alternating high and low pressures... -
Page 10: Operating Your Cleaner
Operating Your Cleaner If this is the first time you are using the cleaner, please read this whole section before operating your cleaner. Operating Your MT or MTH Cleaner MT Cleaner MTH Cleaner Explanation of Controls Control Function HEAT Activates heat to 60ºC maximum. (MTH only) NOTE: Refer to pages 16 and 17 for further temperature information. - Page 11 Before You Start Cleaning CAUTION Do not place parts or containers directly on the bottom of the cleaning tanks; use a tray or wire to suspend items. Do not allow the solution to drop more than 3/8 inch below the operating level line with the cleaner on.
- Page 12 Degassing Step Action Turn the HEAT ON (MTH Cleaner only). Turn the TIMER to 5-10 and let the cleaner run to allow the solution to “degas”. NOTE: Refer to page 17 for information on degassing. Cleaning Items NOTE: To stop ultrasonics at any time, turn the TIMER to zero. Step Action Set the TIMER for the amount of time you wish the items to be...
-
Page 13: Operating Your Dth Cleaner
Operating Your DTH Cleaner Explanation of Controls Control Function POWER Press to activate/deactivate power to the cleaner. ON/OFF After you press SELECT OPTION and set the LED Display for the selected option, press to activate HEAT (SET TEMP), SONICS (SET SONICS) and/or DEGAS (SET DEGAS). Indicates the tank temperature, set temperature, ultrasonics Display time or degas time setting, depending on your SELECT... - Page 14 Control Function Function Lights indicate the option selected by pressing SELECT Indicators OPTION. SOLUTION TEMP: Displays current solution temp. (10 - 75ºC, 4ºC). SET TEMP: Set tank temperature (01 - 69ºC). SET SONICS: Set ultrasonic time (01 - 99 mins., 60 mins. default).
- Page 15 NOTE: If this is the first time you are running the cleaner, or if you have changed cleaning solution, you must degas the solution. If not, move to Setting Operating Parameters. Degassing Step Action Degas for 5-10 minutes. If necessary, use SET/CLEAR DISPLAY to alter this setting.
- Page 16 Cleaning Items CAUTION Do not place parts or containers directly on the bottom of the cleaning tank; use a tray or wire to suspend items. Do not allow the solution to drop more than 3/8 inch below the operating level line with the cleaner on. Do not ever use alcohol, gasoline or flammable solutions.
-
Page 17: Draining Your Cleaner
To repeat a timed cleaning cycle - press ON/OFF once while in the Set Sonics mode. This cleaning cycle time will remain in memory until reset or you turn off the power to the cleaner. To reset ultrasonics time during a cleaning cycle - press ON/OFF once, press SELECT OPTION until the SET SONICS LED lights. - Page 18 1-1/2, 2-1/2 and 5-1/2 gallon models include a drain and valve kit. Step Action Place the cleaner to allow easy reach of the drain tube into a waste disposal unit. Remove the thread protecting cap from the end of the cleaner’s drain pipe. This will expose the white teflon sealing tape on the drain pipe’s threads.
-
Page 19: Optimizing Your Cleaner
Optimizing Your Cleaner Tanks Cleaning - check the tank for contamination whenever you change solution. If necessary, remove contaminants with a nonabrasive cloth and water. Emptying - always unplug the cleaner before emptying the tank. Empty the solution into a waste disposal unit. Filling - always unplug the line cord before filling the tank. - Page 20 Over temperature protection (DTH only) - the cleaner will shut down at 75ºC and the LED display will blink “75”. Turn the cleaner off and allow it to cool down. For a faster cooldown, replace some of the warm solution with cold solution.
-
Page 21: Application Hints
Application Hints CAUTION Never clean novelty or inexpensive jewelry in the cleaner. The combination of heat and vibration may loosen a cement-held setting. Never clean gemstones such as emerald, amethyst, pearl, opal, coral, turquoise, peridot or lapis lazuli in the cleaner. First time cleaning - first experiment with one piece, then proceed with the remainder. -
Page 22: Cleaning Methods
Cleaning Methods There are two methods of cleaning - direct and indirect. Each has advantages and disadvantages. When in doubt, run test samples using both methods to decide which one produces the best results for you. Direct Method How it works: Fill the tank with warm water and a cleaning solution. - Page 23 Indirect Method How it works: Fill the tank with warm water and a cleaning solution. Pour your solution medium into one or more beakers or into a solid insert tray. Place the beakers in a beaker positioning cover or a solid insert tray to fit your cleaner.
-
Page 24: Cleaning Solutions
Cleaning Solutions CAUTION Do not use alcohol, gasoline, bleach, mineral acids, solutions with a flash point, semi-aqueous or combustible liquids in ultrasonic tanks, or you will void the warranty. Only use non-flammable solutions and water-based solutions. Solution Types Water-based solutions are either slightly acidic or alkaline. They include detergents, soaps and industrial cleaners designed to remove specific soils. - Page 25 Change the cleaning solution periodically. Cleaning solutions can become contaminated with suspended soil particles which coat the tank bottom. This coating dampens the ultrasonic action and reduces cleaning efficiency. Certain solutions will cavitate better than others. Contact your local distributor for further information. Heat and cavitation: increase the chemical activity of cleaning solutions.
- Page 26 Solution Effects on Metals Cleaning Steel Brass Alumi- Magne- Zinc S. Steel Agent sium Copper Optical (1) none none none none** none** none none** Jewelry (1) none none none none none none none Buffing (1) none slight none none attacks none none compound...
-
Page 27: Troubleshooting
Troubleshooting If your cleaner does not operate satisfactorily, please check the tables below for possible causes before calling your authorized service center. WARNING High voltage inside - dangerous shock hazard. DO NOT attempt to disassemble or repair the cleaner. Problem Cause What to do Cleaner... - Page 28 WARNING High voltage inside - dangerous shock hazard. DO NOT attempt to disassemble or repair the cleaner. Problem Cause What to do Cleaner Malfunctioning heater or Call nearest authorized operates but sensor components. service center. does not maintain set temperature Cleaner Interrupted calibration Press SET DISPLAY...
- Page 29 Check your cleaner periodically to test the level of activity of the ultrasonic cavitation. Frequency of testing will depend on your use of the cleaner. Glass Slide Test You will need the following equipment: Frosted microscope glass slide (1” x 3”), such as ESCO #2951F, or equivalent;...
- Page 30 The ultrasonics will begin immediately to remove the lead from the slide. All lead should be removed within 10 seconds. If your cleaner passes this test, its ultrasonic cavitation is acceptable. NOTE: To ensure consistency from test to test, be sure to repeat test conditions - use the same solution concentration, liquid level, temperature, type of pencil, length of degassing, etc.
-
Page 31: Service Information
Service Information With normal use, your Ultrasonic Cleaner should not require servicing. However, if it fails to operate satisfactorily, first try to diagnose the problem by following the suggestions in the Troubleshooting Guide. WARNING You will void the warranty if you disassemble your cleaner. - Page 32 Authorized Service Centers Name Address Tel/Fax Number Alpha Omega 2821 National Drive Tel: 972-271-5569 Electronics Corp. Garland, TX 75041 Tel: 1-800-540-4967 Fax: 972-840-3668 Tel: 905-841-5762 Crystal Electronic Inc. 140 Centre Street Fax: 905-841-9688 Aurora Canada L4G 1K0 Paragon Electronics 11075 N.E. 6th Ave. Tel: 305-757-0631 Miami, FL 33161 Fax: 305-754-6877...
- Page 33 Notes:...
- Page 34 Technical Support: Tel: 203-796-0339 Branson Ultrasonics 41 Eagle Road Tel: 203-796-0557 Corp. P.O. Box 1961 Fax: 203-796-2240 Danbury, CT 06813-1961...
Need help?
Do you have a question about the 1510; 2510; 3510; 5510; 8510 and is the answer not in the manual?
Questions and answers