
Related Manuals for Branson 1800


Summary of Contents for Branson 1800
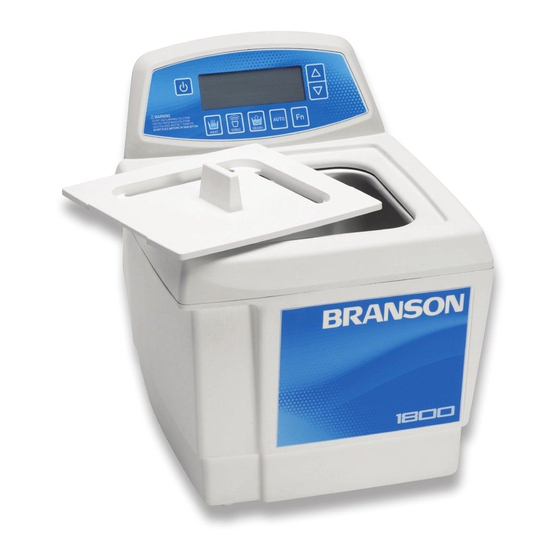
- Page 1 100-214-294 Rev. 2 Ultrasonic Bath Models 1800, 2800, 3800, 5800, 8800 Operator’s Manual www.Bransonic.com...
-
Page 2: Limited Warranty
Branson. If within thirty (30) days after discovery of any warranty defects within the warranty period, the Customer notifies... - Page 3 consequential punitive or incidental damages including without limitation, and/or any consequential damages arising out of commercial losses. • Do not place parts or containers directly on the bottom of the tank; use a tray or wire to suspend items. Direct placement can cause the units to fail.
-
Page 5: Table Of Contents
Contents Front Limited Warranty Cover Safety Precautions Introduction Ultrasonic Baths Accessories For Your Unit Unpacking Your Unit Installing Your Unit How Ultrasonics Works Model Name Definition Equipment Specifications (North America Models) Equipment Specifications (Europe Models) Equipment Specifications (Japan Models) Equipment Specifications (China Models) Operating Your Ultrasonic Bath M Series: Before You Begin M Series: Explanation of Controls... - Page 6 Troubleshooting Service Centers Information for Users on Disposal of Equipment...
-
Page 7: Safety Precautions
Safety Precautions Before using your Ultrasonic Bath, please read and thoroughly understand these safety precautions. Failure to follow them may result in serious personal injury or property damage. To avoid electrical shock: • Do unplug from power source before filling or emptying the tank. •... - Page 8 To prevent damage to the unit: • Do change your solution regularly. • Do not cover vents on the cover. • Do not operate the unit dry. • Do not place parts or containers directly on the bottom of the tank; use a tray or wire to suspend items.
-
Page 9: Introduction
These provide increased ultrasonic power along with built in sweep frequency to ensure uniform ultrasonic activity throughout the bath. Models 1800 and 2800 have a molded dip in the left side of their rims to facilitate emptying of solution from the tank. Models 3800, 5800 and 8800 have built in drains and are supplied with tank drain kits. -
Page 10: Accessories For Your Unit
Accessories For Your Unit As parts cannot be placed on the tank bottom, accessories include beaker positioning covers, solid and perforated insert trays, mesh baskets, beakers, and support racks. NOTE: Tank covers are included with every unit. Unpacking Your Unit Please check your unit and its carton carefully for any external or internal damage. -
Page 11: How Ultrasonics Works
How Ultrasonics Works Ultrasonic sound is sound transmitted at frequencies generally beyond the range of human hearing. In your ultrasonic bath, ultrasonic sound (sonics) can be used for cleaning materials and parts, and for dissolving, homogenizing and degassing liquids. This is how it works: •... -
Page 12: Model Name Definition
1800 Model Tank Capacity Heater Region/voltage │ │ │ │ CPX: Digital 1800: 1/2 gal. Blank: No Heater Blank: North (1.91L) America (120 VAC) M: Mechanical 2800: 3/4 gal. H: With Heater - E: Europe (2.81 l) (230 VAC) 3800: 1-1/2 gal. -
Page 13: Equipment Specifications (North America Models)
Equipment Specifications (North America Models) Model Name Tank Tank Overall Weight Heater Max. Capacity Size Size Sonics Power Draw (Inches) (Inches) Power Power Req. M1800 L: 6 L: 9.9 M1800H 1/2 gal. 9 lb W: 5.5 W: 12 (1.91 l) (4 kg) CPX1800H H: 4... -
Page 14: Equipment Specifications (Europe Models)
Equipment Specifications (Europe Models) Model Name Tank Tank Overall Weight Heater Max. Capacity Size Size Sonics Power Draw (mm) (mm) Power Power Req. M1800-E 1.91 l L: 150 L: 251 M1800H-E 5.4 kg (1/2 W: 140 W: 305 (12 lb) CPX1800H-E gal.) H: 100... -
Page 15: Equipment Specifications (Japan Models)
Equipment Specifications (Japan Models) Model Name Tank Tank Overall Weight Heater Max. Capacity Size Size Sonics Power Draw (Inches) (Inches) Power Power Req. M1800-J 1.91 l L: 150 L: 251 M1800H-J 4 kg (1/2 W: 140 W: 305 (9 lb) CPX1800H-J gal.) H: 100... -
Page 16: Equipment Specifications (China Models)
Equipment Specifications (China Models) Model Name Tank Tank Overall Weight Heater Max. Capacity Size Size Sonics Power Draw (Inches) (Inches) Power Power Req. M1800-C 1.91 l L: 150 L: 251 M1800H-C 5.4 kg (1/2 W: 140 W: 305 (12 lb) CPX1800H-C gal.) H: 100... -
Page 17: Operating Your Ultrasonic Bath
Operating Your Ultrasonic Bath If this is the first time you are using the ultrasonic bath, please read this whole section before operating your unit. M Series Before You Begin • Do not place parts or containers directly on the bottom of the tanks; use a tray or wire to suspend items. -
Page 18: M Series Explanation Of Controls
M Series Explanation of Controls M Series Tower Control Function MAIN POWER This switch is located on the back of the unit, next to the SWITCH power cord receptacle. • Press the (on) side to power on the unit. • Press the (off) side to power off the unit. -
Page 19: M Series Operating Your Unit
M Series Operating your Unit Degassing For initial cleaning solution degassing. Step Action Turn Main Power switch on. Turn the Timer Knob clockwise to 5–10 and let the unit run to allow the solution to “degas.” NOTE: Refer to page 39 for information on degassing. Cleaning Items (Treating Samples) NOTE: To stop ultrasonics at any time, turn the Timer Knob to the zero position. -
Page 20: Mh Series Before You Begin
MH Series Before You Begin • Do not place parts or containers directly on the bottom of the tanks; use a tray or wire to suspend items. Direct placement can cause the units to fail. • Do not allow the solution to drop more than 3/8 inch (1 cm) below the operating level line with heat or ultrasonics on. -
Page 21: Mh Series Explanation Of Controls
MH Series Explanation of Controls MH Series Tower Control Function MAIN POWER This switch is located on the back of the unit, next to the SWITCH power cord receptacle. • Press the (on) side to power on the unit. • Press the (off) side to power off the unit. -
Page 22: Mh Series Operating Your Unit
MH Series Operating your Unit Degassing For initial cleaning solution degassing. Step Action Turn Main Power switch on. Turn HEAT switch on. Turn the Timer Knob clockwise to 5–10 and let the unit run to allow the solution to “degas.” NOTE: Refer to page 39 for information on degassing. -
Page 23: Cpx Series Before You Begin
CPX Series Before You Begin • Do not place parts or containers directly on the bottom of the tanks; use a tray or wire to suspend items. Direct placement can cause the units to fail. • Do not allow the solution to drop more than 3/8 inch (1 cm) below the operating level line with ultrasonics on. -
Page 24: Cpx Series Explanation Of Controls
CPX Series Explanation of Controls CPX Series Tower Control Function MAIN This switch is located on the back of the unit, next to the POWER power cord receptacle. SWITCH • Press the (on) side to power on the unit. • Press the (off) side to power off the unit. - Page 25 Control Function SONICS Press to activate ultrasonics. If running in Timed Mode, a timer will begin to count down and ultrasonics will stop at 0 minutes. In Constant Sonics Mode ( and “- -” on the display), timer has no function. Press key again to deactivate ultrasonics.
-
Page 26: Cpx Series Lcd Description
CPX Series LCD Description Item Function Displayed for 15 s only during power-up, shows the current ultrasonic output power selection. Power Press the Sonics ( ) or Degas key ( ) to go into normal Level operating mode. Press key to change between high (HI) and low (LO) power ultrasonics. -
Page 27: Cpx Series Operating Your Unit
CPX Series Operating your Unit Degassing For initial cleaning solution degassing. NOTE: To stop degassing at any time, press the Degas key ( Step Action Turn Main Power switch on. Press the On/Standby key ( ) to turn on the unit. Press Degas key ( ) once to start the degas process. - Page 28 Step Action Press the Sonics key ( ) to activate ultrasonics. Place the items into a basket, perforated tray, or beakers in a positioning cover. If using beakers or a solid tray, add cleaning solution to beakers or tray to cover the items. Slowly lower the tray or beakers into the tank.
-
Page 29: Cpxh Series Before You Begin
CPXH Series Before You Begin • Do not place parts or containers directly on the bottom of the tanks; use a tray or wire to suspend items. Direct placement can cause the units to fail. • Do not allow the solution to drop more than 3/8 inch (1 cm) below the operating level line with heat or ultrasonics on. -
Page 30: Cpxh Series Explanation Of Controls
CPXH Series Explanation of Controls CPXH Series Tower Control Function MAIN This switch is located on the back of the unit, next to the POWER power cord receptacle. SWITCH • Press the (on) side to power on the unit. • Press the (off) side to power off the unit. - Page 31 Control Function HEAT Press to turn heater on/off. Heater will shut off when set temperature is attained. Unit will maintain set temperature within ± 3 °C (± 5.4 °F). SONICS Press to activate ultrasonics. If running in Timed Mode, a timer will begin to count down and ultrasonics will stop at 0 minutes.
- Page 32 Control Function FUNCTION Press the Fn key to access less-frequently used functions. Ready State (Set Sonics Time) Fn 1x Fn 6x Set Degas Set Target Time Temp. Fn 5x Fn 2x Sel. Temp. Set Constant Units Sonics Set Power Fn 4x Fn 3x Level The appropriate icon will flash to indicate which option is...
- Page 33 Control Function FUNCTION • Timed/Constant Sonics: Press key to select Constant Sonics Mode ( and “- - -” on the display). Press key to select Timed Sonics Mode. Indicates (2x) Blinking • Full/Low Power: Press key to select full power ultrasonic output.
- Page 34 Control Function FUNCTION • Degas Time: Press keys to increase/decrease degas time (hold for quick increments/decrements). Time values are circular, pressing from 99 minutes takes you to 1 minutes. Pressing from 1 minutes takes you to 99 minutes. Indicates (5x) Blinking 28 Operating Your Ultrasonic Bath...
-
Page 35: Cpxh Series Lcd Description
CPXH Series LCD Description Item Function Sonics/ Displays the set time for a timed ultrasonic or degas cycle. Degas Press keys to adjust ultrasonic or degassing Set Time cycle time (adjustable from 1 to 99 minutes). In Constant Sonics Mode, “- - -” is displayed. Displays the target temperature. - Page 36 Item Function Auto Indicates the unit is in Auto Mode. In Auto Mode, the following actions are carried out automatically by the controller: • Heater is turned on to bring bath to set temperature. • When set temperature is reached, ultrasonics are activated.
-
Page 37: Cpxh Series Operating Your Unit
CPXH Series Operating your Unit Degassing For initial cleaning solution degassing. NOTE: To stop degassing at any time, press the Degas key ( Step Action Turn Main Power switch on. Press the On/Standby key ( ) to turn on the unit. Default degas time is 5 minutes. - Page 38 Cleaning Items (Treating Samples) in Timed Sonics Mode NOTE: To stop ultrasonics at any time, press the Sonics key ( Step Action Turn Main Power switch on. Press the On/Standby key ( ) to turn on the unit. If necessary degas the liquid. See page 31 for instructions. Set the amount of time you wish the items to be cleaned: •...
- Page 39 Cleaning Items (Treating Samples) in Constant Sonics Mode NOTE: To stop ultrasonics at any time, press the Sonics key ( Step Action Turn Main Power switch on. Press the On/Standby key ( ) to turn on the unit. If necessary degas the liquid. See page 31 for instructions. Change sonics mode: •...
- Page 40 Cleaning Items (Treating Samples) in Auto Mode NOTE: To stop ultrasonics at any time, press the Sonics key ( Step Action Turn Main Power switch on. Press the On/Standby key ( ) to turn on the unit. If necessary degas the liquid. See page 31 for instructions. Set the amount of time you wish the items to be cleaned: •...
- Page 41 CPXH Temperature Calibration The CPXH unit temperature measurement is factory calibrated. Use the following instructions to perform periodic calibrations: Step Action The ultrasonic bath liquid may be at room temperature or may be heated-up to a desired operating temperature (e.g. 40 °C). Press the Fn key 4 times until the Current Temperature icon ) starts blinking.
-
Page 42: Draining Your Unit
Do not immerse the unit in water. Unplug the unit from the power source. Models 1800 and 2800 do not have a drain. To empty, use the indented side of the rim to pour the used solution into a waste disposal unit, rinse the tank thoroughly and refill with new solution. - Page 43 Step Action Hand tighten the drain valve onto the drain pipe over the white teflon sealing tape. Finish tightening the valve in place using an adjustable or a 21mm wrench. Tighten the valve no more than one full turn when using the wrench until the handle is on top.
-
Page 44: Optimizing Your Ultrasonic Bath
Optimizing Your Ultrasonic Bath Tanks Cleaning - check the tank for contamination whenever you change solution. If necessary, remove contaminants with a nonabrasive cloth and water. Emptying - always unplug the unit before emptying the tank. Empty the solution into a waste disposal unit. Filling - always unplug the line cord before filling the tank. - Page 45 Over temperature protection (CPXH only) - the unit will shut down at 75 °C (167 °F) and display will go blank with only the Alarm icon remaining on. Turn the unit off and allow it to cool down. For a faster cooldown, replace some of the warm solution with cold solution.
- Page 46 Surface tension - can be reduced by adding solution to the bath. Reduced surface tension will increase cavitation intensity and enhance cleaning. Renewal - replace cleaning solutions often to increase ultrasonic cleaning activity. Solutions, as with most chemicals, will become depleted over time.
-
Page 47: Application Hints
Application Hints • Never clean novelty or inexpensive jewelry in the ultrasonic bath. The combination of heat and vibration may loosen a cement-held setting. • Never clean gemstones such as emerald, amethyst, pearl, opal, coral, turquoise, peridot or lapis lazuli in the ultrasonic bath. First time cleaning - first experiment with one piece, then proceed with the remainder. -
Page 48: Cleaning Methods
Cleaning Methods There are two methods of cleaning - direct and indirect. Each has advantages and disadvantages. When in doubt, run test samples using both methods to decide which one produces the best results for you. Direct Method ITEMS IN PERFORATED ITEM INSERT TRAY SUSPENDED... - Page 49 Indirect Method BEAKER POSITIONING TRAY SOLID INSERT TRAY BEAKERS How it works: • Fill the tank with warm water and a cleaning solution. • Pour your solution medium into one or more beakers or into a solid insert tray. • Place the beakers in a beaker positioning cover or a solid insert tray to fit your unit.
-
Page 50: Cleaning Solutions
Cleaning Solutions Do not use alcohol, gasoline, bleach, mineral acids, solutions with a flash point, semi-aqueous or combustible liquids in ultrasonic tanks, or you will void the warranty. Only use non-flammable solutions and water- based solutions. Solution Types Water-based solutions can be either slightly acidic or alkaline. They include detergents, soaps and industrial cleaners designed to remove specific soils. - Page 51 Change the cleaning solution periodically. Cleaning solutions can become contaminated with suspended soil particles which coat the tank bottom. This coating dampens the ultrasonic action and reduces cleaning efficiency. Certain solutions will cavitate better than others. Contact your local distributor for further information. Heat and cavitation increase the chemical activity of cleaning solutions.
- Page 52 Solution Effects on Metals Cleaning Steel Brass Alumi- Magne- Zinc S. Steel sium Copper Agent Optical (1) none none none none none none none Jewelry (1) none none none none none none none Buffing (1) none slight none none attacks none none compound...
-
Page 53: Troubleshooting
Troubleshooting If your unit does not operate satisfactorily, please check the tables below for possible causes before calling your authorized service center. High voltage inside - dangerous shock hazard. DO NOT attempt to disassemble or repair the unit. Problem Cause What to do Unit will not Unit not plugged in properly. - Page 54 High voltage inside - dangerous shock hazard. DO NOT attempt to disassemble or repair the unit. Problem Cause What to do Err on actual Malfunctioning sensor Call nearest authorized temp and components. service center. alarm Icon is on. Sonics and degas operate.
- Page 55 Check your ultrasonic bath periodically to test the level of activity of the ultrasonic cavitation. Frequency of testing will depend on your use of the unit, however, Branson suggests running this test monthly. You will need the following equipment: ®1 •...
- Page 56 5. With the No. 2 pencil, on the frosted portion make an “X” from corner to corner. 6. Immerse the frosted end of the slide into the solution. Hold the slide vertically and center it in the solution. 7. Make sure that model CPX/CPHX models are in Timed or Constant Sonics Mode, not Degas Mode, then turn ultrasonics On.
- Page 57 Tel: 860-410-1700 Repair Center Plainville, CT 06062 800-737-2198 Fax: 860-410-1704 Technical Support (North America) Name Address Tel/Fax Number Branson Ultrasonics 41 Eagle Road Tel: 203-796-0339 Corp. P.O. Box 1961 Tel: 203-796-2296 Danbury, CT 06813-1961 Tel: 800-732-9262 Fax: 203-796-2240 51 Service Centers...
- Page 58 Branson Ultrasonics 4-3-14 Okada, Atsugi-Shi Tel: 81-46-229-0429 Division of Emerson Kanagawa 243-0021, Fax: 81-46-229-0262 Japan Ltd. Japan Branson Korea Co. Ltd. DangJeong-dong, 506-7, Tel: 82-1577-0631 Gunpo-si, Gyeonnggi-do, Fax: 82-31-422-9572 Republic of Korea Branson Ultrasonics No. 20, Jalan Rajawali 3, Tel: 603-8076-8608 Div.
- Page 59 Name Address Tel/Fax Number Branson Ultrasonics Emerson Building, 104 Tel: 63-49-502-8863 (Philippines Rep Office) Laguna Blvd. Fax: 63-49-502-8860 Laguna Technopark Inc. Sta. Rosa, Laguna Philippines, 4026 Branson Ultrasonics 10 Pandan Cresent Tel: 65-6891-7600 Div. of Emerson Electric No. 03-06 UE Tech Park Fax: 65-6873-7882 (South Asia) Pte.
- Page 60 Information for Users on Disposal of Equipment This symbol indicates separate collection of waste electrical and electronic equipment in the EU-countries and EEA (European Economic Area) Please do not dispose the product with the general household waste. Please use the return and collection system in your country for the disposal of this product.
Need help?
Do you have a question about the 1800 and is the answer not in the manual?
Questions and answers