Table of Contents
Advertisement
1
INSTRUCTION MANUAL
CAT. 71020, 71025, 71030, 71040
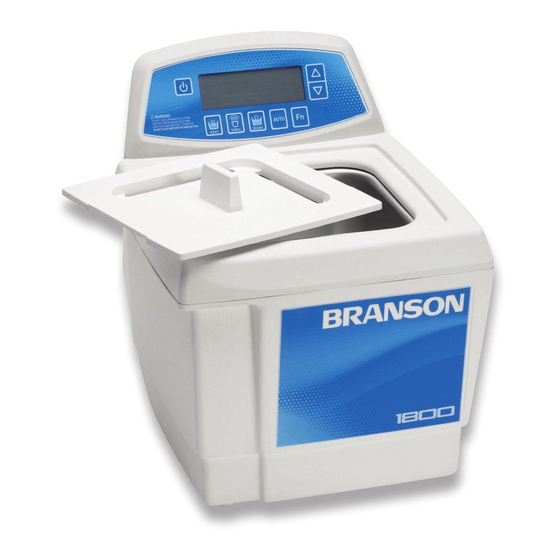
Branson Ultrasonic Benchtop Cleaners
Models 1800, 2800, 3800, 5800, and 8800
[Type text]
Electron Microscopy Sciences
1560 Industry Road Hatfield, PA 19440 P.O. Box 550
TEL: 215-412-8400 FAX: 215-412-8450
EMAIL: sgkcck@aol.com WEB: www.emsdiasum.com
Advertisement
Table of Contents

Related Manuals for Branson 1800


Summary of Contents for Branson 1800
- Page 1 INSTRUCTION MANUAL CAT. 71020, 71025, 71030, 71040 Branson Ultrasonic Benchtop Cleaners Models 1800, 2800, 3800, 5800, and 8800 [Type text] Electron Microscopy Sciences 1560 Industry Road Hatfield, PA 19440 P.O. Box 550 TEL: 215-412-8400 FAX: 215-412-8450 EMAIL: sgkcck@aol.com WEB: www.emsdiasum.com...
-
Page 2: Safety Precautions
WARNING Do not place parts or containers directly on the bottom of the tank; use a tray or wire to suspend items. Direct placement can cause the units to fail. Do not allow the solution to drop more than 3/8 inch (1 cm) below the operating level line. Do not ever use alcohol, gasoline, or flammable solutions. - Page 3 To prevent damage to the unit: Charge your solution regularly. Do not cover vents on the cover. Do not operate the unit dry. Do not place parts or containers directly on the bottom of the tank; use a tray or wire to suspend items.
-
Page 4: Accessories For Your Unit
Models 1800 and 2800 have a molded dip in the left side of their rims to facilitate emptying of the solution from the tank. Models 3800, 5800, and 8800 have built in drains and are supplied with tank drain kits. -
Page 5: Unpacking Your Unit
Unpacking your unit Please check your unit and its carton carefully for any external or internal damage. If you find damage, contact your shipping carrier immediately before contacting your distributor. Please retain your packaging for future use. Installing your unit Check the plate on the back of the unit for correct power requirements. -
Page 6: Model Name Definition
Model name definition Example: 1800 Model Tank Capacity Heater Region/Voltage CPX: Digital 1800: ½ gal (1.91L) Blank: No heater Blank: North America (120 VAC) M: Mechanical 2800: ¾ gal. (2.81L) H: With heater E: Europe (230 VAC) 3800: 1 – ½ gal. (5.71L) J: Japan (100 VAC) –... -
Page 7: Operating Your Ultrasonic Bath
Operating your Ultrasonic Bath If this is the first time you are using the ultrasonic bath, please read this whole section before operating your unit. M Series: Before you begin CAUTION Do not place parts or containers directly on the bottom of the tanks; use a tray or wire to suspend items. Direct placement can cause the units to fail. -
Page 8: M Series: Explanation Of Controls
M Series: Explanation of controls M Series Tower Control Function MAIN POWER SWITCH This switch is located on the back of the unit, next to the power cord receptacle. Press the | (on) side to power the unit. Press the O (off) side to power the unit. When operating the unit, normally leave the Main Power Switch in the I (on) position, and use the Timer Knob to activate ultrasonics. - Page 9 Cleaning items (Treating samples) NOTE: To stop ultrasonics at any time, turn the Timer Knob to the zero position. Step Action Turn Main Power Switch on. Turn the Timer Knob clockwise to set the amount of time (0-60 minutes) you wish the items to be cleaned.
-
Page 10: Mh Series: Before You Begin
MH Series: Before you begin CAUTION Do not place parts or containers directly on the bottom of the tanks; use a tray or wire to suspend items. Direct placement can cause the units to fail. Do not allow the solution to drop more than 3/8 inch (1 cm) below the operating level line with heat or ultrasonics on. -
Page 11: Mh Series: Operating Your Unit
Control Function MAIN POWER SWITCH This switch is located on the back of the unit, next to the power cord receptacle. Press the | (on) side to power on the unit. Press the O (off) side to power off the unit. When operating the unit, normally leave the Main Power Switch in the | (on) position, and use the Timer Knob to activate ultrasonics. -
Page 12: Cpx Series: Before You Begin
CPX Series: Before you begin CAUTION Do not place parts or containers directly on the bottom of the tanks; use a tray or wire to suspend items. Direct placement can cause the units to fail. Do not allow the solution to drop more than 3/8 inch (1 cm) below the operating level line with ultrasonics on. -
Page 13: Cpx Series: Explanation Of Controls
CPX Series: Explanation of controls CPX Series Tower Control Function MAIN POWER SWITCH This switch is located on the back of the unit, next to the power cord receptacle. Press the | (on) side to power the unit. Press the O (off) side to power the unit. When operating the unit, normally leave the Main Power Switch in the | (on) position, and use the On/Standby key to switch between the operating state and standby state. -
Page 14: Cpx Series: Lcd Description
CPX Series: LCD description Electron Microscopy Sciences 1560 Industry Road Hatfield, PA 19440 P.O. Box 550 TEL: 215-412-8400 FAX: 215-412-8450 EMAIL: sgkcck@aol.com WEB: www.emsdiasum.com... -
Page 15: Cpx Series: Operating Your Unit
CPX Series: Operating your unit Degassing For initial cleaning solution degassing. NOTE: To stop degassing at any time, press the Degas key. Cleaning items (Treating samples) NOTE: To stop ultrasonics at any time, press the Sonics key. Electron Microscopy Sciences 1560 Industry Road Hatfield, PA 19440 P.O. - Page 16 Electron Microscopy Sciences 1560 Industry Road Hatfield, PA 19440 P.O. Box 550 TEL: 215-412-8400 FAX: 215-412-8450 EMAIL: sgkcck@aol.com WEB: www.emsdiasum.com...
-
Page 17: Cpxh Series: Before You Begin
CPXH Series: Before you begin Electron Microscopy Sciences 1560 Industry Road Hatfield, PA 19440 P.O. Box 550 TEL: 215-412-8400 FAX: 215-412-8450 EMAIL: sgkcck@aol.com WEB: www.emsdiasum.com... -
Page 18: Cpxh Series: Explanation Of Controls
CPXH Series: Explanation of controls CPXH Series Tower Electron Microscopy Sciences 1560 Industry Road Hatfield, PA 19440 P.O. Box 550 TEL: 215-412-8400 FAX: 215-412-8450 EMAIL: sgkcck@aol.com WEB: www.emsdiasum.com... - Page 19 Electron Microscopy Sciences 1560 Industry Road Hatfield, PA 19440 P.O. Box 550 TEL: 215-412-8400 FAX: 215-412-8450 EMAIL: sgkcck@aol.com WEB: www.emsdiasum.com...
- Page 20 Electron Microscopy Sciences 1560 Industry Road Hatfield, PA 19440 P.O. Box 550 TEL: 215-412-8400 FAX: 215-412-8450 EMAIL: sgkcck@aol.com WEB: www.emsdiasum.com...
- Page 21 Electron Microscopy Sciences 1560 Industry Road Hatfield, PA 19440 P.O. Box 550 TEL: 215-412-8400 FAX: 215-412-8450 EMAIL: sgkcck@aol.com WEB: www.emsdiasum.com...
-
Page 22: Cpxh Series: Lcd Description
CPXH Series: LCD description Electron Microscopy Sciences 1560 Industry Road Hatfield, PA 19440 P.O. Box 550 TEL: 215-412-8400 FAX: 215-412-8450 EMAIL: sgkcck@aol.com WEB: www.emsdiasum.com... - Page 23 Electron Microscopy Sciences 1560 Industry Road Hatfield, PA 19440 P.O. Box 550 TEL: 215-412-8400 FAX: 215-412-8450 EMAIL: sgkcck@aol.com WEB: www.emsdiasum.com...
- Page 24 Electron Microscopy Sciences 1560 Industry Road Hatfield, PA 19440 P.O. Box 550 TEL: 215-412-8400 FAX: 215-412-8450 EMAIL: sgkcck@aol.com WEB: www.emsdiasum.com...
-
Page 25: Cpxh Series: Operating Your Unit
CPXH Series: Operating your unit Degassing For initial cleaning solution degassing. NOTE: To stop degassing at any time, press the Degas key. Ultrasonic operating modes Electron Microscopy Sciences 1560 Industry Road Hatfield, PA 19440 P.O. Box 550 TEL: 215-412-8400 FAX: 215-412-8450 EMAIL: sgkcck@aol.com WEB: www.emsdiasum.com... - Page 26 Cleaning items (Treating samples) in Timed Sonics Mode NOTE: To stop ultrasonics at any time, press the Sonics key. Electron Microscopy Sciences 1560 Industry Road Hatfield, PA 19440 P.O. Box 550 TEL: 215-412-8400 FAX: 215-412-8450 EMAIL: sgkcck@aol.com WEB: www.emsdiasum.com...
- Page 27 Cleaning items (Treating samples) in Constant Sonics Mode NOTE: To stop ultrasonics at any time, press the Sonics key. Electron Microscopy Sciences 1560 Industry Road Hatfield, PA 19440 P.O. Box 550 TEL: 215-412-8400 FAX: 215-412-8450 EMAIL: sgkcck@aol.com WEB: www.emsdiasum.com...
- Page 28 Cleaning items (Treating samples) in Auto Mode NOTE: To stop ultrasonics at any time, press the Sonics key. Electron Microscopy Sciences 1560 Industry Road Hatfield, PA 19440 P.O. Box 550 TEL: 215-412-8400 FAX: 215-412-8450 EMAIL: sgkcck@aol.com WEB: www.emsdiasum.com...
- Page 29 Draining your unit Models 1800 and 2800 do not have a drain. TO empty, use the indented side of the rim to pour the used solution into a waste disposal unit, rinse the tank thoroughly and refill with new solution.
- Page 30 Models 3800, 5800, and 8800 include a drain and valve kit. Electron Microscopy Sciences 1560 Industry Road Hatfield, PA 19440 P.O. Box 550 TEL: 215-412-8400 FAX: 215-412-8450 EMAIL: sgkcck@aol.com WEB: www.emsdiasum.com...
- Page 31 Electron Microscopy Sciences 1560 Industry Road Hatfield, PA 19440 P.O. Box 550 TEL: 215-412-8400 FAX: 215-412-8450 EMAIL: sgkcck@aol.com WEB: www.emsdiasum.com...
- Page 32 Optimizing your Ultrasonic Bath: Tanks Cleaning – Check the tank for contamination whenever you change solution. If necessary, remove contaminants with a nonabrasive cloth and water. Emptying – Always unplug the unit before emptying the tank. Empty the solution into a waste disposal unit.
- Page 33 Solution Solution activity - the amount of visible activity is not necessarily related to optimum cavitation for cleaning. Degassing 1 - fresh solutions contain many dissolved gases (usually air), which reduce effective ultrasonic action. Although solutions will naturally degas over time, using Degas Mode speeds up the degassing process.
- Page 34 Application hints First time cleaning - first experiment with one piece, then proceed with the remainder. Solution level - Be sure to maintain solution level within 1/2 inch (1.3 cm) of the tank’s “operating level” line. Surface activity can vary with liquid level. Load size - It is faster and more efficient to run several small loads rather than a few big loads.
- Page 35 Direct cleaning method How it works: Fill the tank with warm water and a cleaning solution. Place the items to be cleaned in a perforated tray and lower them into the tank. You can also suspend items on a wire and then immerse them in the solution. The advantages of this method are the simplicity of operation and cleaning effectiveness.
- Page 36 Place the beakers in a beaker positioning cover, an insert tray or an insert basket to fit your unit, or place the beakers and flasks onto a Branson support rack. Beakers should not touch the tank’s bottom.
- Page 37 Change the cleaning solution periodically. Cleaning solutions can become contaminated with suspended soil particles which coat the tank bottom. This coating dampens the ultrasonic action and reduces cleaning efficiency. Certain solutions will cavitate better than others. Contact your local distributor for further information.
- Page 38 Solution effects on metals Aluminum Magnesium Cleaning Steel Brass Zinc S. Steel Copper Agent * Optical (1) none none none none none ** none ** none ** Jewelry (1) none none none none none none none Buffing (1) none slight none none attacks...
-
Page 39: Troubleshooting
Troubleshooting If your unit does not operate satisfactorily, please check the tables below for possible causes before calling your authorized service center. Electron Microscopy Sciences 1560 Industry Road Hatfield, PA 19440 P.O. Box 550 TEL: 215-412-8400 FAX: 215-412-8450 EMAIL: sgkcck@aol.com WEB: www.emsdiasum.com... - Page 40 Electron Microscopy Sciences 1560 Industry Road Hatfield, PA 19440 P.O. Box 550 TEL: 215-412-8400 FAX: 215-412-8450 EMAIL: sgkcck@aol.com WEB: www.emsdiasum.com...
- Page 41 Glass Slide Test Check your ultrasonic bath periodically to test the level of activity of the ultrasonic cavitation. Frequency of testing will depend on your use of the unit, however, Branson suggests running this test monthly. You will need the following equipment: •...
-
Page 42: Information For Users On Disposal Of Equipment
Information for users on disposal of equipment Electron Microscopy Sciences 1560 Industry Road Hatfield, PA 19440 P.O. Box 550 TEL: 215-412-8400 FAX: 215-412-8450 EMAIL: sgkcck@aol.com WEB: www.emsdiasum.com...
Need help?
Do you have a question about the 1800 and is the answer not in the manual?
Questions and answers