Table of Contents
Advertisement
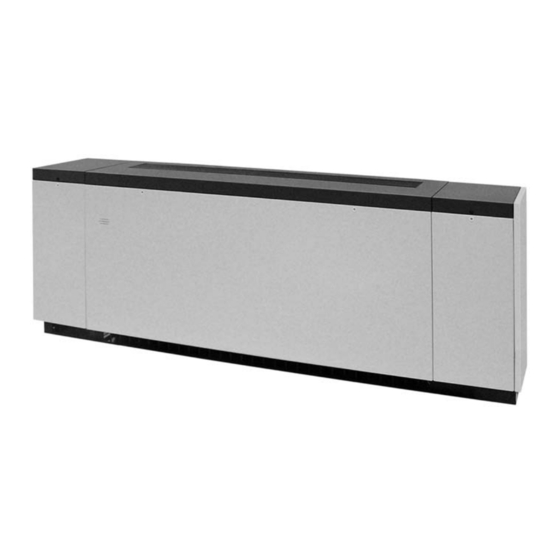
Daikin Classroom Unit Ventilators
Digital Ready, MicroTech II™ ("F" Vintage)
Field Controls by Others
Vertical Floor Models AVS, AVV, AVB and AVR
©2013 Daikin Applied • www.DaikinAP.com • (800) 432-1342
Before beginning installation, please read this publication in its entirety.
Develop a thorough understanding before starting the installation procedure.
This manual is to be used as a guide. Each installation is unique, so only general topics are covered.
The order in which topics are covered may not be those required for the actual installation.
Installation Manual
C
IMPORTANT!
IM 817-4
Group: Unit Ventilator
Part Number: 106506225
Date: October 2013
Advertisement
Table of Contents

Subscribe to Our Youtube Channel
Related Manuals for Daikin AVS


Summary of Contents for Daikin AVS
- Page 1 Daikin Classroom Unit Ventilators Digital Ready, MicroTech II™ (“F” Vintage) Field Controls by Others Vertical Floor Models AVS, AVV, AVB and AVR IMPORTANT! Before beginning installation, please read this publication in its entirety. Develop a thorough understanding before starting the installation procedure.
-
Page 3: Table Of Contents
Superheat Adjustment ..............32 Unit Configuration - Type AL ............8 Making Control Connections Unit Configuration - Type AN ............9 MicroTech II Unit Mounted DDC Control Components–Models AVS, Unit Configuration - Type AK ............9 AVV, and AVR ...............33-35 Unit Configuration - Type AP ............9 Economizer Control Capabilities ...........35... -
Page 4: Model Av Ceiling Unit Ventilator Data Plate Details
Table 1 - Unit Ventilator (Floor Type) Data Plate - Specific Information Field Model BE = Basic Metasys N2 Open w/o TC w/CO 1. Product Category BF = Basic Stand-Alone w/ TC w/CO U = Unit Ventilator BG = Basic Stand-Alone Master w/ TC w/CO 2. -
Page 5: Data Plate Location
Figure 2 - Stack Units Maximum 2 High as Shown Model AV Floor Unit Ventilator Installation Models AVV, AVR, AVS, AVB, and AVR Figure 1 - Data Plate Location 2 high Correct Incorrect Lifting Points Figure 3 – Forklift Lifting Requirements Receiving &... -
Page 6: Pre-Installation Considerations Properly Identify Unit Ventilator(S)
CAUTION louvers, as applicable, are ready and in accordance with the job plans. Vertical Floor Models AVS, AVV, AVB, AVR are typically installed Personal injury hazard. Wear protective gloves to avoid possible cuts and abrasions from exposed edges. Avoid contact with sharp... -
Page 7: Installing Louvers
Installing Louvers Louver Details Figure 6 – Horizontal and Vertical Blade Louvers, Without Flange, (see Caution below for louver blade orientation and drainage) Bird Screen On Side Toward Unit Outside Air Bottom Outside Air Horizontal Blade Louver Vertical Blade Louver Figure 7 –... -
Page 8: Louver Installations With Typical Unit Configurations
Louver Installation With Typical Unit Configurations Unit Configuration Type AL Figure 10 -16 ⁄ " (422mm) Deep Unit with Open Pipe Tunnel & High Figure 9 - The 16 ” (422mm) Deep Unit with Open Pipe Tunnel and Louver Application with Chased Wall Standard Louver Location Lintel (By Others) -
Page 9: Unit Configuration Type An
Louver Installation With Typical Unit Configurations Unit Configuration Type AN Note: Arrangement AB with full metal back panel, similar to configuration type AN. (Outside air opening to be cut and sealed by others.) ⁄ " (556mm) Deep Full Adapter Back Unit With ⁄... -
Page 10: Typical Installation Methods
Installing Louvers to prevent moisture from wicking back to the unit. Do not caulk the joint between the louver and the flashing. This joint is designed to let unwanted moisture escape. Typical Installation Methods If the fresh air opening has not yet been made, see figures 9 through 16 Figure 18 - Typical Louver Installation with Flashing for the recommended locations and the job-specific plans for the exact location. Follow local codes. Louver Wall Cut the wall opening so that it is slightly larger than the louver being Unit installed. -
Page 11: Installing The Ventimatic Shutter
Figure 19 - Suggested method for fastening louver (without flange) Installing the VentiMatic Shutter Assembly inside wall opening . The VentiMatic Shutter Assembly is mounted on an installed wall louver. For larger units with 100% ventilation air dampers, two VentiMatic Shutters may be mounted side by side on the same louver. See figure 24. -
Page 12: Before Setting The Unit In Place
Figure 24 - Two VentiMatic Shutters & Wall Louver CAUTION Aluminum Wall Louver 3'' (76mm) Leakage of outdoor air wastes energy, causes drafts and erratic Assembly with Bird Screen (See Note 1) unit ventilator operation. Check the following details: At the correct unit ventilator location, examine the wall surface. -
Page 13: Drain Pan Adjustment
Figure 30 - Low End of Drain Pan (Drain End) Reversing Drain Pan Slope 1/4" hex head screws Figure 28 - Condensate Drain Pan Connection Location Left Hand Right Hand 7/8"(22 mm) 7/8"(22 mm) Condensate O.D. Drain O.D. Drain Drain 4-3/4"... -
Page 14: Typical Floor Unit Installation
Typical Floor Unit Installation Figure 32 – Typical Classroom Unit Ventilator Installation And Louver Details (see installation section for typical warnings and cautions) Internal Column For Screws or Bolts (by others) Wall Bracing (By Others) Pipe Tunnel Unit Gasket 1" End Panel w/Cut Out Lintel (by others) Weep Holes Unit Gasket... -
Page 15: Unit Ventilator Installation
Meeting IBC Seismic Requirements In addition to all seismic requirements for IBC Certification listed Daikin unit ventilators can be specified, as follows, to meet International elsewhere in the project specification, submittals for these units Building Code seismic requirements: include: • All components included in these unit ventilators are designed, 1. A Certificate of Compliance from the Independent Certifying... -
Page 16: Water Coil Connections
Figure 37 - Shipping Envelope Contents. Unit Ventilator Installation Before setting the unit ventilator in position, be sure that field-supplied electrical connections are in place, de-energized and in accordance with the plans. Move the unit ventilator into position against the wall surface. Check to see that the unit ventilator is level from end to end and back to front. Using a 4' level is recommended. -
Page 17: After Brazing
Water Coil Connections 2-pipe Chilled Water/Hot Water Systems Hook up water piping in accordance with Figure 38 and 39 for hot After making the piping connections, securely attach and insulate the water and chilled water coil connections. water-in temperature sensor (S5) to the water coil supply line. The sensor should be located on the water supply line in an area where there is continuous water flow. The sensor hangs loose in the same CAUTION... -
Page 18: Coil Headers, Locations Heating Only
Coil Headers, Locations Heating Only Figure 44- Electric Heating Only Unit Figure 42 - Hot Water Heating Only Unit Figure 43 - Steam Heating Only Unit (Coils 12, 13) (Coils 65, 66, 67) (Coils 68, 69, 78, 79) R.H. Connections L.H. -
Page 19: Direct Expansion Coils & Heating Coils
Table 8 - Heat/Cool Position/Combinations In Air Stream (one coil per position) Note: X indicates Available. Face and Bypass Valve First Position in Air Stream Second Position in Air Stream AVS Elect.. AVV Elect. Heating Coils Cooling Coils 65 = 1-Row Hot Water Coil... -
Page 20: Reheat
Coil Headers, Locations Reheat Figure 54 - Chilled Water and Hot Water Unit Figure 55 - Chilled Water and Steam Unit Figure 56- Chilled Water and Electric (Cooling Coils S, W, V) (Cooling Coils S, V) Heating (Cooling Coils V, S, W) (Heating Coils 65, 66, 67) (Heating Coils 68, 69, 78, 79) (Heating Coils 12, 13) -
Page 21: Typical Valve Packages
Figure 61 - 3-way End of Cycle Valve Typical Valve Packages The optional factory-supplied Daikin Control Valve(s) for water applications can be either 2-way or 3-way type, and is / are shipped separate from the unit ventilator itself to help avoid shipping damage... -
Page 22: 2-Way And 3-Way Modulating Valves - Microtech Ii
Modulating Valve Specifications – MicroTech II™ 2-Way and 3-Way Modulating Valves – MicroTech II™ Figure 63 The modulating control valves for MicroTech II are designed to regulate the flow of hot water, chilled water and steam. They consist of a bronze 2-Way Modulating Valve body valve with a spring return, floating point actuator. The optional valve accessory is shipped separate from the unit ventilator for field 4-3/32" 3-19/32" (104mm) installation to prevent shipping damage and to provide flexibility in (91mm) 11/32" 3-5/32" (8mm) making the field piping connection. -
Page 23: Steam Modulating Valve Selection - Microtech Ii
based on a 60% pressure drop at the low end of the range and Steam Modulating Valve Selection (MicroTech II™) 100% pressure drop at the high end of the range. For example: The steam modulating control valve is expected to vary the quantity of With 2 psig (13.8 kPa) inlet steam pressure, the valve with a Cv steam through the coil. -
Page 24: Typical Piping Arrangements
2-way EOC and to provide the installing contractor with maximum flexibility in Valve Unit Coil making the field piping connections. Refer to Daikin factory instruction Return sheet shipped with the unit for port orientation and a piping schematic. Control valves must be installed on the units in which they are shipped. Supply Indiscriminate mixing of valves among units can result in valves not properly sized for the desired flow rate. Control valves should be... -
Page 25: Typical Water Coil Piping-Eoc Valve Piping
Union: Half attached to coil, half attached to valve consideration. Modulating control valve (Daikin) All piping, fittings and unions by others (not Daikin) except as noted Steam connections may be same end as cooling coil connections, but Steam check valve and pressure equalizing line (Daikin) are recommended to be opposite end to facilitate piping. -
Page 26: The Optional Factory-Supplied Daikin Microtech Ii Modulating Control Valve
End Drain Connection (Piping Within Unit End Compartment) See page 25 for number designation descriptions. In Steam Systems: The optional factory-supplied Daikin MicroTech II™ Modulating See page 25 for number designation descriptions. Control Valve for steam applications is the 2-way type. It is shipped... -
Page 27: Heating-Modulating Valve Piping
Heating – Modulating Valve Piping 3-way Modulating, Normally Open, Hot Water or 2-pipe CW/HW Valve Piping (typical) Hot Water (or 2-pipe CW/HW) Modulating Valve Piping When piping the modulating valve, refer to the arrows on the modulating The 3-way Modulating hot water (or 2-pipe CW/HW) valve is furnished valve body to determine the direction of flow. The valve should be normally open to the coil. -
Page 28: Cooling-Chilled Water Modulating Valve Piping 2-Way Modulating, Normally Closed, Chilled Water Valve Piping (Typical)
3-Way Modulating, Normally Closed, Chilled Cooling – Chilled Water Modulating Water Valve Piping (typical) Valve Piping The 3-way Modulating chilled water valve is furnished normally closed 2-way Modulating, Normally Closed, Chilled to the coil. When the valve is de-energized (off) the flow bypasses the Water Valve Piping (typical) coil. Energizing the valve allows flow through the coil in a modulating fashion. The 2-way Modulating chilled water valve is furnished normally closed to the coil. When the valve is de-energized (off) there is no flow Figure 83 - 3-way Modulating Valve Control, Normally Closed, Chilled through the coil. Energizing the valve allows flow through the coil in... -
Page 29: Condensate Piping
Condensate piping: Figure 86 - TXV Valve Piping Detail (Left Hand Shown) Daikin cooling unit ventilators are designed for condensate removal into a condensate disposal system. Do not connect the unit drain STOP! Before Brazing connection so that condensate exits to the outside and/or is exposed to Use A Quenching Cloth When Brazing, to Prevent Overheating The TXV Valve freezing temperatures. -
Page 30: Unit Ventilator Split Systems Guidelines
• Unit Ventilator Split Systems Guidelines Incorporate Low Refrigerant Temperature Sensor (T4) in condensing unit control system (T4 protects the system under low refrigerant suction conditions) see figure 90. The following provides basic guidelines that will provide proper system • cooling and operation of an R-22 commercial DX/hot water system UV fans must continue to run upon Low Refrigerant Temperature for school applications. -
Page 31: Checking System Charge
º F subcooling. Table 21 - Dimensions, DX Tubing inches (mm) Determining Subcooling To determine correct subcooling: Models AVS, AVV, Suction Line O.D. Liquid Line O.D. AVB, AVR 1. Measure outdoor ambient. It must be between 65ºF and 105ºF. 3/4" (19mm) 1/4"... -
Page 32: Determining System Superheat
Determining System Superheat Superheat Adjustment Remove the seal cap from thermal expansion valve (see figure 91). After the subcooling has been determined, check system superheat. Turn the adjustment screw clockwise to increase superheat and Determine required superheat from superheat range, table 23. counterclockwise to decrease superheat (see figure 91). One Measure suction line temperature 6 inches from service valve. -
Page 33: Making Control Connections
• 12 Face and Bypass Damper Actuator - (A2) Direct coupled, floating LonWorks ® compliant Space Comfort Controller (SCC) – Supports the LonWorks SCC profile number 8500_10. point (tristate) actuator that is non-spring returned (Model AVS • ® Metasys N2 Open – Provides N2 Open network only). communication capability to the UVC. -
Page 34: Avv, And Avr
21 Control Valve(s) (not shown) – Optional accessory valve(s) may 17 Outdoor Air Temperature Sensor - (S3) The sensor is located in be either 2 position “End of Cycle” (AVS models) or modulating the outdoor air section of the unit before the outdoor air damper. (AVV and AVR models), to control the quantity of water through With network applications, the unit mounted sensor can be the coil. A vailable in 2-way or 3-way configurations. Spring return... -
Page 35: Economizer Control Capabilities
Economizer Control Capabilities Operating Mode States (4) Basic – Compares the inside and outside air temperatures using item • Heat - Heating and economizer operation only 16 (Room Temperature Sensor) and item 18 (Outdoor Air Temperature Sensor) to determine if outdoor air can be used for “free”, economizer • Cool – Cooling and economizer operation only cooling operation. -
Page 36: Microtech Ii Wiring Diagram-Typical
MicroTech II Wiring Diagram – Typical CAUTION Figure 96 - DE Cooling W/Hot Water Heat Damper Control 115, Refer to unit wiring diagram located on inside of right front panel, for 208/230. 265 Volt/1 Phase actual wiring. Improper wiring can cause equipment and property damage. -
Page 37: Microtech Ii Unit Electrical Connections
Figure 97 - Electric Heat Unit Power Switch Locations MicroTech II™ Unit Electrical Connections DANGER To avoid electrical shock, personal injury or death, be sure that field wiring complies with local and national fire, safety, and electrical codes, and voltage to the system is within the limits shown in the job-specific drawings and unit electrical data plate(s). -
Page 38: Microtech Ii Remote Wall Mounted Sensor
Figure 100 - Correct Wall Sensor Locations MicroTech II™ Remote Wall Mounted Sensor = Correct Sensor Location WARNING Window Exposure Window Exposure Rigorously adhere to field wiring procedures regarding proper lockout and tagout of components. Unit WARNING Interior Wall Interior Wall To avoid electrical shock, personal injury or death: 1. -
Page 39: Field Wiring Remote Mounted Temperature Sensor
Figure 104 - Wall Mounted Temperature Sensor Wiring for Expanded CAUTION and Deluxe Wall Sensor Static sensitive components. A static discharge while handling electronic circuit boards can cause damage to the components. Discharge any static electrical charge by touching the bare metal inside the main control panel before performing any service work. - Page 40 Figure 106 - Surface Mounting Using Large Base Mounting The MicroTech II™ Wall Mount Sensor allows for two mounting methods: wallbox mounting and surface mounting. Note: Wallbox mounting requires the large mounting base. Use either the large or small mounting base for surface mounting. Performing Wallbox Mounting To perform wallbox mounting (Figure 105): 1.
- Page 41 Refer to table 25, page 38 for maximum wire length. Figure 109 - 111048101 Sensor Wiring Terminal Block on 111048101 Sensor Repairs and Replacement No repair options available. Call your local Daikin representative for sensor replacement. IM 817-4 Page 41 of 60...
-
Page 42: Digital Ready™-Face & Bypass Control Components Model Avs
Digital Ready – Face & Bypass Control Interface with the fan motor start/stop relay, (R4) in electric Components Model AVS connection box. Interface with a factory installed Low Air Temperature Limit (T6 Digital Ready is a factory installed pre-wired package of selected Direct F±2... -
Page 43: Digital Ready Wiring Diagram-Typical
IM 817-4 Page 43 of 60... -
Page 44: Digital Ready Unit Mounted Temperature Sensor Specifications
Digital Ready Unit Mounted Figure 114 - Sensor Locations Temperature Sensor Specifications Discharge Air Sensor A 10 K ohm Negative Temperature Coefficient (NTC) sensor and a 1 K ohm Positive Temperature Coefficient sensor is provided for the discharge air, outdoor air and room air temperature measurement. They are located next to each other in the air stream as shown in Figure 114. Each is wired to the terminal strip separately so that the Automatic Temperature Control contractor may select the appropriate sensor for the application. -
Page 45: Digital Ready Unit Electrical Connections
4. Wire field power supply to line side of unit power switch. Wire Digital Ready Unit Electrical Connections ground conductor to switch ground terminal. 5. Mount unit power switch in switch junction box and install switch WARNING cover plate (provided). Rigorously adhere to field wiring procedures regarding proper 6. Figure 121 (A) shows switch location for valve control units and lockout and tagout of components. -
Page 46: Controls By Others Components
T4 F ± 2 F ± Daikin unit ventilators come with factory installed components and cuts out below 34 F and automatically resets above 38 wiring. It facilitates the field hookup of controls by others, capable F. -
Page 47: Controls By Others Wiring Diagram-Typical
IM 817-4 Page 47 of 60... -
Page 48: Controls By Others-Electrical Connections
Making Control Connections CAUTION Controls by Others – Electrical Connections It is the responsibility of the Automatic Temperature Control supplier to ensure that the proper electric heat control components WARNING are installed, and operate correctly to protect the unit. Rigorously adhere to field wiring procedures regarding proper lockout and tagout of components. -
Page 49: Electric Heat Wiring Diagram-Typical
IM 817-4 Page 49 of 60... -
Page 50: Electric Heating-Standard Motor Capacities, Amps, Wire Sizing, And Over Current Protection
WARNING To avoid electrical shock, personal injury or death, be sure that field wiring complies with local and national fire, safety, and electrical codes, and voltage to the system is within the limits shown in the job-specific drawings and unit electrical data plate(s). Power supply to unit must be disconnected when making field connections. -
Page 51: Electric Heating-High Static Applications Capacities, Amps, Wire Sizing, And Over Current Protection
Electric Heating Table 31 - High Static Applications Electric Heat Capacities, Amps, Wire Sizing, and Over Current Protection Note: Electric heat disconnect provided. IM 817-4 Page 51 of 60... -
Page 52: Cabinets
Cabinets Figure 124 - Cabinet(s) Meeting Unit Ventilator (refer to the instructions specific to the installation, included with the cabinets). NOTICE Remove debris, dust, dirt, and any obstruction from the area in front of the return air intake grille at the floor (approximately 3' - see shaded area) as this will affect unit performance. - Page 53 Figure 128 - Typical DraftStop Enclosure NOTICE Draftstop Bar Grille and Adjustable Damper The following information is a general outline for installing the Draftstop system. Refer to the specific installation instructions provided with the Draftstop system equipment. Piping Draftstop is made up of three separate sections as listed below: Area Upper channel or backplate Mounting components...
-
Page 54: Installing Unit Ventilator End Panels
Figure 129 - Typical DraftStop Enclosure Table 33 - 6" (152mm) End Panel Dimensions – Floor Unit Ventilators ⁄ " ⁄ " " " Closed (422mm) (556mm) Slide Open 6" 6" Top View (152mm) (152mm) 12" (305mm), 20" (508mm) Enclosure End View &... -
Page 55: Prepare Unit Ventilator For Start-Up
Figure 132 - Install End Panels With Provided Hardware Figure 134 - Oiling Point (1" End Panel Shown) Access To Fan Shaft Bearing Through Left Top Access Door Screws (insert through upper mounting holes inside unit end compartment, and thread into tinnerman clips on end panel) Bearing Oiler Cap Tinnerman Clips End Panel w/Cut out... -
Page 56: Filter(S)
Filters should be checked monthly or more often failure to maintain the unit, etc. So, for example, the following if conditions indicate. Filters are included in all units. Daikin single- damage is not covered by warranty: use filters are standard on all but electric heat units, which come with permanent wire mesh filters. Permanent wire mesh and renewable media... - Page 60 Daikin Training and Development Now that you have made an investment in modern, efficient Daikin equipment, its care should be a high priority. For training information on all Daikin HVAC products, please visit us at www.DaikinAP.com and click on training, or call 540-248-9646 and ask for the Training Department.
Need help?
Do you have a question about the AVS and is the answer not in the manual?
Questions and answers