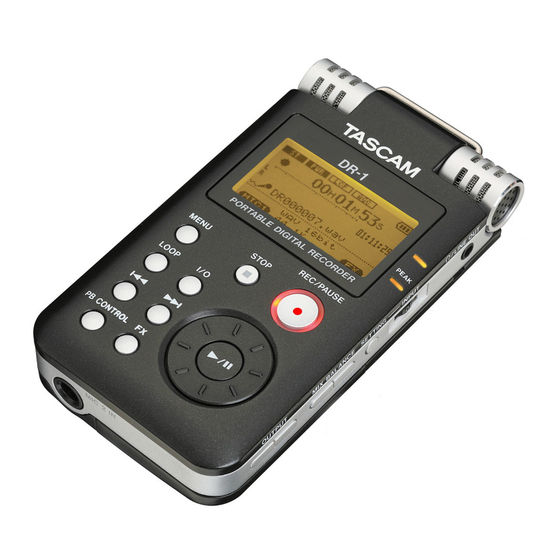
Tascam DR-1 Quick Start Manual
Portable digital recorder
Hide thumbs
Also See for DR-1:
- Supplementary manual (1 page) ,
- Owner's manual (43 pages) ,
- Manual (5 pages)

Related Manuals for Tascam DR-1


Summary of Contents for Tascam DR-1
- Page 1 D01019410B » DR-1 Portable Digital Recorder This device has a serial number located on the bottom panel. Please record it and retain it for your records. Serial number: __________________ Quick Start Guide...
-
Page 2: Important Safety Precautions
“dangerous voltage” within and on, the user is encouraged to try to Model Number : DR-1 correct the interference by one or more of the product’s enclosure that may be of Trade Name : TASCAM the following measures. -
Page 3: Important Safety Instructions
IMPORTANT SAFETY INSTRUCTIONS 1 Read these instructions. tripod, bracket, or table specified D o n o t p l a c e a n y o b j e c t s f i l l e d • 2 Keep these instructions. by the manufacturer, or sold with with liquids, such as vases, on the 3 Heed all warnings. - Page 4 SAFETY INFORMATION...
-
Page 5: Table Of Contents
Table of Contents 1–Introduction 4–Playback . . . . . . . . . . . . . . . . . . . . . 6 . -
Page 6: 1-Introduction
This Quick Start Guide explains the basic opera- built-in microphone, you can connect and record tions of the DR-1 so that you can start using it an external microphone or the line level output of soon after purchase. The Owner’s Manual, which a CD player or other external audio device. -
Page 7: Cleaning The Unit
Manual, you can download a copy from the TASCAM web site (http://www.tascam.com/). When we refer to a key or connector or control on the DR-1, the typeface looks like this: PLAY When we refer to items shown on the display, the... -
Page 8: 2-Preparation
2–Preparation Inserting an SD card Removing the SD card Since this unit uses an SD card for recording and Press the inserted SD card in gently and it will playback, you must insert an SD card before use. disengage from the unit so that you can pull it out The SD card slot and the USB connector are under completely. -
Page 9: Powering The Unit
DR-1 (with the battery inside) to a computer by USB. 1 Slide the battery case cover on the bottom of the unit to open it, and insert the DR-1 battery that was included in the box. Computer... - Page 10 If you connect an AC adapter (purchased DC Plug separately), it also charges the battery in the unit. The charge indicator lights during charging. Moreover, if the AC adapter is connected the battery charges even if the DR-1 power is OFF.
-
Page 11: Turning The Power On And Off
In addition to charging the battery, connecting the POWER key on the left side panel until “ ” DR-1 to a computer using the included USB cable TASCAM DR-1 appears on the display. allows other functions to be performed including the copying of audio files. -
Page 12: Preparation For Monitoring
Preparation for monitoring procedures for your computer to disconnect the Connect headphones or a monitoring system DR-1 and then remove the USB cable. (speakers with built-in amplifiers, stereo system, See the computer manual for how to close the etc.) to the jack. -
Page 13: Resetting The Unit
Resetting the unit The bottom panel of the unit has a reset hole. If the DR-1 is behaving abnormally, push the end of a paperclip or similar item into this hole to press a button inside the unit. This turns the power OFF and resets the DR-1’s system. -
Page 14: 3-Recording
To record a different source (external micro- phone or input), see “Recording with LINE IN other sources” on page 16. NOTE “ ” appears highlighted. The default setting for the DR-1 is “INT/MIC1” so INPUT steps 1–3 are not necessary when it is new. - Page 15 3–Recording 4 Press the key to display the Home STOP/HOME Screen. 5 Press the key to enable record REC/PAUSE standby. The key flashes red and the display shows the Record Screen. The input level is shown by the L/R meter on the Record Screen.
-
Page 16: Recording With Other Sources
• Audio files recorded on the DR-1 are automatically All the procedures after making the input setting given a file name in the format of “DR” followed by six digits assigned in recording order. A file exten- are the same as steps 5–9 in “Recording with the... - Page 17 3–Recording Recording a microphone with a Recording an external audio device standard 1/4” plug connector 1 Connect the output jack of the external audio device to the jack (stereo mini-jack) LINE IN 1 Connect a microphone to the jack MIC 2 IN on the end of the unit.
-
Page 18: Erasing Files
3–Recording Erasing files 3 Use the wheel to select the file you want to erase and press the key. The following ¥/π If you want to erase a recorded file for any reason, pop-up appears. you can erase unwanted files from the BROWSE screen. - Page 19 3–Recording 5 Press the key to erase the file. ¥/π Press the key if you choose not to STOP/HOME erase the file. NOTE In addition to erasing files, you can manage the folder structure of this unit, for example, to catego- rize recorded files.
-
Page 20: 4-Playback
4–Playback Follow these procedures to play recorded files. 1 Press the key to start playback. ¥/π The playback position display bar on the Home Screen shows the current playback position of the file. 2 Use the keys to adjust OUTPUT VOLUME (+, –) NOTE the monitoring level. - Page 21 4–Playback The volume position is shown in a bar in the NOTE lower part of the display during adjustment • When multiple files have been recorded, you can using the keys. OUTPUT VOLUME use the µ/≤ keys to select a file. •...
-
Page 22: 5-Overdubbing
5–Overdubbing In overdubbing, you can play an audio file saved Preparation for overdubbing on the SD card and mix in and record a new sound. Ordinarily, whether a recorded track is being played For example, you can sing along to a karaoke file or not, the input signal is not output through the or play an instrument over a backing track. -
Page 23: Overdubbing
5–Overdubbing Overdubbing 3 Use the keys to adjust playback MIX BALANCE volume as necessary. 1 Use the keys to select the audio file µ ≤ for playback. The selected file name appears on the screen. The volume position is shown in a bar in the lower part of the display during adjustment using the keys. - Page 24 5–Overdubbing 5 Press the key to put the unit in 7 Press the key again. Playback of REC/PAUSE REC/PAUSE record standby. The key flashes red and an the file selected in step 1 and recording of a new file starts simultaneously, so you can start pop-up appears on the screen.
-
Page 25: 6-Copying Cd Tracks To The Unit
(See “Connecting to a computer by USB” on NOTE page 11.) • You can also record tracks to the SD card directly 3 Click the “DR-1” drive that appears on the LINE IN from CDs using the jack. computer to open it and reveal “UTILITY,”... -
Page 26: 7-Playback Control Functions
7–Playback Control Functions This unit has playback control functions that are 2 Use the wheel to select “ ” and press the SPEED key. useful when you want to practice singing or playing ≤ an instrument. The current setting is highlighted. SPEED Changing playback speed You can change the speed of track playback, which... - Page 27 7–Playback Control Functions 8 Press the key. 5 Use the wheel to select “ ” and press the PB CONTROL ≤ key. icon appears highlighted in inverse The current VSA setting is highlighted. in the upper part of the display to show that a speed control function (VSA and/or SPEED function) is active.
-
Page 28: Changing The Playback Pitch
7–Playback Control Functions Changing the playback pitch You can change the pitch of a track being played back, which is convenient for singing along with a song that it is out of your range, for example. 1 When the Home Screen is displayed, press and hold the key to open the PB CONTROL... -
Page 29: Reducing Recorded Part Volume
7–Playback Control Functions Reducing recorded part volume 2 Use the wheel to highlight the “ PART ” item and press the ≤ key. CANCEL When using most commercially available sound sources (CDs, etc.), you can reduce the vocal and instrument sounds using the Part Cancel function. NOTE The effectiveness of this function depends on the sound source. - Page 30 7–Playback Control Functions • With the RANGE and PART items, you can set the pitch range and stereo position that is affected by the Part Cancel function. Changing these settings might increase the effectiveness of this function. For details, see “Reducing the sound of vocals and solo instruments”...
-
Page 31: 8-Loop Playback And Effects
8–Loop Playback and Effects Using loop playback Using effects You can choose part of a track for the DR-1 to play This unit has built-in effects. These effects can be repeatedly. used on all the inputs—the built-in microphone, both microphone inputs and the input. - Page 32 » DR-1 TEAC CORPORATION Phone: +81-42-356-9143 www.tascam.com 1-47 Ochiai, Tama-shi, Tokyo 206-8530 Japan TEAC AMERICA, INC. Phone: +1-323-726-0303 www.tascam.com 7733 Telegraph Road, Montebello, California 90640 U.S.A. TEAC CANADA LTD. Phone: +1905-890-8008 Facsimile: +1905-890-9888 www.tascam.com 5939 Wallace Street, Mississauga, Ontario L4Z 1Z8, Canada TEAC MEXICO, S.A.
Need help?
Do you have a question about the DR-1 and is the answer not in the manual?
Questions and answers