Table of Contents

Related Manuals for Bully Dog Watchdog


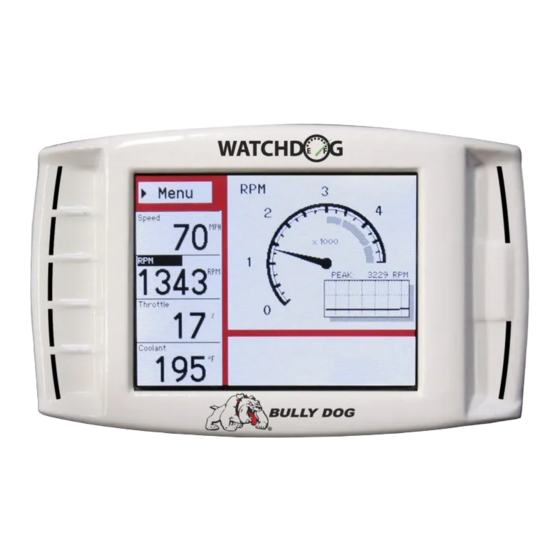
Summary of Contents for Bully Dog Watchdog
- Page 1 INSTALLATION Owners Manual V 2.0 Current as of watchDog software version: 1.1.0.3 Part 1: Physical Installation (pg. 4-15) Part 2: Operations (16-57) Part 3: Internet Updates (58-61) Appendix: Trouble Shooting, and other topics (62-67)
- Page 2 Watchdog itself. This product is a relatively easy product to install, if installation assistance is required this prod- uct can be installed by any Bully Dog dealer and can also be installed using the assistance of our technical support team.
-
Page 3: Main Wire Harness
INSTALLATION seCtiOn 1: Parts Included The list below includes the major parts included in your Watchdog package. The tools list indicates all of the tools necessary to complete the Watchdog install. tOOls neeDeD eXtra parts (optional) • Fuse Puller • Fuse Jack •... -
Page 4: Parts Description
The Head Unit is the interface through which all operating functions take place including: Monitoring functions, the Driving Coach feature, and performance tests. The Watchdog has seven capacitive touch buttons. Capacitive touch buttons are a Watchdog Front Side: button style that is sensitive to the presence of your finger. Capacitive buttons do not need to be pushed, only touched to activate. -
Page 5: Obdii Adapter Plug
Power Wire to OBD ll power 4. Power Supply Switch: as a power supply for the Watchdog. This port is used if a Bully Dog pyrometer kit is purchased for the Watchdog. 5. Four Pin USB: 6. Five Pin USB (do not unplug unless replacing) 7. - Page 6 INSTALLATION watChDOg Main wire harness The main harness connects the Watchdog to the OBD ll Adapter Plug and acts as the main line of communication for the Watchdog. This harness is 5 ft in length. pOwer wire The Power wire connects the OBD ll Adaptor Plug to the vehicle fuse box...
-
Page 7: Microsd Card
MOunt This universal windshield mount is used to install the Watchdog firmly onto the windshield, it is a suction cup mount that will work on any vehicle windshield. We also offer a pillar pod mounting style, check our web site for details. -
Page 8: Installation Overview
Watchdog. Note that some fuse boxes will be located inside the cab of the vehicle and will not require that the power wire go through the vehicle fire wall. For ease of installation, look for an in cab fuse box before going through the fire wall. - Page 9 OBD ll adapter plug is in the “down, ” position. This will ensure QUICk TIP: that the WatchDog is running off of power supplied from the power wire. The end result is that the Watch Dog will only turn on when the ignition is turned on.
-
Page 10: Main Cable
OBDII Adapter P INSTALLATION part 1: COnneCt the ObD ll aDapter tO the VehiCle ObD ll pOrt This part involves locating the vehicle’ s OBD ll port and then simply plugging the OBD ll Adapter Plug into the OBD ll port. 1. -
Page 11: Part 2: Installing The Power Wire
INSTALLATION part 2: installing the pOwer wire Part 2 involves locating the correct fuse within the vehicle fuse box, and connecting the power wire from the OBD ll Adaptor plug to the fuse in the fuse box. Locate the vehicle fuse box; the vehicle owners manual will indicate where the fuse box is Pre Installation: located within the vehicle. - Page 12 3: run watChDOg Main wire harness In this section you will connect the Watchdog Main Harness to the OBD ll Adaptor and then run the other end of the main harness up the side of the vehicle dash and connect it to the back of the Watchdog.
- Page 13 INSTALLATION part 4: MOunting the watChDOg The final step to installation is mounting the Watchdog to the windshield using the universal windshield mount. 1. Locate the T-shaped mount socket on the back side of the Watchdog. 2. Notice that the top of the universal mount will fit into T-shaped socket and slide forward to secure the Watchdog to the mount.
-
Page 14: Button Navigation
1: Button Navigation The buttons used on the Watchdog are Capacitive touch. Capacitive touch buttons only require a touch on the button area rather than a push like regular buttons require. It is not necessary to apply any significant force to the button while navigating through the various menus. -
Page 15: Setup Wizard
Proper setup of the WatchDog ensures that the accuracy of the information displayed by the WatchDog will be reliable. This section is split into two different parts, these two different parts should be performed in the order in which they appear in this manual to achieve proper setup. - Page 16 Once the Vehicle Setup Wizard begins it will au- tomatically detect the vehicles communication CONNECT TO VEHICLE protocol. The WatchDog will not be able to detect vehicle protocol on some vehicles if the engine is The WatchDog is determining the communication protocol used by not running.
- Page 17 OperATION Step 4: Select vehicle fuel type In step four simply select the vehicle fuel type, gas- oline or diesel, and then press “Next,” to continue. FUEL TYPE Next Select your vehicle’s fuel type. GASOLINE DIESEL Step 5: Choose Economy Goal: Choose the desired fuel economy goal.
- Page 18 The WatchDog is must ‘learn’ the correct ranges of THROTTLE this screen to the right, exit into the WatchDog Main and LOAD for your vehicle. Screen. When it is safe to do so accelerate at full throttle for several seconds to tlearn the throttle and load ranges.
- Page 19 Method 1 GPS: that was displayed on the WatchDog at the same time. At any one time, if the speed displayed on the WatchDog is more than 1 mph different than the GPS device then the WatchDog should be adjusted, but first, calculate the percent difference plus or minus.
- Page 20 Use highway mile markers to ensure that your one mile measurement is correct. If it takes 60 seconds to travel one mile at a speed of 60 mph then the WatchDog is reading accurately. If it takes at least 2 seconds more or less than 60 seconds then you will want to record that difference and use the formula below to calculate the percent difference before moving to step 3.
- Page 21 WatchDog doesn’t know the difference so that’s why it is important to adjust the fuel economy of the WatchDog every once in a while. Follow the Steps in this section to adjust the Watch Dog Fuel Economy Read Out.
- Page 22 Driving Coach. Are they the same? If they are different use the formula below to calculate the percent difference so that the fuel economy readout on the WatchDog can be adjusted. If they are the same or within 2% of each other then adjusting the fuel economy readout is pretty trivial.
-
Page 23: Exploring The Main Screen
OperATION seCtiOn 3: Exploring the Main Screen The Main Screen is the screen that displays vehicle activity, it is also the screen from which the main menu is accessed. The Main Screen has a multitude of different functions; the diagrams in this section fully explain each function accessed from the Main Screen. - Page 24 4: Press the top button to change the FUNCTION FUNCTION the left side of the Watchdog adjacent to one of screen theme into the Day Mode setting, press the vehicle parameters on the screen, and that the bottom button to switch to Night Mode.
- Page 25 OperATION large gauge styles: The Large Gauge Area can display three different gauge styles. These gauge styles can be displayed on the main screen. These gauge styles can only be used and viewed when the driv- ing coach is not activated in which case it would be displayed on the main screen. Use Button Function 3 while in the Main Screen to rotate through the different gauge styles.
-
Page 26: Proper Setup
OperATION seCtiOn 4: The Driving Coach The Driving Coach is a special feature designed to help a driver operate their vehicle more efficiently. It coaches drivers into better driving habits by providing real time visual feed- back and audio feedback as to how efficient they are driving. DriVing COaCh aCtiVatiOn: To display the Driving Coach on the Main Go Back... - Page 27 Diagram 1: Driving Coach Location Wasted Energy Menu Dec. Acc. Wasted Energy The Driving Coach: The high- Coolant High lighted area on the WatchDog Dec. Acc. Average Mpg Gallons Grade Intake screen represents the Driving 2138 Coach information display. All...
- Page 28 Trip Mpg: This is a cumulative Coolant High average economy that resets Average Mpg Gallons Grade Intake 2138 each time the WatchDog is Instant Mpg Economy Trip Mpg turned off. Trip Grade Instant Mpg Trip Mpg Trip Grade Trip Grade: This is a cumula- tive grade that indicates driver performance over a single trip.
- Page 29 OperATION the DriVing COaCh On sCreen DriVing tips While parked or after a period of idle the driving coach will post driving tips that will help the driver improve their own driving efficiency. The tips will appear based on drivers previ- ous performance, they aren’t just randomly posted.
- Page 30 OperATION seCtiOn 5: Exploring the Main Menu and submenu systems The diagram below shows all of the main menu items. Section 5 includes a diagram and a comprehensive description of each ain menu item and all sub menus. MAIN MENU Go Back to General Disp Gauge Setup...
-
Page 31: Gauge Setup
Watch- Dog can receive and display. As long as the WatchDog is properly connected to the vehicle, while browsing the Gauge Setup menu, the WatchDog will only display those parameters that are available for the vehicle it is installed on. - Page 32 These gauge options will display EGTs or exhaust gas temperatures. What is dis- • Pyro 1 and Pyro 2: played on the main screen of the WatchDog actually depends on the “Pyro Source,” that is selected from the “Select Pyro Source,” menu which is in the Vehicle Setup Menu.
- Page 33 OperATION Current battery output voltage in volts. • Battery: Display fuel rail pressure on most common rail fuel systems or just lift pressure on some • Fuel Pressure: non-common rail fuel systems. Display calculated engine load displayed as a percentage from 0% for no load to 100% for maxi- •...
-
Page 34: Performance Test
OperATION perFOrManCe testing: (pgs 38-42) Our performance testing feature is a great feature that offers drag racers the ability to record 1/4 mile runs. All of the performance testing information gathered can be transferred to a PC using our Performance Testing Analysis Software. See the Appendix for information on the Perfor- mance Testing Analysis Software. - Page 35 It will not wait to detect speed before it starts recording. Once a complete 1/4 mile has been completed the WatchDog will display the results • Results Screen: screen. If the user wants to save the test so it can be displayed and analyzed on a PC then the run can be...
- Page 36 It will not wait to detect speed before it starts recording. Once a complete 1/4 mile has been completed the WatchDog will display the results • Results Screen: screen. If the user wants to save the test so it can be displayed and analyzed on a PC then the run can be...
- Page 37 Save Test Data to SD Card: Save the results for the last run to the WatchDog SD Card. All runs that are saved to the SD Card can be transferred to our Performance Testing Analysis software. For more information on our Performance Testing Analysis software see the appendix of this manual or visit our website: www.bullydog.com.
- Page 38 OperATION Fastest Times: View the results for the quickest 1/4 mile ever recorded. Performance Testing Setup: Choose the initiation method for a performance test. The two different types available are the Drag Tree method and the Speed detection method. See descriptions below. Go Back TEST START to Main Memu...
- Page 39 Read section 2 of the operating instructions to find out how to completely setup the WatchDog and the Driving Coach. The next two pages will describe the function for each of the menu items listed in the diagram below.
- Page 40 DISPLAY COACH to Drv. Coach Setup the large Gauge Area in the Main Screen of the Turn the Driving Coach Display On or WatchDog. OFF by making your selection below. Driving Coach ON Use these two buttons to toggle between Driving Coach OFF on and off, press “Go Back.”...
- Page 41 OperATION Adjust Acceleration: The sensitivity setting determines the degree to which the Acceleration and Deceleration bar on the Driving Coach interface react to actual vehicle acceleration and deceleration. A new user will want to start with a low or medium sensitivity setting and work up from there as their driving improves and they are able to hold a high letter grade for average and trip economy.
-
Page 42: Vehicle Setup
This menu includes everything related directly to the vehicle, mostly making up input points for vehicle information to make sure the WatchDog knows what it is running on. This menu also includes the Vehicle Setup Wizard and the Speed and Economy Adjustment menus. - Page 43 OperATION Vehicle Setup wizard The Vehicle Setup Wizard appears the very first time the WatchDog is setup. The Setup Wizard can be activated at any time by entering this menu. The Setup Wizard process is described in detail in section 2 of the operation part of the manual.
- Page 44 OperATION Set Vehicle weight Choosing the correct vehicle weight will help the WatchDog to provide accurate information for that vehicle application. The curb weight of a vehicle is usually posted on a sticker on the inside of the drivers door jam. If the curb weight cannot be found on the door jam, refer to the vehicle owners manual or look for it on the internet.
-
Page 45: Set Warnings
OperATION Set Warning Levels This very important feature will trigger an audio and visual warning on the WatchDog main screen during normal operation if a set warning level breaches the user set levels. The two diagrams below describe the process of setting up a warning level. - Page 46 Section 2 describes how to properly check the accuracy of the speed display and overall how to setup the WatchDog. The Speed Display should only be adjusted if the actual vehicle speed is different from the speed displayed on the WatchDog Screen.
-
Page 47: User Options
OperATION user OptiOns: (pgs 51-53) In this sub menu you can personalize the Watchdog. A detailed description of each User Option submenu item is on the following pages. USER OPTIONS Go Back to Main Menu Color Theme Setup Backlight Setup... - Page 48 There are many color themes to choose from, choose a color theme for both day and night time use. Each color theme can be previewed as they are highlighted. Switch between day and night time mode on the main screen by pressing the up/down buttons on the right side of the WatchDog. Press “Go Back”...
- Page 49 Press “Wave Effect ” to turn the ani- mation On or Off. English/ Metric Units The Watchdog contains the ability to display vehicle parameters and fuel economy in either Metric units or US standard units. Press “Go Back” when finished.
- Page 50 If no DTCs are displayed you can simply press the Go Back button to return to the main menu. If DTCs do appear on the screen the WatchDog will provide a DTC code value and a descrip- tion. At that point the DTCs can be writen down and then erased from the vehicle computer.
-
Page 51: Show Settings
See the diagram below to see everything that is listed in this menu. View settings Go Back to Main Menu System Info/Settings HW Version: SW Version: 1.1.0.3 Serial #: 0000000000000 Application: WatchDog Untis: US Standard Vehicle Info/Settings DOWN Vehicle: ##### VIN: 1.10.2 Com Protocol: Engine Size: 5.7 Liters... - Page 52 Before using this function an internet update must be performed through the Bully Dog Update Agent. As this feature is useful only after an internet update has been performed. See the internet updating instructions in the appendix of this manual.
- Page 53 OperATION The scenario below depicts a common errors seen when updating the Watchdog soft- ware. It is important the SD card is always left in the WatchDog. The screen capture below illustrates what will be seen on the screen if an update is No SD Card Notice: attempted without the Watchdog micro SD card in the SD card slot.
- Page 54 1: Watchdog Version Information The only time a Watchdog needs to be updated is when a new version comes available on the Update Agent. Before going through the updating process go to the Bully Dog web site and check the latest version available for the watchdog and compare that version number to the software version currently loaded on the Watch Dog.
- Page 55 Bully Dog Technologies specifically designed to update Bully Dog products. The Update Agent is easy to use, it can be loaded on any windows based PC running Windows XP or newer. The Update Agent is attainable free of charge at the Bully...
- Page 56 7. Follow the screen prompts to update the Watchdog, do not unplug while performing the Watchdog update. 8. Once the Update Software function has completed, the WatchDog will have to be set up for the vehicle like is described in Section 2 of the Operating Instructions.
-
Page 57: Communication Error Screen
2. The WatchDog cannot communicate with most vehicles unless the engine is running and any other vehicle must have the key in the ON position. 3. If the WatchDog is transferred to a new vehicle then this screen will appear because the WatchDog is looking for information on the previous vehicle. - Page 58 Watchdog will not turn on tions Make sure that all of the harnesses are properly installed. If still not working, one of the harnesses could be defective. Contact Technical Support if the Watchdog is Back light quit working Loose Connections otherwise functioning normal.
- Page 59 In case an SD Card is lost or broken, a new micro SD Card can be purchased and used to update the Watchdog. However, the new card will need to be formatted to work with our internet update software, The Update Agent. The reason a new SD card needs to be formatted is so that the Update Agent will automatically recognize that SD Card when the SD card is plugged into a PC.
- Page 60 8. Now unplug the card reader and plug it back into the PC and the Update Agent should recognize this SD Card. Now whenever this card is plugged into any PC that has the Bully Dog Update Agent installed the Agent will automatically recognize the SD Card.
- Page 61 4: Performance Testing Analysis Software If you are a drag racer using the WatchDog for on track use then you must check out the Performance Testing Analysis Software. This free software package takes all of the perfor- mance testing runs that have been collected on the SD card and makes them viewable on your PC.
- Page 62 • Choose your Sensitivity Level Special Note: The WatchDog relies primarily on gathering vehicle information through the OBD ll port. Earlier model year vehicles generally do not display as much information as newer model vehicles. Technology advances in later model vehicles have brought more ve- hicle sensors and so they are able to broadcast more information to the vehicle OBD ll port.
Need help?
Do you have a question about the Watchdog and is the answer not in the manual?
Questions and answers