
Related Manuals for Elan S1616A


Summary of Contents for Elan S1616A
- Page 1 S1616A Multi-Zone Controller Amplifier Single Chassis & Dual Chassis Mode INSTALLATION MANUAL...
-
Page 2: Preface
This manual provides design information, step-by-step installation instructions and connection examples, along with basic user information for installation and ongoing use of the S1616A Multi-Zone Controller Amplifier. This manual is written for the installer of this equipment. This manual only covers the S1616A when used in Multi-Zone Mode. For installation instructions for using the S1616A in Amplifier Mode please download the S1616A Amplifier Mode Installation manual at www.elanhomesystems.com/dealer. - Page 3 S1616A E L A N H O M E S Y S T E M S INSTALLATION MANUAL © ELAN Home Systems 2012 | All rights reserved. Page 2...
-
Page 4: Table Of Contents
Updating Firmware ……..………………………..………………………………………… 19 Setting Unit ID ………………………………………...………………………………………. 20 Chapter 4: Connections ……………….…………………..…………………………….. 22 Chapter 5: Troubleshooting …………………………………………………..…...… 27 Specifications: …………………………………………………………………………..…...… 30 Appendix A: Programming With Configurator …………...…..……..31 © ELAN Home Systems 2012 | All rights reserved. Page 3... -
Page 5: Chapter 1: Introduction
Dual Chassis pair. In Single Chassis mode up to sixteen S1616A units can be linked for a total of 128 stereo outputs or 256 mono outputs. In Dual Chassis mode eight pairs of S1616A units can be linked together providing 128 stereo outputs. The S1616A is a dedicated g! system device and requires an HC series controller for configuration and operation. -
Page 6: S1616A Features
Single Chassis – 8 stereo inputs, 16 mono inputs or combinations thereof Dual Chassis – 16 Stereo inputs • Amplifier Mode Operation The S1616A can act as a high quality amplifier (see Amplifier Mode manual) • Flexible Input Configuration Single Chassis 8 Stereo Inputs ... -
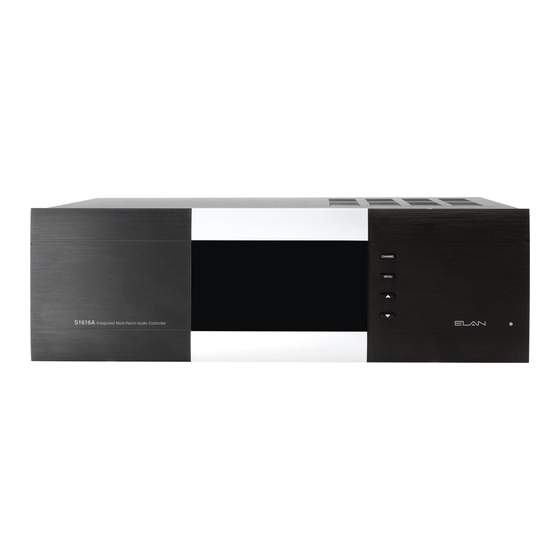
Page 7: S1616A Front Panel Indicators
S1616A E L A N H O M E S Y S T E M S INSTALLATION MANUAL S1616A Front Panel Indicators Figure 1-1: S1616A Front Panel Controls and Display Item Function Channel Button Cycles through information pertaining to each of the 16 audio channels... -
Page 8: S1616A Rear Panel Connections
Replace only with T12.5AL250V Trigger All On Power Cable Connector Used only in Amplifier Mode – see Manual IEC type C14 Note: All 3.5mm connectors are mono (two conductors) © ELAN Home Systems 2012 | All rights reserved. Page 7... -
Page 9: Amplifier Mode
The S1616A is a very flexible controller and as such many design opportunities exist. Understanding the capabilities of the S1616A is critical. What follows are design definitions that will help you maximize the capabilities of the S1616A in your installations. - Page 10 The Single Chassis system provides 8 stereo inputs or 16 mono inputs or any combination in between. Figure 2-1 shows the input configuration options for a Single Chassis installation. Whether an input is stereo or mono, the S1616A automatically adapts it to the stereo and mono outputs.
-
Page 11: Level Matching
Signal Sensing All audio inputs feature a built-in signal sensor that may be used to trigger g! events. Please refer to the g! Configurator manual for information on using triggers. © ELAN Home Systems 2012 | All rights reserved. Page 10... - Page 12 INSTALLATION MANUAL Zones A zone is an area that has independent access to sources. The S1616A is unique in that it separates zones from outputs. Both Single Chassis and Dual Chassis are configurable for up to 64 zones. A system designed with only 4 zones could still utilize all 16 outputs.
- Page 13 The S1616A has only amplified outputs. Should your installation require more amplifier power than the S1616A’s 50WPC @ 8Ω and 75WPC @ 4Ω power output you can use one of any number of speaker level to line level converters on the market to convert the amplified output to a useable line level.
-
Page 14: Output Settings
1 of the left chassis is always connected to the same zone as output 1 of the right chassis. Outputs are expanded in pairs of units and a total of 8 pairs of S1616A units may be used on one installation providing 128 stereo outputs. - Page 15 INSTALLATION MANUAL Applications Single Chassis configurations – below are a few examples of S1616A systems to help you fit your customer’s applications. Additional examples can be found in the S1616A Designer’s Guide available from your ELAN representative or on the ELAN dealer website.
- Page 16 Figure 2-6 shows a system that has a passive in-ceiling subwoofer in the master bedroom along with left and right speakers, a single mono speaker (not a two channel) in the master bathroom, and stereo speakers in the rest of the house. An ELAN C2 is connected and allows doorbell and paging throughout the house.
- Page 17 E L A N H O M E S Y S T E M S INSTALLATION MANUAL Figure 2-7 is a seven stereo, one mono system with an ELAN C2 controller. The system has 6 stereo pairs of speakers and 4 areas with single mono speakers. Three groups allow the Master Suite, Exterior and Entertaining areas to be easily linked through any g! interface.
- Page 18 The use of zones for each speaker provide the ability to adjust the volume in each area while the S1616A’s grouping feature allows simple source selection for all contiguous areas. Any zone can choose any TV tuner, and the whole system can easily be controlled from a VL10 or even an HR2.
- Page 19 32 or more outputs. The C2, when used, always connects to input 16. It must be connected to both units either by looping from one unit to the other or by using a Y cable. Figure 2-9 © ELAN Home Systems 2012 | All rights reserved. Page 18...
-
Page 20: Chapter 3: Unit Addressing
Using the ELAN Firmware Updater or g! Tools connect your laptop to the S1616A with a mini-USB cable to the USB connector on the rear panel of the S1616A. See Figure 3-2. Please refer to the instructions for ELAN Firmware Updater for how to operate the software. Select the “S1616A Multi- Zone”... -
Page 21: Setting Unit Id
Setting the Unit ID Each S1616A in your system must have a unique Unit ID from 1 to 16 on Single Chassis systems and Dual Chassis systems. The default Unit ID is 1. The Unit ID must be set prior to Configurator programming. - Page 22 IDs for left and even IDs for right. Press the Channel button to reboot to the new Unit ID (Figure 3- Figure 3-6 The S1616A will re-boot with the new address. To change the address again repeat the above steps.
-
Page 23: Chapter 4: Connections
(Figure 4-2). Audio input 1 is buffered and routed out the audio output 1 connector, input 2 to output 2 and so forth. Digital audio inputs do not “loop out” of the S1616A. If multiple units are to be used you must use the analog inputs. - Page 24 An RJ-45 VIA!NET Data Bus Loop is provided for g! HC series controller connection. Before the multi-zone controller amplifier will operate it must be set with an appropriate and unique Unit ID. See "Setting Unit ID" on page 20. Figure 4-3 © ELAN Home Systems 2012 | All rights reserved. Page 23...
-
Page 25: Usb Connector
E L A N H O M E S Y S T E M S INSTALLATION MANUAL USB Connector Used to update and configure the S1616A firmware. Note: A Standard USB-A to USB-Mini-B cable must be utilized for firmware updates and is not included with the S1616A (Figure 4-4). -
Page 26: Speaker Binding Post
Use the included rack mount brackets to mount your S1616A in industry standard equipment racks. Be sure to leave at least one rack space above and below the S1616A for heat dissipation. Attach the rack mount brackets onto the S1616A chassis from the front as shown in Figure 4-7. - Page 27 Ensure that the brackets are flush with the front of the unit. Install each of the eight screws (included) through the side mounting flanges into the holes in the sides of the unit as shown in Figure 4-8. Hand tighten screws! Over-tightening could cause damage to the S1616A chassis. Figure 4-8 Once the brackets are securely mounted, install the entire assembly into a standard 19”...
-
Page 28: Chapter 5: Troubleshooting
Turn switch ON. Switch is on the back of the unit. power up. 2. Circuit breaker tripped Set circuit breaker. The S1616A draws 12 amps of AC current. Ensure that combined current draw of all devices on circuit does not exceed the circuit’s capacity. Fix connections. - Page 29 – of amplifier goes to – of speaker on ALL speaker leads. Incorrect source Source connected to wrong input of Verify/correct input connections. playing on speakers amplifier or A/V Controller Speakers connected to incorrect Verify/correct speaker connections. speaker outputs © ELAN Home Systems 2012 | All rights reserved. Page 28...
- Page 30 Update firmware to Rev. 2.0.1.1 or later (see page 19). not communicating Improper VIA!NET wiring Correct VIA!NET connections (see page 23). with S1616A Unit ID does not match Configurator Set Unit ID to correct address (see page 19). © ELAN Home Systems 2012 | All rights reserved. Page 29...
-
Page 31: Specifications
Dimensions w/Feet (3U w/o Feet) 17 W x 5 7/8 H x 17 D 432 W x 149 H x 432 D Weight (Unit) lbs. 47.6 21.6 Weight (Shipping) lbs. 54.0 24.5 © ELAN Home Systems 2012 | All rights reserved. Page 30... -
Page 32: Appendix A: Programming With Configurator
These instructions assume that the proper firmware has been installed and the Unit IDs have been set in each S1616A. If these steps have not been completed please see page 19 and complete these steps prior to programming with Configurator. - Page 33 Specify the C2 Page Mode if applicable. Step 2: Setup Source Inputs Open the Sources node on the ELAN S1616A, and then configure each source one at a time as this allows you to set all source parameters without changing screens. This is shown below in...
- Page 34 Select a level adjustment to match the relative level of this source with other sources. This is usually done via a listen test. Step 3: Setup Zones Open the Zones node on the ELAN S1616A device, and then configure each zone one at a time. This is shown below in Figure A-4: Figure A-4 Zone Configuration –...
- Page 35 Include in Door Bell announcement. Set the Door Bell (DB) Volume. Fixed Zone Outputs - See the instructions at the end of this appendix to create fixed output level zones. © ELAN Home Systems 2012 | All rights reserved. Page 34...
- Page 36 INSTALLATION MANUAL Step 4: Setup Outputs Open the Outputs node on the S1616A, and then configure outputs as shown below in Figure A-5: Figure A-5 The outputs are listed on the page according to the Unit ID and the Output Zone: these fields cannot be changed, and the sort order cannot be changed.
- Page 37 Importing overwrites the current configuration and importing does not include any of the names that were entered (i.e. speaker, source, and zone names). Select the S1616A zone controller and note at the bottom of the configuration screen the buttons shown in Figure A-8: Figure A-8 Check to verify that you have the correct Single Chassis or Dual Chassis mode.
- Page 38 E L A N H O M E S Y S T E M S INSTALLATION MANUAL Figure A-9 Click Import Settings from S1616A and confirm your desire to import and overwrite the current configuration and Configurator will read the data from the attached unit(s) and populate the configuration accordingly.
- Page 39 Generic Single Zone Controller Method Configure a zone in the S1616A with all of the source, WHM, Group, C2 and output level attributes you desire in the fixed zone. Name it something like “Dining Fixed Out”.
- Page 40 INSTALLATION MANUAL Figure A-11 Right click Power Off and add a command to turn off the S1616A “Fixed Out” zone (Figure A-12): Figure A-12 Select (Source 01) of your Dining Interface controller and select the Source Device to be the Output From <S1616A Name>:Zone Dining Fixed Out and hit Apply.
- Page 41 Settings Interface to the Dining Fixed Out Settings and set the sources you wish to show and in what order and hit Apply (see Figure A-14). Figure A-14 © ELAN Home Systems 2012 | All rights reserved. Page 40...
- Page 42 When you create your Zone Controller set it up for one more zone than you actually have. Configure the first zone in the S1616A with the bass, treble, loudness and output level attributes you desire in the fixed zone. WHM and Grouping settings will not matter. Name it something like “Dining Fixed Out”.
- Page 43 INSTALLATION MANUAL Notes on Event Map Commands The S1616A includes the following Events in the Audio Zone Controller System Family: “Chassis Selection” indicates features available by selecting the Zone Controller; “Zone Selection” indicates features available by selecting a specific zone;...
- Page 44 Zone N: Set Volume To… (select) Zone N: Turn Off Zone N: Turn On Zone N: Un-Mute Zone N: Volume Down 5%, 10% • Zone N: Volume Up 5%, 10% © ELAN Home Systems 2012 | All rights reserved. Page 43...
-
Page 45: Limited Warranty
(c) to installed equipment which is not installed to ELAN’s specifications, (d) to equipment which shall have been repaired or altered by others than ELAN, (e) to equipment which shall have been subjected to negligence, accident, or damage by circumstances beyond ELAN’s control, including, but not limited to, lightning, flood, electrical surge, tornado, earthquake, or other catastrophic events beyond ELAN’s control, or to improper operation, maintenance or storage, or to other than...
Need help?
Do you have a question about the S1616A and is the answer not in the manual?
Questions and answers