Table of Contents
Advertisement
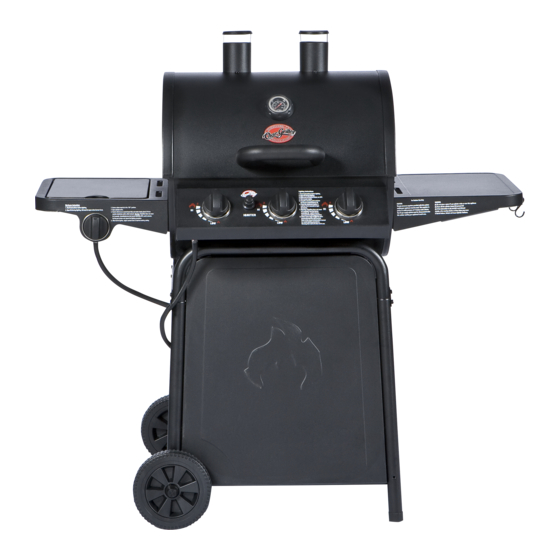
Features:
• Porcelain Coated Cast Iron Grates
• Stainless Steel Thermometers
• Nickel Plated Warming Racks
• 40,800 BTU's
• 645 Inches of Cooking Area
• Side Burner, 12,000 BTU, Cast Brass
• Stainless Steel Tube Burners
• Electronic Ignition System
• Porcelain Coated Flame Shields
• 6" Wheels
• Dual Stacks for Even Heating
• Stay Cool™ Hood Handle
WARNING
!
For Outdoor Use Only (outside any enclosure)
SAVE THESE INSTRUCTIONS FOR FUTURE
REFERENCE. IF YOU ARE ASSEMBLING THIS
UNIT FOR SOMEONE ELSE, GIVE THIS MANUAL
TO HIM OR HER TO SAVE FOR FUTURE
REFERENCE.
FOR CUSTOMER SERVICE, CALL 912-638-4724
OWNER'S MANUAL
Grillin' Pro™ 3001
Model #3001
Gas Grill
LP
WARNING:
Improper installation, adjustment, alteration, service or
maintenance could cause injury or property damage
Read the installation, operation and maintenance
instructions thoroughly before assembling or servicing
this equipment.
Failure to follow these instructions could result in fire
or explosion that could cause property damage,
personal injury or death.
DANGER:
DO NOT use gas grill for indoor cooking or heating.
TOXIC fumes can accumulate and cause
asphyxiation. Do not use in or on boats or recreational
vehicles.
PROP 65 WARNING:
Chemicals known to the state of California to cause
cancer, birth defects or other reproductive harm are
created by the combustion of propane.
A propane gas cylinder is required for operation.
This gas grill is not intended for commercial use.
MH45677
™ & © Char-Griller / A&J Mfg.
Advertisement
Table of Contents

Related Manuals for Char-Griller 3001


Summary of Contents for Char-Griller 3001
- Page 1 UNIT FOR SOMEONE ELSE, GIVE THIS MANUAL TO HIM OR HER TO SAVE FOR FUTURE REFERENCE. A propane gas cylinder is required for operation. This gas grill is not intended for commercial use. FOR CUSTOMER SERVICE, CALL 912-638-4724 ™ & © Char-Griller / A&J Mfg.
- Page 2 2. An LP cylinder not connected for use shall not be stored in the vicinity of this or any other appliance. page 2 ™ & © Char-Griller / A&J Mfg.
-
Page 3: Table Of Contents
Operating Grill Connecting Gas Cylinder……………………….page 16 Checking for Leaks……………………………...page 16 Lighting Grill…...…………………………………page 17 Cleaning and Care………………………………page 18 Gas Grill Troubleshooting……………………………page 19 - 20 Grill Preparation………………………………………page 21 Recipes……………………………………………..….page 22 Accessories…………………………………………….page 23 - 24 page 3 ™ & © Char-Griller / A&J Mfg. -
Page 4: Important Safety Information
Keep all combustible items and surfaces at least 36 inches (91.4cm) away from grill at all times. DO NOT use this grill or any gas product near unprotected combustible constructions. page 4 ™ & © Char-Griller / A&J Mfg. - Page 5 Never use a propane cylinder with a damaged body, valve, collar or footing. • Dented or rusted propane cylinders may be hazardous and should be checked by your propane gas supplier. page 5 ™ & © Char-Griller / A&J Mfg.
-
Page 6: Illustrated Parts List
5. HOOD HANDLE……..1 SET 6.WARMING.RACK…..1 PC 7A. BURNER 8. BASE……………….. 9. FLAME SHIELD…..3PCS … (with short wire)…. 7B. BURNER (with longer wire)… 10. LONG LEG………..…2PCS 11. SHORT LEG………….2PCS 12. LEG CROSS BAR..2PCS page 6 ™ & © Char-Griller / A&J Mfg. - Page 7 17. AXEL………………..….1PC 18. FRONT PANEL……..1PC 19. SIDE BURNER / CONTROL 20. UTENSIL HOOK….3PCS 21. GREASE TRAY..……1PC PANEL / HOSE VALVE…1SET 22. CATCH PAN……..…..1PC 23. SIDE SHELF…………1 PC 24. POT STAND……1 PC page 7 ™ & © Char-Griller / A&J Mfg.
-
Page 8: Tools Required, Assembly Tips And Hardware List
912-638-4724. Do not attempt assembly if you are missing parts. HARDWARE: ¼-20x 1 ½” BOLT……4 PCS ¼-20x1/2” BOLT…..38 PCS SCREW……………….3 PCS ¼” FLAT WASHER…4 PCS ¼-20 HEX NUT……..8 PCS ¼” LOCK WASHER…32 PCS HINGE PINS………..2 HAIR COTTER PIN….2 page 8 ™ & © Char-Griller / A&J Mfg. -
Page 9: Assembly Instructions
Insert the LEGS into the LEG CROSS BARS as shown below. Step 3 Insert the AXEL through the SHORT LEGS and through the BASE. Slide WHEELS onto AXEL and hammer AXEL CAPS onto each end of the AXEL to secure WHEELS. page 9 ™ & © Char-Griller / A&J Mfg. - Page 10 You may need to loosen other bolts and move the GRILL BODY slightly to get the holes in the GRILL BODY to line up with the holes in the LEGS. Flat Washer Lock Washer Bolt page 10 ™ & © Char-Griller / A&J Mfg.
- Page 11 GRILL BODY and then screw into the SIDE BURNER and CONTROL PANEL. See Figures below. Lock Washers Bolts Lock Washers Bolts WRONG HOSE LOCATION Note: the hose should WRONG be on the outside of the leg brace. page 11 ™ & © Char-Griller / A&J Mfg.
- Page 12 GRILL BODY that the BURNER goes through and then attach the WIRE to the backside of the ELECTRONIC IGNITER, which is attached to the CONTROL PANEL. Burner Igniter Wire Electronic Igniter page 12 ™ & © Char-Griller / A&J Mfg.
- Page 13 Attach the HOOD to the GRILL BODY using the HINGE PINS as shown. First place the HOOD onto the GRILL BODY then screw the HINGE PINS into place and then insert COTTER PINS through the holes in the HINGE PINS on the inside of the GRILL BODY. page 13 ™ & © Char-Griller / A&J Mfg.
-
Page 14: Operating Grill
2. Turn the Screw on the left side of the base panel clockwise to secure the standard 20 lb. LP gas cylinder. NOTE: Hose must go under and to the outside of the leg brace. Screw page 14 ™ & © Char-Griller / A&J Mfg. - Page 15 Hint: The paper label that is affixed to the hood is more easily removed when the hood is warm. Any remaining glue residue can be cleaned off with a spray lubricant like WD-40 ® page 15 ™ & © Char-Griller / A&J Mfg.
-
Page 16: Connecting Gas Cylinder
Check the regulator connection as follows: Disconnect regulator from the tank and reconnect, making sure the connection is secure. Retest with solution. If you continue to see bubbles, replace the cylinder. page 16 ™ & © Char-Griller / A&J Mfg. -
Page 17: Lighting Grill
“Hi” positions after first burner is lit. Adjust burners to desired cooking settings. Observe Flame Height When Lit: Flame should be a Blue / Yellow color between 1-2 in. High page 17 ™ & © Char-Griller / A&J Mfg. -
Page 18: Cleaning And Care
Inspect burner for any damage (cracks or holes). If damage is found, replace with new burner. Reinstall burner; check to insure that gas valve orifices are correctly positioned inside burner inlet (venturi). Also check position of spark electrode. Spark Electrode Burner page 18 ™ & © Char-Griller / A&J Mfg. -
Page 19: Gas Grill Troubleshooting
30 second s and then light grill. Irregular flame Burner ports are clogged or Clean burner ports pattern, flame does blocked. not run the full length of burner. page 19 ™ & © Char-Griller / A&J Mfg. - Page 20 Clean thoroughly. The lid is stainless is not painted on the inside. to be peeling has turned to carbon and is steel, it is not painted. - like paint peeling flaking off. page 20 ™ & © Char-Griller / A&J Mfg.
-
Page 21: Grill Preparation
SHISH KABOB MARINADE: Mix 1 cup soy sauce, 1/2 cup brown sugar, 1/2 cup vinegar, 1/2 cup pineapple juice, 2 teaspoons salt, 1/2 teaspoon garlic powder and bring to a boil. Marinate beef in mixture a minimum of 4 hours. page 21 ™ & © Char-Griller / A&J Mfg. -
Page 22: Recipes
30 minutes turning several times (no need to turn if smoked). GRILLED VEGETABLES: Slice 1/4" thick and soak in olive oil prior to grilling to prevent burning. Grill for 9 minutes each side. page 22 ™ & © Char-Griller / A&J Mfg.
Need help?
Do you have a question about the 3001 and is the answer not in the manual?
Questions and answers