Table of Contents
Advertisement
Available languages
Available languages
Quick Links
INSTALLATION
MANUAL
IMPORTANT: Dimensions Shown in Both Inches and Centimeters.
IMPORTANT:
Be sure the appliance being installed is equipped for the gas to be supplied. Refer to serial plate on
underside of burner box for this information. Do not attempt to convert this appliance for use with a gas other than the type
specified.
30² MODEL
36² MODEL
IMPROPER INSTALLATION, ADJUSTMENT, ALTERATION, SERVICE, MAINTENANCE
OR USE OF RANGE CAN RESULT IN SERIOUS INJURY OR PROPERTY DAMAGE.
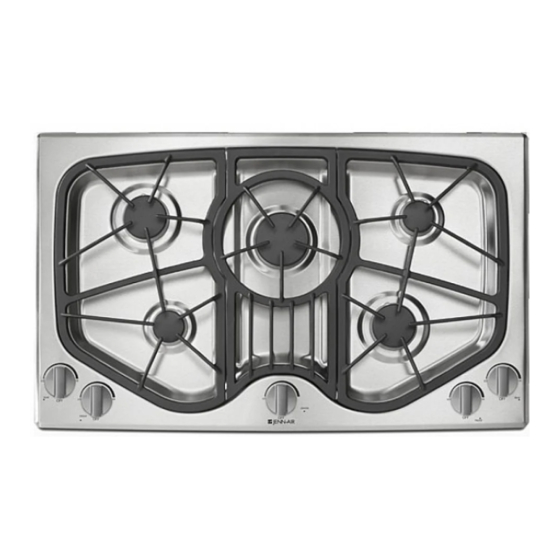
SEALED GAS COOKTOPS
Models: JGC9430 & JGC9536
NOTICE TO INSTALLER: Leave these instructions with the appliance.
NOTICE TO CONSUMER: Retain these instructions for future reference.
SPECIAL WARNING:
403 WEST FOURTH STREET, NORTH · NEWTON, IA 50208
DIMENSIONS
inches
A
28 1/2
+ 1/16
B
19 15/16 + 1/16
C
2 1/8
+ 1/16
D
5 1/4
+ 1/16
E
30
+ 1/16
F
21 1/2
+ 1/16
G 3 13/16 + 1/16
H
12 1/4
+ 1/16
DIMENSIONS
inches
A
34 1/2
+ 1/16
B
19 15/16 + 1/16
C
2 1/8
+ 1/16
D
5 1/4
+ 1/16
E
35 5/16 + 1/16
F
21
+ 1/16
G 3 13/16 + 1/16
H
15 1/4
+ 1/16
CUTOUT DIMENSIONS
ARE CRITICAL
cm
72.4 + 0.2
50.6 + 0.2
5.4 + 0.2
13.3 + 0.2
76.2 + 0.2
54.6 + 0.2
9.7 + 0.2
31.1 + 0.2
cm
87.6 + 0.2
50.6 + 0.2
5.4 + 0.2
13.3 + 0.2
89.7 + 0.2
53.3 + 0.2
9.7 + 0.2
38.7 + 0.2
8101P502-60
(01-03-00)
Advertisement
Table of Contents

Related Manuals for Jenn-Air JGC9430


Summary of Contents for Jenn-Air JGC9430
- Page 1 INSTALLATION SEALED GAS COOKTOPS MANUAL Models: JGC9430 & JGC9536 IMPORTANT: Dimensions Shown in Both Inches and Centimeters. IMPORTANT: Be sure the appliance being installed is equipped for the gas to be supplied. Refer to serial plate on underside of burner box for this information. Do not attempt to convert this appliance for use with a gas other than the type specified.
-
Page 2: Important Preparation Suggestions
0.0122 inch thick. B = 13² (33.02 cm) maximum depth of cabinets installed above cooktop. Avoid use of cabinets above cooktop for storage space to eliminate associated potential hazards such as reaching over open flames. FIGURE 2... -
Page 3: Mobile Homes
If no other appliance is to be installed in the cabinetry below this unit, proceed as instructed under paragraph 1, page 4. If this unit is to be installed over a Jenn-Air Model JJW8530, JJW9530, W30400P, or JJW8130 Electric Wall Oven proceed as instructed under paragraph 2, page 5. - Page 4 Apply a non-corrosive leak detection fluid to all joints and fittings in the gas connection between the supply line shut-off valve and the cooktop. Include gas fittings and joints in the cooktop if connections were disturbed during installation. Check for leaks! Bubbles appearing around fittings and connections will indicate a leak.
- Page 5 2. IF THIS UNIT WILL HAVE A JENN-AIR MODEL JJW8530, JJW9530, W30400P, or JJW8130 ELECTRIC WALL OVEN INSTALLED BELOW THIS COOKTOP. NOTE 1: This appliance and its gas and electrical supply sources must be installed before the wall oven is installed.
-
Page 6: Pressure Testing
Alternative Piping Methods To Connect Appliance To Gas Supply A QUALIFIED SERVICEMAN OR GAS APPLIANCE INSTALLER MUST MAKE THE GAS SUPPLY CONNECTION. Leak testing of the appliance shall be conducted by the installer according to the instructions given. Unless prohibited by local codes or ordinances, a new A.G.A. -
Page 7: Electrical Wiring Information
Electrical Wiring Information This appliance is equipped with a grounded type power cord. A grounded outlet must be provided. It is recommended, for convenience, the outlet be located (with reference to figure 6) as in A or B, below: A. If no other appliance is to be installed below this appliance: within either the shaded area or the cross hatched area shown in figure 6. -
Page 8: Converting Appliance For Use With Lp Gas
Converting Appliance For Use With LP Gas Propane conversion is to be performed by a JENN-AIR AUTHORIZED SERVICER (or other qualified agency) in accordance with the manufacturer’s instructions and all codes and requirements of the authority having jurisdiction. Failure to follow instructions could result in serious injury or property damage. - Page 9 Step 6: Place 9.2k burner choke(s) into right rear and left front orifice holder with chamfer facing down. (See figure 10). FIGURE 10 Step 7: Place 15k burner choke into center orifice holder. (See figure 11). Step 8: Replace burner base, caps, and grates. Tighten screws (do not cross thread) to 25-30 in lbs.
-
Page 10: To Convert Appliance For Use With Natural Gas
After the above operation, the burner will produce a stable, steady blue flame of minimum size. The setting should be checked by turning knob from high to low several times without extinguishing the flame. The above operation will automatically provide the proper flame size at medium setting. -
Page 11: Burner Ignition And Auto-Reignition
14. If the flames appear too large or too small, make sure all steps were completed correctly. FIGURE 17 JENN-AIR 30² ² ² ² INPUT RATES - NATURAL GAS / LP GAS (BTU/HR) BURNER LOCATION Right Front... -
Page 12: Instalación
INCORRECTOS DE LA ESTUFA PUEDEN CAUSAR LESIONES GRAVES O DAÑOS MATERIALES. AVISO AL INSTALADOR: DEJE ESTAS INSTRUCCIONES CON EL ELECTRODOMÉSTICO. AVISO AL PROPIETARIO: CONSERVE ESTAS INSTRUCCIONES COMO REFERENCIA FUTURA. DE GAS SELLADAS Modelos: JGC9430 y JGC9536 ADVERTENCIA ESPECIAL: 403 WEST FOURTH STREET, NORTH · NEWTON, IA 50208 DIMENSIONES pulgadas... - Page 13 4. El mostrador de la cocina debe estar apoyado a menos de 3” (7.62 cm) del corte del hueco. Instalación de los gabinetes por encima de la superficie para cocinar Jenn-Air A = 30² (76.2 cm) de espacio vertical mínimo entre la superficie para cocinar y la construcción encima...
-
Page 14: Instalación Del Electrodoméstico
LP. PRECAUCIÓN: La garantía queda anulada en los equipos Jenn-Air instalados de otra manera que no sea la recomendada por el fabricante. Este electrodoméstico está diseñando para usarse con el regulador de presión de gas provisto con él. - Page 15 Conexión del electrodoméstico al suministro de gas LA CONEXIÓN DEL SUMINISTRO DE GAS DEBE REALIZARLA UN TÉCNICO CALIFICADO O UN INSTALADOR DE ELECTRODOMÉSTICOS DE GAS. Las revisiones de fugas del electrodoméstico debe realizarlas un instalador de acuerdo con las instrucciones proporcionadas. La tubería del suministro de gas DEBE estar en conformidad con todos los códigos locales, municipales y estatales de construcción y los...
- Page 16 2. SI SE VA A INSTALAR EN ESTA UNIDAD UN HORNO DE PARED ELÉCTRICO, MODELO JJW8530, JJW9530, W30400P o JJW8130 DE JENN-AIR DEBAJO DE LA SUPERFICIE PARA COCINAR. NOTA 1: Este electrodoméstico y las fuentes de suministro eléctrico y de gas deberán instalarse antes de instalar el horno de pared.
- Page 17 Métodos alternativos de tubería para conectar el electrodoméstico al suministro de gas LA CONEXIÓN DEL SUMINISTRO DE GAS DEBE REALIZARLA UN TÉCNICO CAPACITADO O UN INSTALADOR DE ELECTRODOMÉSTICOS DE GAS. Las revisiones de fugas del electrodoméstico debe realizarlas un instalador de acuerdo con las instrucciones proporcionadas.
- Page 18 Información de cableado eléctrico Este electrodoméstico está equipado con un cordón eléctrico con conexión a tierra. Debe proporcionarse un tomacorriente conectado a tierra. Se recomienda, para su comodidad, que el tomacorriente esté ubicado (con referencia a la figura 6) como la A o la B, más adelante: A.
- Page 19 Conversión del electrodoméstico para usarse con gas LP ADVERTENCIA La conversión al gas propano debe realizarla un TÉCNICO AUTORIZADO DE SERVICIO DE JENN-AIR (u otra agencia calificada) de acuerdo con las instrucciones del fabricante y todos los códigos y requisitos de las autoridades que tengan jurisdicción. No seguir las instrucciones podría causar lesiones graves o...
- Page 20 Paso 6:Coloque un obturador de quemador de 9.2k en los portadores de orificio derecho posterior e izquierdo delantero con el chaflán orientado hacia abajo. (Vea la figura 10.) TAPA DEL QUEMADOR TORNILLOS OBTURADOR DE QUEMADOR DE 9.2k (EL CHAFLÁN ORIENTADO HACIA ABAJO) PUNTAL DE ORIFICIO...
- Page 21 Después de la operación anterior, el quemador producirá una llama estable, de color azul del tamaño mínimo. Debe revisarse el ajuste girando la perilla de alto a bajo varias veces sin apagar la llama. La operación anterior automáticamente proporcionará el tamaño de llama adecuado en el ajuste medio.
- Page 22 Alto y Bajo comparándolos con la figura 14. Si las llamas parecen muy grandes o muy pequeñas, asegúrese que se hayan seguido todos los pasos correctamente. FIGURA 17 MODELO DE 30² ² ² ² JENN-AIR CLASIFICACIONES DE ENTRADA – GAS NATURAL / GAS LP (BTU/HORA) UBICACIÓN DEL QUEMADOR...
- Page 23 MANUEL DE MISE EN SERVICE Modèles : JGC9430 et JGC9536 IMPORTANT : Dimensions montrées en pouces et en centimètres. IMPORTANT : S’assurer que l’appareil correspond au type de gaz fourni. Ces renseignements se trouvent sur la plaque signalétique, sous la boîte des brûleurs. Ne pas convertir cet appareil à un type de gaz autre que celui spécifié.
- Page 24 4. Le dessus du comptoir doit avoir un support à une distance maximum de 3 po (7,6 cm) des rebords de la découpe. Pose d’armoires au-dessus de la plaque de cuisson Jenn-Air A = 30 po (76,2 cm) minimum entre la plaque de cuisson et tout élément...
-
Page 25: Pose De L'appareil
1, page 4. Si la plaque de cuisson est posée au-dessus d’un four encastré électrique Jenn-Air modèle JJW8530, JJW9530, W30400P ou JJW8130, suivre les indications du paragraphe 2, page 5. - Page 26 Raccordement de l’appareil au gaz LE RACCORDEMENT AU GAZ DOIT ÊTRE EFFECTUÉ PAR UN TECHNICIEN QUALIFIÉ OU PAR UN INSTALLATEUR D’APPAREILS À GAZ. La vérification de l’absence de fuites sera effectuée par l’installateur conformément aux directives fournies. Les conduites de gaz DOIVENT être conformes à tous les codes du bâtiment locaux, municipaux et provinciaux, ainsi qu’aux règlements des services publics locaux.
- Page 27 2. SI CE MEUBLE DOIT AVOIR UN FOUR ÉLECTRIQUE ENCASTRÉ JENN-AIR MODÈLE JJW8530, JJW9530, W30400P OU JJW8130 MONTÉ SOUS CETTE PLAQUE DE CUISSON. REMARQUE 1 : La pose de cet appareil et son raccordement au gaz et à l’électricité doivent être effectués avant la pose du four.
-
Page 28: Vérification De La Pression
Autres méthodes de raccordement de l’appareil à l’alimentation en LE RACCORDEMENT AU GAZ DOIT ÊTRE EFFECTUÉ PAR UN TECHNICIEN AYANT REÇU LA FORMATION APPROPRIÉE OU PAR UN INSTALLA- TEUR D’APPAREILS À GAZ. La vérification de l’absence de fuites sera effectuée par l’installateur conformément aux directives fournies. -
Page 29: Câblage Électrique
Câblage électrique Cet appareil est équipé d’un cordon d’alimentation avec raccordement à la terre. Il doit être branché dans une prise de courant reliée à la terre. Il est recommandé, pour plus de facilité, que la prise soit placée (en référence à la figure 6) tel qu’indiqué... - Page 30 Conversion de l’appareil au gaz GPL AVERTISSEMENT La conversion au propane doit être effectuée par un PRESTATAIRE DE SERVICE AGRÉÉ JENN-AIR (ou tout autre service qualifié) conformément aux consignes du fabricant et à tous les codes et exigences de toutes autorités...
- Page 31 Étape 6 : Placer le ou les réducteurs de débit pour brûleur de 9,2 kbtu dans les porte-orifices arrière droit et avant gauche avec le biseau orienté vers le bas. (Voir la figure 10.) CAPUCHON DU BRÛLEUR 9,2 kbtu RÉDUCTEUR DE DÉBIT (BISEAU ORIENTÉ...
- Page 32 Une fois le réglage effectué, le brûleur produit une flamme bleue et stable d’une longueur minimum. Vérifier le réglage en passant le bouton du plein feu au feu doux et vice versa à plusieurs reprises. La flamme ne doit pas s’éteindre.
- Page 33 14. Si la flamme paraît trop grande ou trop petite, s’assurer que chaque étape a été effectuée correctement. FIGURE 17 MODÈLE DE 30² ² ² ² PO JENN-AIR DÉBITS DE GAZ - GAZ NATUREL/GPL (BTU/H) EMPLACEMENT DU BRÛLEUR Hi (plein feu)
Need help?
Do you have a question about the JGC9430 and is the answer not in the manual?
Questions and answers