Table of Contents
Advertisement
..............................
1
...............................
2-3
Controls at a Glance ............................
4-6
Pads ..................................
4-5
Setting the Clock ................................
5
Setting the Timers ...........................
5-6
Oven Control Lockout .......................
6
............ .7
Oven Vent & Light .............................
7
..................................
8-16
Cooking ..................... 8
Oven Fans ...........................................
8
Foods ............................
9
Oven Racks and Positions ................. 9
Baking Chart ....................................
10
Probe .................................................
11
Broiling .............................................
12
Clock Controlled ..................................
................... 13-14
Drying ..........................................
15-16
Care and Cleaning ...........................
17-20
Oven ..........................
17-18
Chart .................................
19
..........................................
20
Before You Call for Service .............. 21-22
If You Need Service ................................
22
................................................
23
Advertisement
Table of Contents

Subscribe to Our Youtube Channel
Related Manuals for Jenn-Air 81t2P180_60


Summary of Contents for Jenn-Air 81t2P180_60
-
Page 1: Table Of Contents
For Future Assistance Safety Instructions Controls at a Glance ... Function Pads ... Setting the Clock ... Setting the Timers ... Oven Control Lockout ... Adjusting Oven Temperature Oven Vent & Light ... Oven Operation Baking, Roasting Convection Cooking ... 8 Oven Fans ... -
Page 2: For Future Assistance
For Future Assistance Congratulations on your choice of a Jenn-Air electric wall oven. Your complete satisfaction is very important to us. Read this user's guide carefully. It is intended to help you operate and maintain your new wall oven. In addition, you will find a booklet entitled "Cooking Made Simple."... -
Page 3: Safety Instructions
• • • • • • • • • • • • The following instructions are based on safety considerations and must be strictly followed to eliminate the potential risks of tire, electric shock, or persona/injury, Installation and Repair • Have your appliance installed and properly grounded by a qualified installer according to the installation instruc- tions, •... -
Page 4: Safety Instructions
Important Safety Instructions • • • • • • • • • • • • Cooking Safety • Never heat an unopened food container in the oven. Pres- sure build-up may cause container to burst resulting in se- rious personal injury or damage to the appliance, * Use dry, sturdy potholders. -
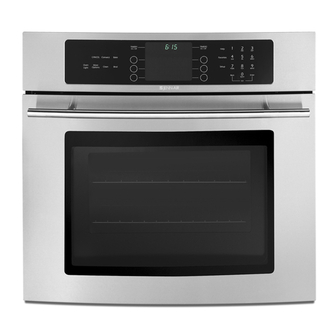
Page 5: Controls At A Glance
The control panel is designed for ease in programming. The display window shows time of day, timer and oven functions. Indicator words flash to prompt your programming steps. In double ovens (select models), "U" indicates upper oven is ON and "L" indicates lower oven is ON. NOTE: Lower oven controls on double ovens only. -
Page 6: Setting The Clock
• • • • • • • • • • • • 3. Attheendofthetimeset, the timer will chime four times and "End" will appear in the display. If the timer is notcancelled (see "To cancel" below), "End" will remain in the display and there will be two chimes every 30 seconds for five minutes. - Page 7 [OVEN RACKS] Single Oven - two fiat racksand one offsetrackwerepackaged w ith youroven. Double Oven - two fiat racks and one offsetrackplusanadditional o ffsetandfiat rackfor the lowerovenwere packaged i n your oven. To remove: Pullforward to the "stop" position; l ift uponthefront ofthe rackand pullout.
-
Page 8: Adjusting Oven Temperature
Oven Operation • • • • • • • • • • • • Adjusting Oven Temperature If you think the oven should be hotter or cooler, you can adjust it yourself. To decide how much to change the thermostat, set the oven temperature 25°F higher or lower than the tempera- ture in your recipe, then hake. -
Page 9: Baking, Roasting And Convection Cooking
• • • • • • • • • • • • Baking, Roasting and Convection Cooking Every oven has its own characteristics. Youmay find that the cooking times and temperatures vary slightly from your old oven. This is normal, Oven Fans A cooling fan will automatically turn on during cleaning, broiling and some baking operations. -
Page 10: Convenience Foods
Oven Operation • • • • • • • • • • • • Convection Cooking of Convenience Foods • For best results, use the Convect Roast pad. • Preheating the oven is not necessary. • Follow package recommendations for oven temperature, foil covering and the use of cookie sheets. -
Page 11: Baking Chart
• • • • • • • • • • • • Brownies Breads - Yeast Loaf Rolls , Breads- Quick Loaf Cornbread Biscuits Muffins Vegetables Potatoes (reed.) Do notwrapin foil, prick with fork, An "o" after a rack number implies that the offset rack should be used. The times given are based on specific brands of mixes or recipes tested. -
Page 12: Probe
]]Oven Operation • • • • • • • • • • • • Probe To assure excellent results every time when roasting, use the probe supplied with your wall oven. Installing and Setting the Probe 1. Insert the probe into the food item. (For meats, the probe tipshould be located in the center of the thickest part of the meat and not into the fat or touching a bone.) 2. -
Page 13: Broiling
Broiling results, designed for broiling. best a pan tional broiling tips, see "Cooking Made Simple" booklet. Setting the Controls for Broiling 1. Place the oven rack on the proper rack positon. (See following chart.) 2. Press the Broil pad. • Indicator word BROIL will flash and three dashes will appear. -
Page 14: Clock Controlled
] Oven Operation • • • • • • • • • • • • Clock Controlled Oven Operations The clock controlled oven cooking feature is used to turn the ovenoffat apreset time of day or delay the start andthenturn off the oven. -
Page 15: Oven Operations
6. Press the appropriate number pads to enter the time you wish the oven to stop. A stop time can only be accepted for later in the day. Example: If at 10:00 you set the oven for 350° convection baking and 2 hours and 30 minutes of cooking time, the calculated stop time would be "12:30". -
Page 16: Drying
However. additional drying time is needed. • Refer to other resources at your local library or call your local County Extension service for additional information. before ° ° ° a drying rack, Co ,_act_yolar Jenn-Air _'DRYINGRACK Accessory Kit or dry well .and retain their... -
Page 17: Drying
• • • • • • • • • • • • Fruits Varieties Best for Drying Apples* FirmVarieties: G raven Stein,GrannySmith, Jonathan, W inesap, RomeBeauty,Newton Apricots* Blenheim/Royal m ost common. T ritonalsogood Bananas* FirmVarieties Cherries Lambert,RoyalAnn, Napoleon,Vanor Bing Nectarines FreestoneVarieties andPeaches* Pears*... -
Page 18: Care And Cleaning
Care and Cleaning • • • • • • • • • • • • Self-Clean Oven The self-clean cycle uses above normal cooking tempera- tures to automatically clean the entire oven interior. While this occurs, a device in the oven vent helps consume normal amounts of smoke. - Page 19 • • • • • • • • • • • • To Delay the Start of a Clean Cycle 1-3. Follow steps 1-3 on page 14. 4. Press the Stop Time pad. Indicator words STOP TIME will flash in the display and CLEAN and the calculated stop time will also appear in the display, 5.
-
Page 20: Cleaning Chart
]9 Care and Cleaning Be sure all controls are OFF and all parts are cool before cleaning. • To prevent staining or discoloration, clean appliance after each use. Parts Cleaning Procedure Never cover insert with aluminum foil as this prevents thefat from draining to the pan below. and Insert •Place soapy cloth over insert andpan;... -
Page 21: Maintenance
About Cleaning Products Becauseofthemanynewcleaningproductsintroducedinthe marketplace each year, it is not possible to list all products that can be safely used to clean this appliance. Listed below are just a few examples of recommended products. REMEMBER, ALWAYS READ FACTURER'S INSTRUCTIONS to be sure the cleaner can be safely used on this appliance. -
Page 22: Before You Call For Service
]Before You Call for Service Check the following list to be sure a service call is really necessary. A quick reference of this guide may prevent an unneeded service call. If the oven fails to operate: Check for a blown fuse or a tripped circuit breaker. •... -
Page 23: Before You Call For Service
Before You Call for Service If You Need Service: • Call the dealer from whom your appliance was purchased or call Maytag Appliances Sales Company, Jenn-Air Customer Assistance at 1-800-688-1100 or 1-423-472- 3333 to locate an authorized servicer. • Be sure to retain proof of purchase to verify warranty stares. -
Page 24: Warranty
• • • • JENN-AIR COOKING Full One Year Warranty - Parts and Labor For one (1) year from the original retailpurchase date,any partwhich fails in normalhome use will be repairedor replacedfree of charge. Limited Warranties - Parts Only SecondYear- After the first year from theoriginalpurchasedate,partswhich fail in normalhomeuse will be repairedorreplacedfree of charge forthe partitself, with the ownerpaying all other costs, includinglabor,mileage and transportation.
Need help?
Do you have a question about the 81t2P180_60 and is the answer not in the manual?
Questions and answers