
Related Manuals for Jenn-Air JMW2430D


Summary of Contents for Jenn-Air JMW2430D
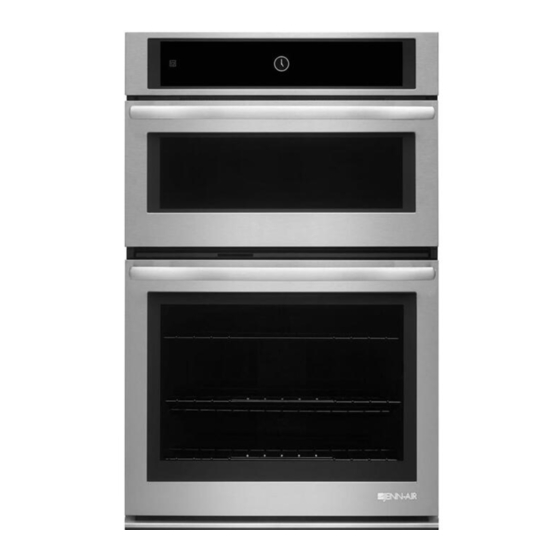
- Page 1 JAC - 3 Multimedia Enhanced TECHNICAL EDUCATION 27 & 30” Microwave Combination Wall Ovens JOB AID W10813197...
- Page 2 GOALS AND OBJECTIVES The goal of this Job Aid is to provide information that will enable the In-Home Service Professional to properly diagnose malfunctions and repair the "Jenn-Air Built-In Wall Ovens. The objectives of this Job Aid are to: • Understand and follow proper safety precautions.
-
Page 3: Table Of Contents
TABLE OF CONTENTS Microwave Combination Wall Ovens SECTION 1 — GENERAL INFORMATION ............... 1-1 JENNAIR MODEL NUMBERING SYSTEM ..............1-2 SERIAL NUMBER BREAKDOWN ................1-2 SALES SPECIFICATIONS..................... 1-3 ELECTRICAL REQUIREMENTS................... 1-5 SECTION 2 — OPERATION (HOW THE OVEN WORKS).......... 2-1 MICROWAVE COMBINATION OVEN WIRING DIAGRAM ........ - Page 4 TABLE OF CONTENTS CON’T SECTION 4 - COMPONENT ACCESS ................4-1 HOW TO REMOVE THE: CONTROL PANEL....................4-2 MICROWAVE APPLIANCE MANAGER BOARD .............4-2 OTHER COMPONENTS ACCESSIBLE FROM THE TOP OF THE OVEN ....4-3 LOWER OVEN APPLIANCE MANAGER BOARD ............4-4 COMPONENTS SERVICED FROM THE BACK OF THE MAIN OVEN .....4-5 EXHAUST BLOWER MOTOR AND FAN ASSEMBLY ..........4-6 OVEN SHUTDOWN THERMAL FUSE ..............
-
Page 5: Section 1 - General Information
This section provides general Oven Safety & Service information, Sales Specifications and some Installation guidelines used for servicing the Microwave Combination Wall Oven n Jenn-Air Model Numbering System n Serial Number Breakdown n Sales Specifications n Electrical Requirements Microwave Combination Wall Ovens... -
Page 6: Jennair Model Numbering System
GENERAL INFORMATION Jenn-Air Model Numbering System Serial Numbering System Microwave Combination Wall Ovens... -
Page 7: Sales Specifications
GENERAL INFORMATION Sales Specifications Microwave Combination Wall Ovens... -
Page 8: Electrical Requirements
(L1)* (L2)* Cleveland, OH 44131-5575 Models rated from 7.3 to 9.6 kW at 240 volts (5.4 to JMW2430D 7.4 kW at 208 volts) require a separate 40-amp circuit. 6507 Electrical Connection Do not cut the conduit. The length of conduit provided JMW2427D is for serviceability of the oven. - Page 9 OPERATION Section 2: Operation This section provides a breakdown of all electrical circuits on the wiring diagram. It also shows all electrical power operations of each circuit. n How the Oven Works n Wiring Diagram and LOGIC circuits n The Main Oven 120 VAC Section n The Main Oven 240 VAC section n Wiring Diagram - Microwave Oven n Safety System &...
- Page 10 All information we talk about is in the TECH SHEET which is located behind the Control Panel in every oven Jenn-Air produces. Both Ovens in stand-by mode, main oven door closed. MW door open.
-
Page 11: Wiring Diagram And Logic Circuits Main Oven
OPERATION Wiring Diagram & LOGIC Circuits - Main Oven The wiring diagram shown, on the previous page, is for a Microwave Combination Oven with Convection cooking in both ovens. Let’s look at the main oven first and point out a couple of interesting circuits that could easily catch a seasoned tech off guard. -
Page 12: The Main Oven 120 Vac Section
OPERATION The Main Oven 120 VAC section. With the Appliance Manager powered up and the connection between the Appliance Manager connector P1 and the User Interface connector J15, the two electronic controls are able to communicate with each other. Information the consumer inputs into the Control Panel Assembly/User Interface is transferred to the Appliance Manager so that the necessary relays on the board open and close. -
Page 13: The Main Oven 240 Vac Section
OPERATION The Main Oven 240 VAC section This diagram shows the 240 VAC components. All the cooking elements are included in this section. Notice all of these components go through the Temperature Limiter to the L2 side of the circuit. The operation of all these components are controlled by the Temperature Limiter (Safety), the Oven and Meat Probe Sensors (Cooking results) and the User Interface (Customer’s request). -
Page 14: Wiring Diagram - Microwave Oven
OPERATION Wiring Diagram - Microwave Oven This diagram is just the microwave oven section. It’s broken out of the complete wiring diagram so that we can take a closer look at the diagram without the clutter of the main oven. Everything in the microwave operates at 120 VAC. -
Page 15: Safety System & Logic Circuits - Microwave Oven
OPERATION Safety System & LOGIC Circuits - Microwave Oven The first thing we need to do when discussing the microwave oven is tallk about the built in safety system. Because of the microwave energy being produced by this oven, we need to be sure the oven safety system is in place and operating correctly. -
Page 16: Receiving And Distributing Electricity
OPERATION Receiving and Distributing Electricity The Electronic Control Boards Anytime the Combination Oven is powered up 120 VAC is available to the SMPS power supply which provides 14 VDC to the Main Oven Appliance Manager and the Microwave Appliance Manager. 120 VAC is also available to both Appliance Managers. -
Page 17: User Interface
OPERATION User Interface The User Interface will be serviced two ways. It will be part of the Control Panel Assembly and will be available as a single part. Below we point out the 5 connections to and from the User Interface. The J15 connector is important because it receives 14 VDC from the SMPS board across pins J15-2 and J15- 4. -
Page 18: Main Oven Appliance Manager
OPERATION Main Oven Appliance Manager Below is the Appliance Manager board for the Main Oven. It provides Connector locations with pin callouts. It also shows actual relays being used on the oven we are discussing (note at bottom of the diagram). -
Page 19: Main Oven Appliance Manager Connector Test Pins
OPERATION Main Oven Appliance Manager Connector Test Pins The P1 Connector provides communications between the User Interface. Logic circuits to the Lower Oven Appliance manager The P5 connection controls the 120 VAC output to the listed components Microwave Combination Wall Ovens 2-11... -
Page 20: Microwave Oven Appliance Manager
OPERATION Microwave Oven Appliance Manager This is the layout of the Microwave Oven Appliance Manager. It shows wire colors, test results at each connector and the component each of the connectors control. The chart on the next page provide the same information in an easier to read format. -
Page 21: Main Oven Appliance Manager Test Chart
OPERATION Main Oven Appliance Manager Test Chart Microwave Combination Wall Ovens 2-13... -
Page 22: Smps (Switch Mode Power Supply)
OPERATION SMPS Low Voltage Power Supply The SMPS (Switch Mode Power Supply) is not available on all ovens. On this Microwave Combination ovens it is. It is mounted behind the control panel next to the microwave appliance manager. This board is supplied with 120 VAC and reduced the output voltage to 14 VDC. The CON007 two terminal connector receives 120 VAC input from the L1 and Neutral lines and provides 14 VDC output to the appliance managers through the 6 position COON002 connector COON002-1 and COON002-4. -
Page 23: Microwave Inverter Board
OPERATION Microwave Inverter Board The microwave inverter board replaces the capacitor, diode and transformer of the high voltage system. The main feature of this inverter system is that it provides constant microwave energy and doesn’t cycle on and off to produce the constant supply. When testing this board, you just check the 4 connection points (CN701, CN702, CN703 and the ground lug). -
Page 24: Section 3 - Electronic Control Diagnostic Mode And Other Component Testing
ELECTRONIC CONTROL DIAGNOSTIC MODE AND COMPONENT TESTING Section 3: Electronic Control Diagnostic Mode and other Component Testing This section provides a look at using the Diagnostic Mode and Failure/Error Codes. The Relay Logic and Component Testing Chart can be very helpful. n Safety n Using the Diagnostic Mode n Failure/Error Codes... -
Page 25: Safety
ELECTRONIC CONTROL DIAGNOSTIC MODE AND COMPONENT TESTING Safety Your safety and the safety of others are very important. We have provided many important safety messages in this manual and on your appliance. Always read and obey all safety messages. This is the safety alert symbol. This symbol alerts you to potential hazards that can kill or hurt you and others. - Page 26 ELECTRONIC CONTROL DIAGNOSTIC MODE AND COMPONENT TESTING Safety Microwave Combination Wall Oven...
-
Page 27: Using The Diagnostic Mode
ELECTRONIC CONTROL DIAGNOSTIC MODE AND COMPONENT TESTING Using the Diagnostic Mode The Jenn-Air Ovens provide a Diagnostic program 3. From the Diagnostic Menu, scroll to the desired that can help diagnose concerns with the oven. selection using the touch screen. -
Page 28: Failure/Error Codes
ELECTRONIC CONTROL DIAGNOSTIC MODE AND COMPONENT TESTING Failure/Error Codes The following five pages contain information about error codes and what to look for when you encounter a specific condition. This information is a portion of the information that is in the Tech Sheet, but provides a more direct picture of the repair. - Page 29 ELECTRONIC CONTROL DIAGNOSTIC MODE AND COMPONENT TESTING Failure/Error Codes Microwave Combination Wall Oven...
- Page 30 ELECTRONIC CONTROL DIAGNOSTIC MODE AND COMPONENT TESTING Failure/Error Codes Microwave Combination Wall Oven...
- Page 31 ELECTRONIC CONTROL DIAGNOSTIC MODE AND COMPONENT TESTING Failure/Error Codes Microwave Combination Wall Oven...
- Page 32 - no big surprise there. Remember that the fan will cycle OFF whenever the oven door is opened. This chart is available in the Tech Sheet that is provided with every oven Jenn-Air FOR SERVICE TECHNICIAN’S USE ONLY produces.
-
Page 33: Component Testing Chart - Main Oven
ELECTRONIC CONTROL DIAGNOSTIC MODE AND COMPONENT TESTING FOR SERVICE TECHNICIAN’S USE ONLY Component Testing Chart - Main Oven Component Serviceable Procedure Results - Component Side Resistance Location Primary Test 1: Test 1: Interlock Unplug microwave oven or disconnect power. Door Open = Infinite. Switch Disconnect the wires at the Primary Interlock Door Closed = Continuity. -
Page 34: Component Testing Chart - Microwave Oven
ELECTRONIC CONTROL DIAGNOSTIC MODE AND COMPONENT TESTING FOR SERVICE TECHNICIAN’S USE ONLY Component Testing Chart - Microwave Oven Component Testing Chart - Microwave Component Serviceable Procedure Results - Component Side Resistance Location Appliance Check wiring to MW microwave appliance Manager manager: Unplug the microwave oven or disconnect power. - Page 35 ELECTRONIC CONTROL DIAGNOSTIC MODE AND COMPONENT TESTING Component Testing Chart - Microwave Oven FOR SERVICE TECHNICIAN’S USE ONLY Component Serviceable Procedure Results - Component Side Resistance Location Primary Test 1: Test 1: Interlock Unplug microwave oven or disconnect power. Door Open = Infinite. Switch Disconnect the wires at the Primary Interlock Door Closed = Continuity.
- Page 36 ELECTRONIC CONTROL DIAGNOSTIC MODE AND COMPONENT TESTING Component Testing Chart - Microwave Oven FOR SERVICE TECHNICIAN’S USE ONLY Component Serviceable Procedure Results - Component Side Resistance Location Inverter Check wiring to MW inverter: Unplug the microwave oven or disconnect power. Visually inspect 4 connectors on the MW inverter boards, CN701, CN702, CN703 and E701 to see whether there are signs...
- Page 37 ELECTRONIC CONTROL DIAGNOSTIC MODE AND COMPONENT TESTING Component Testing Chart - Microwave Oven FOR SERVICE TECHNICIAN’S USE ONLY Component Serviceable Procedure Results - Component Side Resistance Location Broil Rear Unplug microwave oven or disconnect power. Normal = 9Ω Element Remove wire leads. Abnormal = Infinite Measure resistance.
- Page 38 OPERATION NOTES 2-16 Microwave Combination Wall Ovens...
-
Page 39: Section 4 - Component Access
COMPONENT ACCESS Section 4: Component Access Multimedia This section provides service parts access, removal, and replacement instructions for the “Jenn-Air Enhanced Microwave Combination Oven. How to remove the: • Control Panel • Microwave Appliance Manager Board • Other components accessible from the top of the oven •... -
Page 40: Microwave Appliance Manager Board
COMPONENT ACCESS REMOVING THE MICROWAVE REMOVING THE CONTROL PANEL APPLIANCE MANAGER BOARD WARNING WARNING Electrical Shock Hazard Electrical Shock Hazard Disconnect power before servicing. Disconnect power before servicing. Replace all parts and panels before operating. Replace all parts and panels before operating. Failure to do so can result in death or Failure to do so can result in death or electrical shock. - Page 41 COMPONENT ACCESS REMOVING THE MICROWAVE APPLIANCE MANAGER BOARD CON’T OTHER COMPONENTS ACCESSIBLE WHEN THE TOP SERVICE COVERS ARE REMOVED: Cavity Thermostat After sliding the cover panel out, access to the Mi- Convection Thermoactuator crowave Oven Appliance Manager board is available. Cooling Fan Motor Filter Board Remove the Appliance Manager mounting screws...
-
Page 42: Lower Oven Appliance Manager Board
COMPONENT ACCESS REMOVING THE LOWER OVEN Under the cover is the Lower Oven Appliance Man- APPLIANCE MANAGER BOARD ager and the 20 amp line fuse. Remove the electri- cal connections and 4 mounting screws securing the WARNING Appliance Manager Board, remove Board Electrical Shock Hazard Disconnect power before servicing. -
Page 43: Components Serviced From The Back Of The Main Oven
COMPONENT ACCESS COMPONENTS SERVICED FROM THE BACK OF THE MAIN OVEN WARNING Electrical Shock Hazard Disconnect power before servicing. Replace all parts and panels before operating. Failure to do so can result in death or electrical shock. WARNING The oven will need to be completely removed from Electrical Shock Hazard the cabinet. -
Page 44: Exhaust Blower Motor And Fan Assembly
COMPONENT ACCESS The 2 back service covers (behind the oven). BOTTOM REMOVING THE EXHAUST BLOWER MOTOR AND FAN ASSEMBLY WARNING Electrical Shock Hazard Disconnect power before servicing. Replace all parts and panels before operating. Failure to do so can result in death or electrical shock. -
Page 45: Oven Shutdown Thermal Fuse
COMPONENT ACCESS REMOVING THE OVEN SHUTDOWN WARNING THERMAL FUSE FROM THE MAIN OVEN WARNING At the back of the oven remove the lower oven Electrical Shock Hazard back service panel. Locate the bake element ter- Disconnect power before servicing. minals near the bottom of the oven (Red Wires). Replace all parts and panels before operating. -
Page 46: Main Oven Convection Components
COMPONENT ACCESS REMOVING MAIN OVEN CONVECTION COM- PONENTS WARNING Electrical Shock Hazard Disconnect power before servicing. Replace all parts and panels before operating. Failure to do so can result in death or electrical shock. After you remove the convection cover from the back REMOVING THE MAIN OVEN CONVECTION of the oven, You can see that the heating element FAN BLADE... -
Page 47: Convection Motor
COMPONENT ACCESS REMOVING THE CONVECTION MOTOR Once the heating element and motor are disconnect- ed, pull the assembly out of the oven cavity. At the back of the assembly you will see your convection motors. The motors are mounted from the front of the silver panel and the fan blade. -
Page 48: Oven Door
COMPONENT ACCESS REMOVING THE OVEN LIGHT ASSEMBLY (ONE ON EACH SIDE OF OVEN) REMOVING THE OVEN DOOR WARNING It may be easier servicing the next few compo- nents with the oven door and oven racks removed. Electrical Shock Hazard Disconnect power before servicing. Replace all parts and panels before operating. -
Page 49: Broil Element
COMPONENT ACCESS REMOVING THE BROIL ELEMENT. REMOVING THE OVEN SENSOR WARNING The Broil Element will need to be removed to ac- cess the Sensor mounting bracket. Remove the screw mounting the oven sensor and pull the sensor into the oven far enough that the sensor quick disconnect plug enters the oven cavity. -
Page 50: Probe Jack Assembly
COMPONENT ACCESS From behind the oven remove the back service panel and disconnect the probe electrical connec- tion. REMOVING THE PROBE JACK ASSEMBLY WARNING WARNING From the right side of the oven remove the side insulation cover (top front and rear service covers Electrical Shock Hazard Electrical Shock Hazard are also removed). -
Page 51: Door Latch And Oven Light Switch Assembly
COMPONENT ACCESS Picture shown with the Appliance Manager mounting support removed for clarity REMOVING THE DOOR LATCH AND OVEN LIGHT SWITCH ASSEMBLY WARNING Electrical Shock Hazard Disconnect power before servicing. Replace all parts and panels before operating. Failure to do so can result in death or Must clear mounting tab electrical shock. -
Page 52: Microwave Convection Parts
COMPONENT ACCESS REMOVING MICROWAVE OVEN CONVEC- TION PARTS WARNING Electrical Shock Hazard Disconnect power before servicing. Replace all parts and panels before operating. Failure to do so can result in death or electrical shock. Remove the dome shaped panel that is held in place with two T10 Torx screws at the top of the panel and WARNING two tabs at the bottom. - Page 53 COMPONENT ACCESS To remove the Fan Motor, you need to remove the Convection Element, Fan, Cap Nut and spacer Fan Blade (the fan blade has a “D” shaft cutout on the fan blade for easy re-assembly). The electrical component terminals for the Fan Mo- The motor is held in place by the fan Blade cap nut tor, Convection Thermo and element are shown and three retainer clips that fit into the motor tab...
- Page 54 COMPONENT ACCESS REMOVING THE HUMIDITY SENSOR Below, from inside the oven cavity. The Broil ele- ment is shown at the top of the cavity and the Hu- WARNING midity sensor is shown at the back of the oven sus- pended from the ceiling. Electrical Shock Hazard Disconnect power before servicing.
- Page 55 Wiring Diagrams Section 5: Wiring Diagrams n This section provides a look at the 2 Wiring Diagrams being used for the Jenn-Aire Microwave Combination Ovens 27” and 30” Electric Convection Self-Clean Combination Ovens (W10767736) 30” Electric Convection Self-Clean Microwave Combination Oven with WI-FI capabilities (W10767738) Microwave Combination Wall Oven...
- Page 56 Wiring Diagrams FOR SERVICE TECHNICIAN’S USE ONLY PRECAUTIONS TO BE OBSERVED BEFORE AND DURING SERVICING TO AVOID POSSIBLE EXPOSURE TO EXCESSIVE FOR SERVICE TECHNICIAN’S USE ONLY MICROWAVE ENERGY a. Do not operate or allow the oven to be operated with the door open. Double Oven Models - Double-Convect b.
- Page 57 Wiring Diagrams Models: JMW2430DB-0 JMW2430DS-0 JMW2430DP-0 JMW2427DB-0 JMW2427DS Microwave Combination Wall Oven...
- Page 58 Wiring Diagrams Models: JMW3430DB-0 JMW3430DS-0 JMW3430DP-0 Microwave Combination Wall Oven...
- Page 59 PRODUCT SPECIFICATIONS & WARRANTY INFORMATION SOURCES IN THE UNITED STATES: FOR PRODUCT SPECIFICATIONS AND WARRANTY INFORMATION CALL: FOR WHIRLPOOL PRODUCTS: 1-800-253-1301 FOR KITCHENAID PRODUCTS: 1-800-422-1230 FOR ROPER PRODUCTS: 1-800-447-6737 FOR TECHNICAL ASSISTANCE WHILE AT THE CUSTOMER’S HOME CALL: THE TECHNICAL ASSISTANCE LINE: 1-800-832-7174 HAVE YOUR STORE NUMBER READY TO IDENTIFY YOU AS AN AUTHORIZED IN-HOME SERVICE PROFESSIONAL FOR LITERATURE ORDERS:...
Need help?
Do you have a question about the JMW2430D and is the answer not in the manual?
Questions and answers