Page 2
Any reprinting, reuse or redistribution of the material in this document is expressly prohibited. Features of VICTORY Motorcycles are covered by U.S. Patents: 6,976,691; 6,407,663; D489670; D482311; D482304; D481980; D481973; D474142. Refer also to the patent label on the motorcycle.
Page 3
• Be aware of your surroundings and driving conditions. • Keep both hands on the handlebars and both feet on the footrests when riding. • Use only genuine VICTORY accessories designed for your model. ALWAYS USE AN NEVER USE WITH APPROVED HELMET DRUGS OR ALCOHOL.
VIC- TORY dealer. To locate the nearest authorized VICTORY dealer, call 1-800-POLARIS or visit www.polaris.com. VICTORY motorcycles comply with all federal, state and local safety and emission regula- tions for the area of intended sale.
Safety section. Understand and follow the procedures outlined in the Maintenance section to keep your VICTORY motorcycle in top condition on the road or in storage. Bring the manual with you when you ride. Following the precautions and proce- dures in the manual will add to your enjoyment and help keep you riding safely.
Page 8
Safety Safety Terms and Signal Words The following signal words and symbols appear throughout this manual and on your vehicle. Your safety and the safety of others is involved when these words and symbols are used. Become familiar with their meanings before reading the manual. The safety alert symbol indicates a potential personal injury hazard.
To minimize the risk of injury, read and understand the information contained in this section before operating the motorcycle. This section contains safety information specific to the VICTORY motorcycle, as well as information about general motorcycle safety. Anyone who rides the motorcycle (operators and passengers) must follow these safety precautions.
Page 10
• If your motorcycle operates abnormally, correct the problem immediately. See the VIC- TORY Service Manual or an authorized VICTORY dealer. • Ride defensively, as if you are invisible to other motorists, even in broad daylight. A motorist's failure to see or recognize a motorcycle is the leading cause of automobile/ motorcycle accidents.
Page 11
Safety Safe Riding Practices • Reduce speed when: • the road has potholes, or is otherwise rough or uneven. • the road contains sand, dirt, gravel or other loose substances. • the road is wet, icy or oily. • the road contains painted surfaces, manhole covers, metal grating, railway crossings or other slippery surfaces.
Page 12
Safety Safe Riding Practices Carrying a Passenger Do not carry a passenger unless the motorcycle is equipped with passenger seat and passen- ger footrests. To carry a passenger safely: • Do not exceed the gross vehicle weight rating (GVWR). See the manufacturer’s label (on the left side of the frame at the steering head).
Page 13
• Wear eye protection to protect eyes from wind or airborne particles and objects. Laws in some areas require that you wear eye protection. VICTORY recommends that you wear approved Personal Protective Equipment (PPE) bearing markings such as VESC 8, V-8, Z87.1, or CE.
Page 14
Do not attach cargo to an accessory not designed for that purpose. Either circumstance could result in an accessory failure that could cause loss of control. • Do not attach anything to the motorcycle unless specifically designed for that purpose by VICTORY.
Modifying the motorcycle by removing any equipment or by adding equipment not approved by VICTORY may void your warranty. Such modifications could make the motorcycle unsafe to ride and could result in severe injury to operator or passengers, as well as damage to the motorcycle.
Safety Transporting the Motorcycle When transporting the motorcycle: • Use a truck or trailer. Never tow the motorcycle. Towing will impair steering and han- dling. • Restrain the motorcycle in an upright position to prevent fuel leaks. • Place the transmission in neutral. •...
Page 17
Safety Use of Accessories Because VICTORY cannot test and make specific recommendations concerning every acces- sory or combination of accessories sold, the operator is responsible for determining that the motorcycle can be safely operated with any accessories or additional weight. Use the follow- ing guidelines when choosing and installing accessories: •...
Page 18
Safety Fuel and Exhaust Safety WARNING Gasoline is highly flammable and explosive under certain conditions. • Always exercise extreme caution whenever handling gasoline. • Always turn off the engine before refueling. • Always refuel outdoors or in a well-ventilated area. •...
Page 19
• Clean the motorcycle thoroughly to reveal items in need of repair. See page 81. • Fasteners must meet original specifications for quality, finish and type to ensure safety. Use only genuine VICTORY replacement parts, and ensure that all fasteners are tightened to the proper torque.
Safety Electromagnetic Interference This vehicle complies with the requirements of European directive 97/24/EC Chapter 8, United Nations ECE regulation 10 and Canadian ICES-002. Reporting Safety Defects
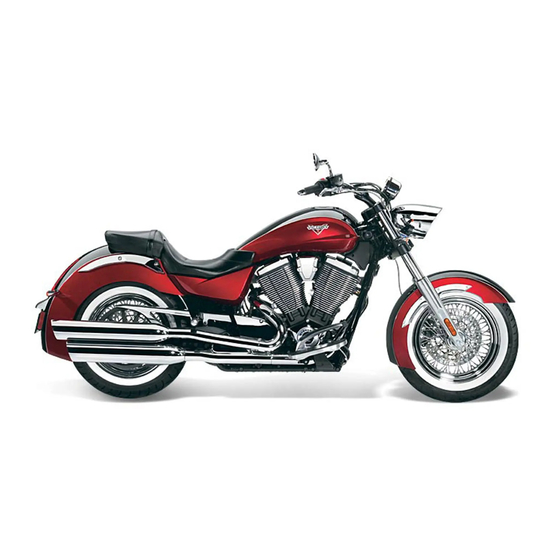
 If you believe that your vehicle has a defect that could result in a crash or cause injury or death, you should immediately inform the National Highway Traffic Safety Administration (NHTSA) in addition to notifying Polaris Industries in writing.
Page 21
Safety Safety and Information Labels Due to different model and market requirements, your vehicle may not have all of the labels shown. Labels that apply to your model will be located as shown. Handlebar Position Warning Label (if equipped) Warning Label Patent Manufacturing...
Component Identification Handlebar Area (Models differ in appearance, but locations are the same as shown) Clutch Lever Mirror Speedometer Indicator Light Panel Tachometer (if equipped) Front Brake Fluid Reservoir Front Brake Lever Throttle Control Grip Switches 10. Throttle Cables 11. Fuel Cap Left Side View Front Turn Signal Headlamp...
Component Identification Engine Identification Number The engine identification number is stamped into the right crankcase half behind the rear cylinder. The first 8 digits are the engine model number. The last 5 digits are the serial number. Record the number in the space pro- vided on page 102.
ON position and the engine is off. This indicates proper function. If this lamp illuminates while the engine is running, contact an authorized VICTORY dealer promptly for diagnosis. The light will remain on if the tilt sensor shuts down the engine. See page 47. If abnormal sensor or engine operation is detected the light will remain on as long as the fault condition exists.
Instruments, Features and Controls Instrument Cluster Multi-Function Display Use the mode button to toggle through the modes of the multi-function display. Press and hold the mode button to reset the trip odome- ters, average fuel economy, average speed and trip hour meter. Modes Available Standard Modes Accessory Modes...
Page 27
Instruments, Features and Controls Instrument Cluster Multi-Function Display Odometer The odometer displays total distance traveled by the vehicle. Trip Odometers The ignition switch must be in the ON position to access the trip odometers. The trip odome- ters (Trip 1 and Trip 2) display total distance traveled since being reset. To reset a trip odom- eter, toggle to the trip odometer.
Page 28
If the accessory sensor is installed, toggle to this mode to display the ambient air tempera- ture. The key must be in the ON position. Diagnostic Functionality Certain conditions will cause an error message to display in the screen. If this occurs, please see your VICTORY dealer. Message Location Indicates DC Voltage Screen Voltage remains below 11.0 volts for more than 10 seconds...
Page 29
4. Press and release the mode button to advance to the next error code. 5. Press and hold the mode button to exit the diagnostics code menu. 6. See an authorized VICTORY dealer for code details and diagnosis. Low Oil Pressure Display “LO OIL”...
Instruments, Features and Controls Left Handlebar Controls Clutch Lever High/Low Light Switch Clutch Lever Pull the lever toward the handlebar to disengage the clutch. Gradually release the lever to engage the Flasher clutch. For smooth clutch operation, Switch pull the lever quickly and release it gradually.
Instruments, Features and Controls Right Handlebar Controls Engine Stop/Run Switch Press the top of the engine stop/run switch (STOP) to stop the engine. Press the bot- tom of the switch (RUN) to allow operation of the engine. The engine should not start or run when the switch is in the STOP position.
Instruments, Features and Controls Fuel Cap Use the ignition key to open and close the fuel cap. Follow proper fueling procedures. See page 46. Tip: Prime the fuel pump if the tank is completely empty. Open the fuel cap 1. Lift the key slot cover on the fuel cap and insert the key.
Instruments, Features and Controls Sidestand WARNING! An improperly retracted sidestand could contact the ground during operation and cause loss of control resulting in serious injury or death. Always make sure the sidestand is fully retracted before operating the motorcycle. 1. While the motorcycle is in the upright position, push the sidestand downward until it is fully extended.
When inspections reveal the need for adjustment, replacement or repair: • refer to the maintenance section of this manual (page 51) • refer to the VICTORY Service Manual • or see your authorized VICTORY dealer...
Pre-Ride Inspections Electrical Components Move the ignition switch to the ON position before performing the electrical inspections out- lined on this page. Return the ignition switch to the OFF position after completing these inspections. If inspection of any electrical item reveals component failure, repair or replace the component before operating the motorcycle.
Pre-Ride Inspections Engine Oil Level We recommend the use of only VICTORY brand Semi-Synthetic 20W-40 Motor Oil or an equivalent oil designed for use with wet clutches (such as those with a JASO MA rat- ing). The oil fill cap/dipstick is located on the right side of the vehicle.
Pre-Ride Inspections Fuel Level 1. On level ground, straddle the motorcycle and bring it to the fully upright position. 2. Start the engine. The low fuel indicator light will stay on if the fuel tank level is less than one gallon (3.8 l). 3.
Inspect the tire sidewalls, road contact surface and tread base. If inspection reveals cuts, punctures, cracks or other wear or damage, replace the tire before riding. Use only approved replacement tires. See the VICTORY Service Manual or your authorized VICTORY dealer. Tire Tread Depth Wear bars (if equipped) are easily visible tread depth indicators.
You should feel a firm resistance in the lever within the first 3/4 inch (19 mm) of lever travel. If the lever fails to perform as stated, service the brake lever before riding. See the VICTORY Service Manual or your authorized VICTORY dealer.
3/8 inch (8 mm) of pedal travel. If the brake pedal fails to perform as stated or travels too far before beginning to engage the brake, see the VICTORY Service Manual, or con- tact an authorized VICTORY dealer for service. Brake Pedal Gap This procedure does not apply to JUDGE.
Page 41
Access Cover Cable Ends does not return properly, or if cable ends are frayed. See the VICTORY Service Manual or your authorized VICTORY dealer. Throttle Freeplay Throttle freeplay is the amount of throttle control grip movement from the rest posi- tion to the point of cable resistance.
Page 42
Pre-Ride Inspections Mechanical Clutch 1. Squeeze the clutch lever toward the handlebar and release it. It should move freely and smoothly, and it should return to the rest position quickly when released. If the lever fails to perform as stated, service the clutch lever before riding.
Do not measure belt tension when the belt or drive system is wet, or when it is hot (such as imme- diately after riding). 2. Inspect drive belt condition. If you discover cracks, broken teeth or frayed edges, replace the drive belt before riding. See the VICTORY Service Manual or your authorized VICTORY dealer.
Page 44
1. Inspect the entire motorcycle chassis and engine for loose, damaged or missing fasten- ers. Tighten loose fasteners to the proper torque. Tip: Refer to the specifications section of this manual or to the VICTORY Service Manual for torque val- ues.
Operation The operation section describes how to operate your VICTORY motorcycle to ensure the best performance and longevity of the engine and other components. Information includes: • Engine Break-in Period • Accelerating • Fueling and Fill Height • Braking • Starting the Engine •...
Page 46
Operation Engine Break-in Period Fueling and Fill Height Always heed fuel warnings. See page 18. Always refuel on level ground with the sidestand down. Use only the recommended fuel. See page 102. Fill the fuel tank to a level just below the bot- tom of the fuel filler insert.
Operation Engine Break-in Period Starting the Engine The starter interlock system allows the engine to be started only when the transmission is in neutral, or when the transmission is in gear with the clutch disengaged (clutch lever pulled in). Tip: If the motorcycle runs out of fuel, prime the system before attempting to restart the engine. See page 46.
Page 48
Operation Shifting Gears WARNING! Forced shifting (with clutch engaged) could cause damage to the engine, transmission and drive train. Such damage could cause loss of control, which could result in serious injury or death. Always pull the clutch lever fully toward the handlebars to disengage the clutch before shifting gears. On motorcycles equipped with a six-speed trans- Overdrive (6th Gear)
Operation Accelerating Accelerate by opening the throttle (rolling the throttle control grip rearward). The more quickly you open the throttle, the more quickly the motorcycle accelerates. For even acceler- ation, open the throttle with a smooth, continuous motion. When you reach the recom- mended speed for upshifting, shift up one gear.
Page 50
Operation Parking the Motorcycle Choose a firm level surface to park the motorcycle. 1. When fully stopped, shift into neutral. 2. Stop the engine. 3. Fully extend the sidestand. 4. Turn the handlebars to the left and lean the motorcycle to the left until the sidestand firmly supports the motorcycle.
Proper maintenance assures the highest level of safety, durability and dependability for your motorcycle. • Have your VICTORY dealer perform the initial maintenance procedures when the motor- cycle’s odometer registers 500 miles (800 km). • Review the safety-related maintenance information. See page 19.
Page 52
Maintenance Periodic Maintenance Table See table key below Odometer Reading in Miles (Kilometers) Component Page ***Air Filter Battery **Brake Fluid Brake Pads Clutch Lever Clutch Cable Crankcase Ventilation System Drive Belt *Engine Oil *Engine Oil Filter Engine Compression Evaporative Emission Control System (California models) Exhaust System Fasteners...
Maintenance Universal Tool The universal tool and a 4 mm hexagonal wrench are located under the left side cover. The universal tool is a combination 6 mm hexagonal wrench with a Phillips screwdriver tip. It can be used to service the following items (if equipped): •...
Replace the drive belt if it is cracked or has broken teeth or frayed edges. No matter its con- dition, the drive belt should be replaced at periodic intervals. See the VICTORY Service Man- ual or your authorized VICTORY dealer.
Page 55
Maintenance Drive Belt Tension Inspection Maintenance Drive Belt Deflection - with 10 lbs. (4.5 kg) of force HAMMER 8-BALL VEGAS 8-BALL HAMMER S VEGAS JACKPOT HIGH-BALL JUDGE BOARDWALK New drive systems (new belt/sprockets) 5 mm +/- 0.5 mm 10 mm +/- 0.5 mm After 500 miles on drive system 6 mm +/- 0.5 mm...
Page 56
• Belt and sprockets must be clean, dry, and at room temperature for accurate deflection measurement. • Lowering kits affect belt deflection specifications. Consult an authorized VICTORY dealer if a lowering kit is installed on your motorcycle. • When a new drive belt is installed, tension must be adjusted after 500 miles (800 km) to ensure...
Page 57
6. Pump the rear brake pedal several times to reset brake pad distance. 7. Slowly rotate the rear wheel. If the wheel does not rotate smoothly, inspect the wheel bearings, axle and brakes. See the VICTORY Service Manual or your authorized VICTORY dealer.
Page 58
Maintenance Rear Wheel Alignment WARNING! A skewed rear axle can damage the drive belt, causing belt failure and loss of control of the motorcycle. 1. Elevate and support the rear of the motorcycle with the wheel slightly above the ground. Use an appropriate motorcycle support placed securely under the frame.
Page 59
Maintenance Rear Suspension Rear Shock Preload (Ride Height) Inspection Set preload with accurate load conditions before riding to ensure optimum handling, safety and ride quality. A shock absorber preload wrench (PV-43507) is designed specifically for adjusting the preload on your motorcycle. The tool is available from your dealer. Have an assistant help with this procedure.
Page 60
Maintenance Rear Suspension Rear Shock Preload (Ride Height) Adjustment 1. Rest the motorcycle on the sidestand. Remove 10 mm Bolts the right side cover. See page 33. 2. Remove the fuse box. See page 77. Make sure the rear brake fluid reservoir cap is secure to prevent fluid loss.
Page 61
TORY Service Manual or your authorized VICTORY dealer. • If there is movement at the front of the swing arm, inspect the swing arm pivot bushings/bear- ings and pivot shaft nut torque. See the VICTORY Service Manual or your authorized VICTORY dealer.
Lubricate the steering head bearings at the recommended intervals even if there is no front-to-back movement at the steering head. See the VICTORY Service Manual or your authorized VICTORY dealer.
Page 63
Maintenance Fuel System CAUTION! Always observe all fuel safety procedures when inspecting or servicing the fuel system. See page 18. Fuel Tank Removal/Installation Before beginning, be prepared to place the fuel tank in a secure location with a drain pan positioned to catch any fuel that may leak or drip from disconnected hoses or fittings.
Replace any damaged, sticky or sluggish cable. 1. Disconnect the cable at the throttle body. 2. Apply a light film of VICTORY All Purpose Grease or equivalent to the barrel end. 3. Reconnect the cable and adjust freeplay as needed.
Page 65
Replace any dam- aged, sticky or sluggish cable. 1. Disconnect the cable at the clutch lever and at the primary cover. 2. Lubricate both barrel ends with VICTORY All Purpose Grease or equivalent. 3. Reconnect the cable and adjust freeplay as needed.
Maintenance Gear Shift Pedal Do not remove and reposition the shift arm on the shift shaft to adjust gear shift pedal height. A 90°+/-5° angle between the shift arm and the linkage rod is necessary to ensure correct shift 90° linkage operation.
Page 67
Maintenance Brake Systems Front Brake Fluid Check the front brake fluid level. See page 39. The fluid level should be at or above the top of the sight glass. Add fluid as needed. Replace cloudy or contaminated fluid. Use DOT4 brake fluid in the brake fluid reservoir. Use fluid only from a sealed, clean con- tainer.
Page 68
Minimum thickness is stamped on the inner hub of the disc. If any disc is worn to the minimum thickness at the thinnest point, or if a disc is damaged, see your VICTORY dealer for replacement.
Inspect the tire sidewalls, road contact surface and tread base. If inspection reveals cuts, punctures, cracks or other wear or damage, replace the tire before riding. Use only approved replacement tires. See the VICTORY Service Manual or your authorized VICTORY dealer. Tire Tread Depth The raised areas at the base of the tread are wear bars.
Wheels Inspect both wheels for cracks or damage and replace damaged wheels promptly. Do not operate the motorcycle if wheels are damaged or cracked. See the VICTORY Service Manual or your authorized VICTORY dealer. Exhaust System Check the exhaust system for stains from leaking exhaust gasses. Replace damaged or leak- ing exhaust gaskets.
Tip: Spark plugs with bright white or sooty black deposits or with damaged insulators or electrodes can indicate engine problems. If these conditions exist, or if the condition of one plug is markedly differ- ent from the other, see the VICTORY Service Manual or your authorized VICTORY dealer.
Page 72
Maintenance Seat Removal (HAMMER S) Seat Screws WARNING! A loose seat could cause a sudden shift in riding position, causing loss of control. Always ensure seats are secure before riding. 1. Remove the passenger seat cowl by pulling evenly and directly upward on both sides of the cowl.
Page 73
Maintenance Seat Removal (JUDGE/BOARDWALK) 1. Remove the side covers. Remove the fuse box from the bracket. 2. Remove the two screws securing the seat to the frame. Remove the four screws securing the rear fender rails and remove the fender rails. Loosen the four screws securing the rear seat bracket to the frame.
Page 74
Maintenance Seat Removal (VEGAS 8-BALL/HIGH-BALL) WARNING! A loose seat could cause a sudden shift in riding position, causing loss of control. Always make sure the seats are securely fastened before riding the motorcycle. 1. Remove the side covers. Remove the fuse box from the bracket. 2.
Page 75
Maintenance Handlebar Position (HIGH-BALL) On models equipped with two handlebar positions, the motor- High cycle is manufactured with handlebars in the low position. Position Before changing handlebar position, check regulations in your area of operation. Operation with the handlebars in the high position may not be legal in all areas or for all riders.
Page 76
12.5 DC volts. Replace the battery if it fails to reach 12.5 volts after the second charge. Tip: An accessory maintenance charger and accessory fused charging harness can be purchased through your authorized VICTORY dealer.
Maintenance Battery Battery Installation 1. Before installing the battery, make sure it's fully charged and clean. 2. Slide the battery into position in the battery tray with the positive (+) terminal to the rear of the motorcycle. NOTICE: Connecting the battery cables to the wrong terminals can severely damage the electrical system.
Maintenance Headlight Aim Inspection The top edge of the high beam must be 3 inches High Beam (7.6 cm) below the height of the headlight hous- 25 ft. (7.6 m) ing parting line and centered straight ahead at 25 feet (7.6 m). 3 in.
Wipe any old grease and dirt from the sidestand, frame and pivot bolt. 4. Lubricate the sidestand, the pivot bolt and the ends of the spring with VICTORY All Purpose Grease or equivalent. 5. Reinstall the sidestand spring and place the sidestand on the mounting boss with the stand in the stored (up) position.
Suede Finish Cleaning Suede paint should be cleaned and cared for in the following manner: 1. Spray Pure Victory Polish Suede Finish Cleaner (#90949) directly on all the suede body- work. 2. Using a Pure Victory Polish 100% Microfiber Polishing Towel (#90962), wipe the cleaner into the surface, then wipe the finish dry using a clean, dry surface of the towel.
Page 81
This section provides tips on the very best way to clean, polish and preserve every surface of your beautiful new VICTORY Motorcycle. If your motorcycle has a suede paint finish, do not use conventional cleaning methods to clean your motorcycle. See page 80.
Page 82
This is the new way to clean your VICTORY quickly and easily, then resume riding. Pure VICTORY Spray Rinse and Ride bike wash is safe and will not harm any surface that water won’t harm. If your motorcycle has a suede paint finish, do not use conventional cleaning methods to clean your motorcycle.
Page 83
Polishing the Motorcycle Polished Aluminum Care When a VICTORY is new, the polished aluminum wheels, hand levers and shifter shine like chrome. Ultraviolet (UV) rays and oxidation will cause polished aluminum to grow dull, however, if it’s not properly polished and protected.
Page 84
3. Rub the product until it is almost clear, then allow to dry to a haze before removal. The entire motorcycle can be treated before removing polish. 4. Use a Pure VICTORY Polishes Plush Microfiber Towel to wipe it off easily and dust- free.
Page 85
3. Spray Liquid Spray Wax on a wet or dry bike, one section at a time. (For best results, the bike’s surface should be cool.) 4. Wipe dry one section at a time with Pure VICTORY Microfiber Chamois or microfiber towel.
Page 86
Slippery tires can cause loss of traction and loss of control. Both situations could result in serious injury or death. For the finest leather care, use Pure VICTORY Leather, Vinyl & Rubber Conditioner, a unique, pleasantly scented formula of premium-quality polymers designed to restore luster and softness to vinyl, leather and rubber without making them slippery.
Do not apply rubber protectant to the tire tread surfaces. Fuel Stabilizer Using a mixture of fuel and the recommended amount of VICTORY Premium Carbon Clean Plus or other gasoline stabilizer, fill the fuel tank to a level just below the bottom of the fuel filler insert.
See page 76. Motorcycle Covers Cover the motorcycle with a genuine VICTORY motorcycle cover or a cover made from a durable, breathable material designed for storage. The cover must be of a breathable material to prevent moisture build-up, which can cause oxidation of metal surfaces.
Storage Removal From Storage 1. Remove the cover and any intake or exhaust coverings. 2. Unlock the front forks (if locked). 3. Verify that tire pressure is at specification. 4. Install the battery and perform an electrical inspection. 5. Check the oil level. If the motorcycle was stored in an area subject to wide swings in temperature and humidity (such as outdoors), change the engine oil before starting the engine.
Noise Emission Warranty VICTORY Motorcycle Division warrants that this exhaust system, at the time of sale, meets all applicable U.S. EPA Federal noise standards. This warranty extends to the first person who buys this exhaust system for purposes other than resale, and to all subsequent buyers.
As the motorcycle owner, you are responsible for the performance of the required maintenance listed in your owner's manual. VICTORY recommends that you retain all receipts covering maintenance on your motorcycle, but VICTORY cannot deny warranty solely for the lack of receipts or for your failure to ensure the performance of all scheduled maintenance.
Page 92
VICTORY dealers is not reasonably available, a part is not available within 30 days, or a repair is not complete within 30 days. Any replacement part can be used in an emergency repair. VICTORY will reimburse the owner for expenses, including diagnosis, not to exceed VICTORY's suggested retail price for all warranted parts replaced and labor charges based on VICTORY's recommended time allowance for the war- ranty repair and the geographically appropriate hourly labor rate.
Page 93
Any replacement part that is equivalent in performance and durability may be used in the performance of any maintenance or repairs. However, VICTORY is not liable for these parts. The owner is responsible for the perfor- mance of all required maintenance. Such maintenance may be performed at a service establishment or by any individual.
VICTORY Motorcycle due to fire, explosions or any other cause beyond VICTORY Motorcycle Division, Polaris Sales Inc. control.
Page 95
How To Obtain Warranty Service If your VICTORY Motorcycle requires warranty service, you must take it to a VICTORY Motorcycle Servicing Dealer. When requesting warranty service you must present your copy of the Warranty Registration form to the dealer.
Gasoline that has been reformulated or oxygenated can be used. Engine Oil Specifications Polaris recommends the use of VICTORY Brand Synthetic Blend 20W-40 Motor Oil or an equivalent oil designed for use with wet clutches (such as those with a JASO MA rating).
Need help?
Do you have a question about the Vegas Jackpot and is the answer not in the manual?
Questions and answers