RODE Microphones VideoMic Pro Instruction Manual
Hide thumbs
Also See for VideoMic Pro:
- Instruction manual (18 pages) ,
- Instruction manual (18 pages) ,
- Instruction manual (28 pages)
Table of Contents
Advertisement
Advertisement
Table of Contents

Related Manuals for RODE Microphones VideoMic Pro


Summary of Contents for RODE Microphones VideoMic Pro
- Page 1 VideoMic Pro Instruction Manual www.rodemic.com...
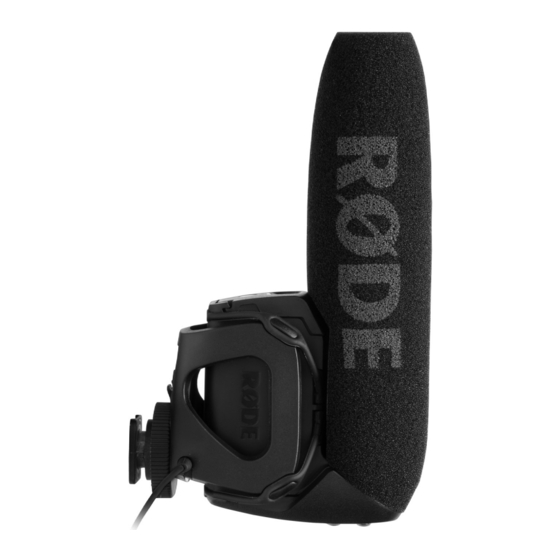
- Page 2 VideoMic Pro. Creating a high performance microphone as lightweight and manageable as the VideoMic Pro was quite a technical challenge. Other companies have attempted and failed, simply because a directional microphone depends on the length of the microphone barrel to reject the surrounding ambient noise that you don’t want to pick up.
- Page 3 Specifi cations Acoustic Principle: Line Gradient Polar Pattern: Super-Cardioid Frequency Range: 40Hz ~ 20 000Hz Frequency Range: Selectable HPF (High Pass Filter) @ 80Hz/12 dB/octave Variable Level: 3 position switch (-10 dB, 0 dB, +20 dB) Output 200 Impedence: Signal to Noise 74 dB Ratio: Equivalent Noise:...
-
Page 4: Frequency Response
Specifi cations Frequency Response 20 Hz 1000 10 000 20 000 Polar Response 0˚ +5.0 -2.0 -2.0 -4.0 -6.0 -8.0 -10.0 -10.0 -12.0 -14.0 -16.0 -18.0 -20.0 -20.0 -22.0 -24.0 90˚ 270˚ -25.0 dB rel. 1V/Pa Frequency: 500 Hz: 1000 Hz: 2000 Hz: 8000 Hz: 180˚... - Page 5 Features • Compact, lightweight body • Broadcast recording quality • Condenser microphone • 9V battery powered - over 70 hours use (alkaline) • Integrated shock mounting • Integrated foam windshield • 3.5mm stereo mini-jack output (dual mono) • Two step high-pass fi lter (0, 80Hz) •...
- Page 6 We recommend you use either Alkaline or Lithium batteries for the longest continuous operating time. • The VideoMic Pro will run continuously for over 70 hours with a good quality Alkaline battery. It is however important to understand that battery performance can vary dramatically with ambient temperature and shelf life.
-
Page 7: Installing The Battery
Installing the battery • To remove the cover, hold the sides of the cover with your thumb and third fi nger, and push up on the indentation with your index fi nger, then pivot the bottom of the cover away. •... - Page 8 Now turn the knurled ring in a clockwise direction, gently tightening it so the VideoMic Pro base is seated fi rmly in place. - 8 -...
- Page 9 Secure your cable on the clip on the underside of the VideoMic Pro shockmount • The VideoMic Pro delivers a mic level signal to the video camera via a stereo mini jack audio lead. The mini jack should be connected to the camera via the camera’s “Audio-In”...
- Page 10 RED indicator is lit, however with reduced performance. Level Control • The VideoMic Pro features three settings to control the output signal to your recording device. These are set via the bottom selector switch on the back of the microphone.
- Page 11 If you have the +20 dB level selected on the VideoMic Pro you may want to reduce the level on your camera. As always it is recommended to test your audio fi rst before recording anything of importance.
- Page 12 Shockmount & bands • The VideoMic Pro has been designed with an integrated suspension shockmount, which reduces the chance of transmitting handling noise to the mic when recording your audio. • This shockmount uses four elastomer suspension bands to hold the VideoMic Pro in its shockmount cradle.
- Page 13 BAND TYPE ONE BAND TYPE TWO Top view of the VideoMic Pro. Use the band with the correct alignment for the area you are attaching The ‘arrow head’ end of the band is to be placed into the notch on the side of the mic body which is normally just below the windshield foam.
- Page 14 Once the fi rst end is secured, angle the square end of the band into the corresponding notch underneath the front or back of the mic body and press into place. Angle the square end of the band into the corresponding square notch on the bottom of the mic body Repeat the process for all four shockmount bands.
- Page 15 General Operation • The VideoMic Pro comes pre-fi tted with a foam windshield. It is not necessary to remove it, however if it ever is removed please take care not to tear the foam. The windshield should be left on at all times while recording, as even the slightest breeze can cause sound interference.
-
Page 16: Technical Support
Support If you experience any problem, or have any questions regarding your microphone, fi rst contact the dealer who sold it to you. We have an extensive dealer network to assist you. If you have diffi culty getting the advice or assistance you require, do not hesitate to contact us directly via the details below.
Need help?
Do you have a question about the VideoMic Pro and is the answer not in the manual?
Questions and answers