
Related Manuals for Pro-Ject Audio Systems 9


Summary of Contents for Pro-Ject Audio Systems 9
- Page 1 INSTRUCTIONS FOR USE Pro-Ject 9 Pro-Ject 9c Pro-Ject 9cc Pro-Ject 10cc Pro-Ject 12cc...
- Page 2 Tonearm base fixing bolts (3x 12mm M5) * Wood screws to fix the RCA/phono socket box (2x 2,9 x 9,5) * 2x hexagon keys: 1,5mm and 3mm * © Audio Trade GmbH · Tonearms Pro-Ject 9, 9c, 9cc, 10cc and 12cc · Revision 15.06.11/15.07.11...
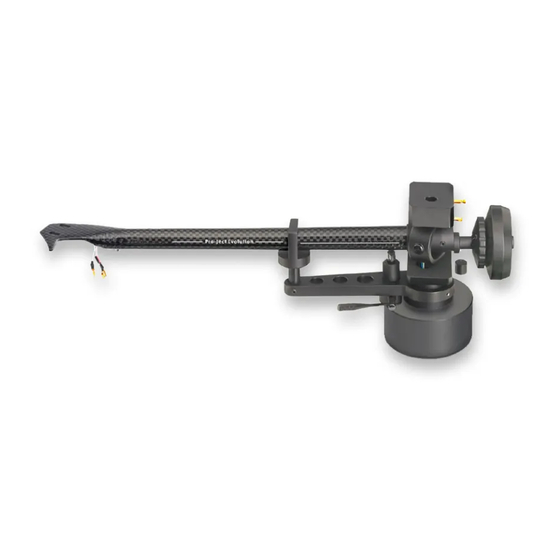
- Page 3 PRO-JECT dealer to accomplish this task for you. Models Pro-Ject 9 and Pro-Ject 9c. The finger lift (1) must be fitted on top of the headshell under the cartridge fixing bolts or nuts - not between headshell and cartridge body.
- Page 4 Once the arm is correctly balanced return it to the rest. Hold the counterweight (8) without moving it, and gently revolve the downforce scale ring (8a) until the zero is in line with the anti-skating prong (9). Check whether the arm still balances out.
-
Page 5: Technical Specifications
All tonearms are available either with flying leads terminated with a 5-pole standard tonearm socket, or with a cable terminated with RCA phono sockets. © Audio Trade GmbH · Tonearms Pro-Ject 9, 9c, 9cc, 10cc and 12cc · Revision 15.06.11/15.07.11...
Need help?
Do you have a question about the 9 and is the answer not in the manual?
Questions and answers