Table of Contents
Advertisement
Quick Links
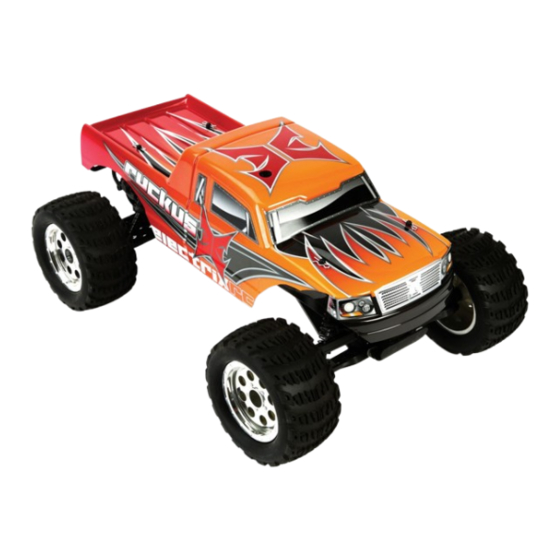
RUCKUS
1/10 electrIc
Monster truck
ecX2000s | ecX2000sa | ecX2000seu
ecX2100s | ecX2100sa | ecX2100seu
InstructIon Manual
BedIenungsanleItung
Manuel d'utIlIsatIon
Manuale dI IstruzIonI
®
Congratulations on your purchase of the ECX
Monster Truck. This 1/10-scale model introduces you
to the sport of RC driving.
Herzlichen Glückwunsch zum Kauf des ECX
Monster Truck. Dieses 1/10 Scale Model öffnet Ihnen
die Welt des RC Car Sports.
Nous vous félicitons pour l'achat du ECX
Monster Truck. Ce modèle 1/10 vous initie à la
conduite RC.
Congratulazioni per l'acquisto di questo Ruckus
Monster Truck ECX. Questa vettura in scala 1/10
vi introdurrà nel mondo dei modelli RC.
Ruckus
™
®
Ruckus
™
®
Ruckus
™
®
®
Advertisement
Table of Contents

Subscribe to Our Youtube Channel
Related Manuals for ECX RUCKUS ECX2222S


Summary of Contents for ECX RUCKUS ECX2222S
- Page 1 ® Monster Truck. Ce modèle 1/10 vous initie à la BedIenungsanleItung conduite RC. Congratulazioni per l’acquisto di questo Ruckus ® Manuel d’utIlIsatIon Monster Truck ECX. Questa vettura in scala 1/10 vi introdurrà nel mondo dei modelli RC. Manuale dI IstruzIonI...
-
Page 2: Table Of Contents
notIce All instructions, warranties and other collateral documents are subject to change at the sole discretion of Horizon Hobby, Inc. For up-to-date product literature, visit http://www.horizonhobby.com and click on the support tab for this product. Meaning of special language: The following terms are used throughout the product literature to indicate various levels of potential harm when operating this product: NOTICE: Procedures, which if not properly followed, create a possibility of physical property damage AND little or no possibility of injury. -
Page 3: Water-Resistant Vehicle With Waterproof Electronics
Water-resIstant VehIcle WIth WaterProof electronIcs Your new Horizon Hobby vehicle has been designed and built with Wet conditions Maintenance a combination of waterproof and water-resistant components to • Remove the battery pack(s) and dry the contacts. If you have an air allow you to operate the product in many “wet conditions,” compressor or a can of compressed air, blow out any water that including puddles, creeks, wet grass, snow and even rain. -
Page 4: Specifications
5 V/1 A Output Torque 41.66 oz (3 kg-cm) Size 27 x 35 x 17.3mm Operating Speed 0.23sec/60 degrees of travel Weight 34–36 g Size 40.5 x 20 x 36.8mm coMPonents 1. ECX Ruckus 1/10-scale Monster Truck ™ ® 2. ECX 2.4GHz Transmitter ™ 3. AA (4) Batteries 4. DYN4113 2A Peak Battery Charger 5. Dynamite Speedpack 7.2V... -
Page 5: Installing Transmitter Batteries
InstallIng transMItter BatterIes CAUTION: If using rechargeable batteries, charge only rechargeable batteries. Charging non-rechargeable batteries may cause the batteries to burst, resulting in injury to persons and/or damage to property. Install 4 AA alkaline batteries into the transmitter, NEVER install damaged batteries, batteries of mixed types or batteries following the instructions provided for your radio system. of different ages in the transmitter. Remove exhausted batteries. -
Page 6: Transmitter Controls
transMItter controls reverse switch Battery level Indicator Solid Red and Green: Battery voltage is good (above 4V). Solid Red: Battery voltage is critically low Allows you to change the direction of steering (below 4V). Replace (ST. REV) and throttle (TH. REV) controls. (The transmitter batteries. -
Page 7: Getting Started
gettIng started 1. Power on the transmitter. 2. Power on the ESC. 3. Do a test of the transmitter’s control of the vehicle with 4. Start driving slowly, and, if the vehicle does not go straight, the vehicle’s wheels off the ground. adjust the steering trim dial on the transmitter. -
Page 8: Operation
oPeratIon • ALWAYS turn on your transmitter before you turn on the • ALWAYS operate your vehicle in a wide open area. Operating receiver in the vehicle. Always power off the receiver before the vehicle in a small space or indoors can cause overheating turning your transmitter off. at low speeds. Operating at low speed increases heat in the electronic speed control (ESC). Overheating can damage the vehicle and failure may result. When you are fInIshed 1. -
Page 9: Maintenance
MaIntenance settIng the gear Mesh The gear mesh has already been set at the factory. Setting the gear mesh is only necessary when changing motors or gears. You must remove the vehicle’s gear cover (a) to make this adjustment. Proper gear mesh (how the gear teeth meet) is important to the perfor- mance of the vehicle. -
Page 10: Shock Cleaning
shock cleanIng Rear Shock Front Shock rear shock front shock ECX1037 Oil-filled shocks will require regular maintenance due to the oil ECX1037 ECX1043 breaking down or getting dirty. This maintenance should be performed ECX1043 after about every 3 to 5 hours of use, depending on the conditions that ECX1057 ECX1057 ECX1037 the vehicle is used in. -
Page 11: Binding
BIndIng failsafe In the unlikely event the radio connection is lost during use, the receiver will reduce the throttle to idle. The steering channel holds the last input command. If you power on the receiver before powering on the transmitter, the receiver enters failsafe mode with throttle at idle. When you power on the transmitter, normal control resumes. -
Page 12: Limited Warranty
lIMIted Warranty Warranty serVIces What this Warranty covers Horizon Hobby, Inc. (“Horizon”) warrants to the original purchaser Questions, assistance, and repairs that the product purchased (the "Product") will be free from defects Your local hobby store and/or place of purchase cannot provide war- in materials and workmanship at the date of purchase. -
Page 13: Contact Information
This product must not be disposed of with other waste. No. HH2012081601 Instead, it is the user’s responsibility to dispose of their waste Product(s): ECX 1/10th Ruckus V2.0 equipment by handing it over to a designated collections point Item Number(s): ECX2000SEU, ECX2100SEU for the recycling of waste electrical and electronic equipment. -
Page 14: Parts Diagrams
Parts dIagraM | eXPlosIonszeIchnung | Vue éclatée des PIÈces | esPloso del Modello con referenza PezzI recoMMended IteMs M3X10 eMPfohlene Werkzeuge M3X12 outIls recoMMandés attrezzI consIglIatI M3X10 M3X10 M3X12 M3X12 M3X12 M3X12 M3X25 M3X10 M3X12 M3X10 M3X15 M3X12 M3x15 M3X10 M3x25 M3x15 M3X8... - Page 15 Parts dIagraM | eXPlosIonszeIchnung | Vue éclatée des PIÈces | esPloso del Modello con referenza PezzI The slipper clutch can be adjusted using this locknut (ECX1060). Fully tighten the locknut. Then loosen the nut two full turns. Die Rutschkupplung kann durch diese Stopmutter eingestellt werden (ECX1060). Ziehen Sie die Mutter an und drehen Sie dann...
-
Page 16: Parts Lists
replacement Parts / ersatzteile / Pièces de rechange / Pezzi di ricambio Part # | Nummer Numéro | Codice Description Beschreibung Description Descrizione 2A Peak Charger 2A Peak Ni-MH Ladegerät 2A Chargeur à détection 2A Caricabatterie a rileva- DYN4113 de pics mento di picchi DYN1050EC Ni-MH battery... - Page 17 | ecX2000sa | ecX2000seu ecX2100s | ecX2100sa | ecX2100seu www.ecxrc.com 33334 Created 7/2012 © 2012 Horizon Hobby, Inc. ECX, Ruckus, Dynamite and Speedpack are trademarks or registered trademarks of Horizon Hobby, Inc. WD-40 is a registered trademark of WD-40 Manufacturing Company.
Need help?
Do you have a question about the RUCKUS ECX2222S and is the answer not in the manual?
Questions and answers