Table of Contents
Advertisement
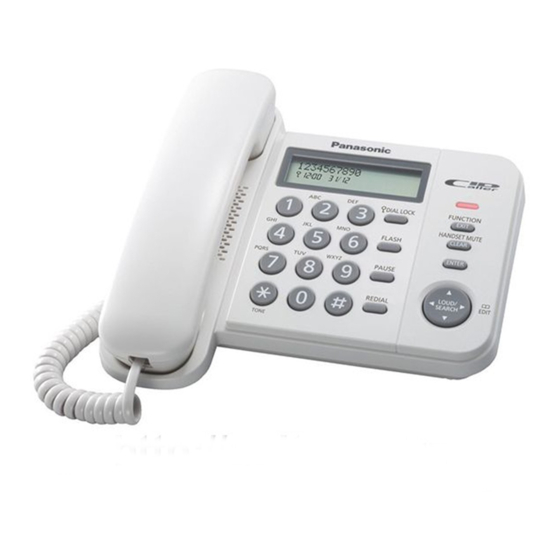
Operating Instructions
Integrated Telephone System
KX-TS560ML
Model No.
Model shown is KX-TS560ML
This unit is compatible with Caller ID. You must subscribe to the appropriate service offered
by your service provider/telephone company.
Please read these operating instructions before using the unit and save them for future
reference.
Advertisement
Table of Contents

Related Manuals for Panasonic KX-TS560ML


Summary of Contents for Panasonic KX-TS560ML
-
Page 1: Operating Instructions
Integrated Telephone System KX-TS560ML Model No. Model shown is KX-TS560ML This unit is compatible with Caller ID. You must subscribe to the appropriate service offered by your service provider/telephone company. Please read these operating instructions before using the unit and save them for future... -
Page 2: Table Of Contents
Table of Contents Introduction Phonebook Accessory information....... 3 Phonebook ........19 For your safety........4 Chain dial ........20 Important safety instructions ..... 4 Caller ID Service For best performance ......5 Using Caller ID service....21 Preparation Caller list..........22 Controls ..........6 Useful Information Display.......... -
Page 3: Introduction
Introduction Thank you for purchasing a new Panasonic integrated telephone. For your future reference We recommend keeping a record of the following information to assist with any repair under warranty. Serial No. Date of purchase (found on the bottom of the unit) Name and address of dealer Attach your purchase receipt here. -
Page 4: For Your Safety
Introduction For your safety Important safety instructions To prevent severe injury and loss of life/ When using your product, basic safety property, read this section carefully before precautions should always be followed to using the product to ensure proper and safe reduce the risk of fire, electric shock and operation of your product. -
Page 5: For Best Performance
Introduction Information on Disposal in other For best performance Countries outside the European Union Environment ≥ The product should be kept free from excessive smoke, dust, high temperature, and vibration. ≥ The product should not be exposed to direct sunlight. ≥... -
Page 6: Preparation
Preparation Controls 1 Display (page 7) 7 Navigator key ({ {LOUD/SEARCH} {kEDIT} 2 Ringer indicator (page 16) (page 20, 22) 3 {FUNCTION} (page 12, 13, 19) 8 {£} {TONE} (page 17) {EXIT} (page 12, 13, 15, 19, 22) 9 {REDIAL} (page 15) 4 {HANDSET MUTE} (page 17) {CLEAR} (page 14, 15, 20) : {PAUSE} (page 7, 15) -
Page 7: Display
Preparation Display Display items Item Meaning The dial lock mode is set (page 18). You have checked this caller information, answered the call or called back the caller from the caller list (page 22). The display flashes when the battery power is low. To replace the batteries, see page 8. -
Page 8: Battery Installation And Replacement
(LR6) or Manganese (R6, UM-3) batteries. We s do not charge, short-circuit, disassemble, recommend to use Panasonic batteries. heat or dispose of in fire. Battery life is: j about six months when using s remove all the batteries when replacing. -
Page 9: Connections
After line connection, lift the handset to check for a dial tone. LINE To single-line telephone jack ≥ Use only a Panasonic handset for KX-TS560ML. ≥ Use only the supplied telephone line cord. Using another telephone line cord may not allow the unit to work properly. -
Page 10: Connecting A Communication Device
Preparation Connecting a communication device If you connect a communication device (computer, modem, fax, answering machine etc.) to the telephone line, you can connect it through this unit using the DATA jack. After connecting the handset and telephone line cord, connect the communication device telephone line cord to the DATA jack. -
Page 11: Symbols Used In These Operating Instructions
Preparation Symbols used in these operating instructions Symbol Meaning The words in the brackets indicate button names on the unit. > Proceed to the next operation. “ ” The words in quotations indicate the menu on the display. Example: “SAVE PHONEBOOK ?” }: “... -
Page 12: Setting Up The Unit Before Use
Preparation continue with the setting. Enter the correct Setting up the unit before date and time. For Caller ID service users (page 21) If a time display service is available with Date and time the Caller ID service: ≥ The Caller ID information will re-set the clock >... -
Page 13: Programming
Programming Programmable settings You can customize the unit by programming the following features. Make sure that the handset is on the cradle. Programming by scrolling through the display menus {FUNCTION} > } / { }: Select the desired item in main menu {ENTER} >... -
Page 14: Special Instructions For Programmable Settings
≥ If you change the password, please make note of your new password. The unit will not reveal the password to you. If you forget your Call restriction password, consult your nearest Panasonic You can restrict the unit from dialling phone service center. numbers beginning with specified digit(s) (1 digit or 2 digits). -
Page 15: Making/Answering Calls
Making/Answering Calls Pause (for PBX/long distance service Making calls users) A pause is sometimes required when Lift the handset and dial the phone making calls using a PBX or long distance number. service. When storing a calling card access When you finish talking, place the number and/or PIN in the phonebook, a handset on the cradle. -
Page 16: Answering Calls
Making/Answering Calls Answering calls When a call is being received, the unit rings, the ringer indicator flashes quickly and “INCOMING CALL” is displayed. You can answer a call by simply lifting the handset. Note: ≥ The ringer indicator will flash when s a telephone number is dialled in PULSE mode, or s someone picks up or hangs up another... -
Page 17: Useful Features During A Call
Making/Answering Calls Temporary tone dialling (for Useful features during a call rotary/pulse service users) You can temporarily switch the dialling Handset mute mode to tone when you need to access touch-tone services (for example, While mute is turned on, you can hear the answering services, telephone banking other party, but the other party cannot hear services, etc.). -
Page 18: Dial Lock
Making/Answering Calls Dial lock This feature prohibits making outside calls. The default setting is OFF. Important: ≥ When dial lock or call restriction (page 14) is turned on, only phone number stored in the phonebook as emergency numbers (numbers stored with a # at the beginning of the name) can be dialled using the phonebook (page 19). -
Page 19: Phonebook
Phonebook Character table for entering names Phonebook The phonebook allows you to make calls Character without having to dial manually. You can add & ' ( ) , - . / 1 50 names and phone numbers. A B C 2 D E F 3 Adding entries G H I 4... -
Page 20: Chain Dial
Phonebook Finding and calling a phonebook Erasing entries entry Press { } or { } to enter the phonebook list. Scrolling through all entries > } / { }: Select the desired entry Press { } or { } to enter the phonebook >... -
Page 21: Caller Id Service
Caller ID Service Missed calls Using Caller ID service If a call is not answered, the unit treats the Important: call as a missed call. The display shows the ≥ This unit is Caller ID compatible. To use Caller number of missed calls, while the unit is not ID features, you must subscribe to Caller ID in use. -
Page 22: Caller List
Caller ID Service Erasing selected caller Caller list information Important: Press { } or { } to enter the caller list. ≥ Make sure the unit’s date and time setting is correct (page 12). } / { }: Select the desired entry. >... -
Page 23: Useful Information
Useful Information Wall mounting Press the tabs in the direction of the arrows (1), then remove the wall mounting adaptor (2). Tuck the telephone line cord inside the wall mounting adaptor, and push it in the direction of the arrow. ≥... -
Page 24: Troubleshooting
Useful Information Troubleshooting Problem Cause/solution ≥ Check the connections (page 9). The unit does not work. ≥ Remove the batteries and reinstall them to reset the unit. ≥ The RINGER selector is set to OFF. Set to HIGH or LOW The unit does not ring. -
Page 25: Liquid Damage
Useful Information Problem Cause/solution ≥ A call is being received. Answer the call and start again While programming or searching, the unit starts to after hanging up. ring and stops the program/ search. ≥ Do not pause for over 60 seconds while searching. The display exits the caller list. -
Page 26: Specifications
Useful Information Specifications Power source: From telephone line From 3 AA (LR6, R6, UM-3) batteries Approx. 95 mm k 190 mm k 196 mm Dimensions (H x W x D): Mass (Weight): Approx. 588 g Operating conditions: 5°C– 40°C, 20 %j80 % relative air humidity (dry) Note: ≥... -
Page 27: Index
Index Redial: 15 Index Ringer volume: 16 Rotary/pulse service: 17 Accessories: 3 Answering calls: 16 Temporary tone dialling: 17 Area code: 12 Time adjustment: 13 Troubleshooting: 24 Battery: 8 W Wall mounting: 23 Caller ID service: 21 Caller list: 22 Caller list edit: 22 Call restriction: 14 Call waiting: 17... - Page 28 1-62, 4-chome, Minoshima, Hakata-ku, Fukuoka 812-8531, Japan Copyright: This material is copyrighted by Panasonic Communications (Malaysia) Sdn. Bhd., and may be reproduced for internal use only. All other reproduction, in whole or in part, is prohibited without the written consent of Panasonic Communications (Malaysia) Sdn. Bhd.