
Related Manuals for Pisector GSM-03


Summary of Contents for Pisector GSM-03
- Page 1 PiSector Professional Wireless GSM Alarm System User Manual (GSM-03) Read manual fully before use. PiSector Inc., USA, www.pisector.com...
-
Page 2: Table Of Contents
WHAT'S IN THE BOX ..............4 MAIN FEATURES ................ 5 KNOW YOUR SYSTEM ............... 6 SYSTEM INITIALIZATION ............9 SYSTEM SETTING INSTRUCTIONS ........10 5.1............10 NTERING ETTING 5.2..........11 DDING EMOTE ONTROLLER 5.3..........13 ELETING EMOTE ONTROLLER 5.4. - Page 3 5.22..........34 HANGE PERATION ASSWORD 5.23..........35 HANGE ROGRAM ASSWORD 5.24............36 ETTING ELAY 5.25......... 37 ETTING LARM ELAY 5.26............38 OICE ROMPT ETTING 5.27....39 IREN ROMPT ETTING FOR EMOTE ONTROLLER 5.28.............. 40 ACKLIGHT ETTING 5.29.
-
Page 4: What's In The Box
What's In The Box 1 x Main Unit Panel 2 x Remote Controller 1 x Indoor Siren 1 x Passive IR Sensor 1 x Door Gap Sensor 1 x Power Adapter 1 x User Manual... -
Page 5: Main Features
2. Main Features Quad-band worldwide cellular phone (900/1800/850/1900 MHz). Elegant touch keypad with easy to use detailed menu system. 128×64 lattice LCD screen with clock display (English/Chinese) 4 wired and 10 wireless (433MHz) defense zones; each wireless zone supports up to 10 sensors. Support for up to 8 remote controllers. -
Page 6: Know Your System
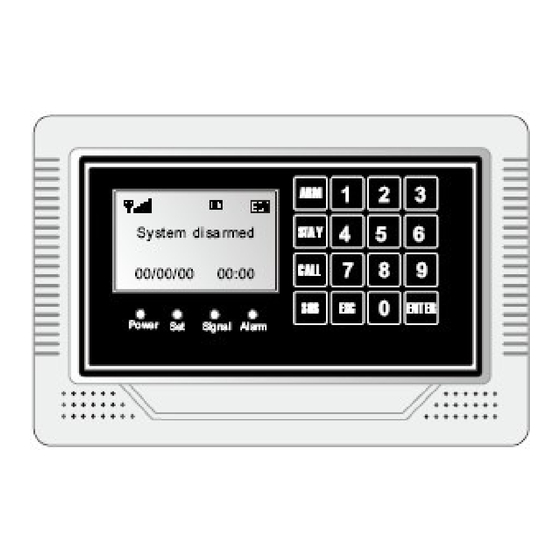
3. Know Your System 1. LCD Screen: Resolution: 128×64; English and Chinese display. 2. LED Status Indicators POWER: power and system activity indicator: - fast flashing once per second: system is searching for GSM signal. - slow flashing once per 3 seconds: system is in ready mode. SET: is ON when the system enters setting mode. - Page 7 ESC: clears the input content or back to last operation. ENTER: confirms current command or operation. 4. Wired Ports SIREN+ Positive of siren (red cable) SIREN- Negative of siren (black cable) T_VCC Reserved port Reserved port DATA Reserved port T_GND Reserved port Zone 1 Wired sensor 1: support both NO and NC...
- Page 8 5. Internal Backup Battery Switch. 6. SIM Card Slot: Please pay attention to the direction arrow marked on the slot: “LOCK” / “OPEN”. Do not insert or take out the SIM card when the main unit panel is powered on.
-
Page 9: System Initialization
4. System Initialization Correct initialization of the main unit panel is important to its normal working and lifespan. 1. Connect the wired accessories that you need. 2. Insert the SIM card. 3. Connect the power adapter. The main unit panel will start self-inspection and the POWER indicator LED will flash once per second. -
Page 10: System Setting Instructions
5. System Setting Instructions 5.1. Entering Setting Mode All settings have to be done in the setting mode. Use keys 2 / 8 / 4 / 6 as direction keys (up / down / left / right). At the disarm state, input your 6-digit password (default: 888888), then press ENTER. -
Page 11: Adding Remote Controller
5.2. Adding Remote Controller This system supports maximum 8 remote controllers ( 2 free remote controllers come with package). All remote controllers have to be coded with the main unit panel in order to perform correctly. Their code cannot be empty or the same as those already saved in the main unit panel. Method: enter remote controller setting menu, press “4”... - Page 12 Fig 4A: recognize successfully Fig 3: waiting to receive signal Fig 4B: the main unit has the same code Fig 5: press ENTER to save with remote controller code...
-
Page 13: Deleting Remote Controller
5.3. Deleting Remote Controller If the remote controller is lost or damaged, it must be deleted immediately so no other person can control the main unit panel. Method: enter remote controller setting menu, press “4” or “6” to choose the remote controller you want to delete. Press “8” to find “Delete”, and then press ENTER. -
Page 14: Coding Defense Zone
5.4. Coding Defense Zone This alarm system supports 10 wireless defense zones, each of which supports up to 10 wireless detectors. All sensors and sirens including any extra ones not included in the standard package have to be coded to the main unit panel in order to perform correctly. Their code cannot be empty or the same as any of the saved codes in the main unit panel. - Page 15 Fig 4A: recognize successfully Fig 3: waiting signal from sensor Fig 4B: the main unit has the same code Fig 5: press ENTER to save with sensor code...
-
Page 16: Deleting Defense Zone
5.5. Deleting Defense Zone The wireless detector cannot trigger the main unit panel after it is deleted. Method: enter defense zone setting menu, press “4” or “6” to choose the sensor you want to delete. Press “8” to find “Delete”, and then press ENTER. -
Page 17: Setting Defense Zone Places
5.6. Setting Defense Zone Places The location of defense zone can be set in the main unit panel, so that the main unit panel can send detailed alarm messages. There are 8 locations for alarm: SOS, fire, gas, door, hall, window, balcony, and boundary. - Page 18 Fig 4: (this example) Before setting, the alarm SMS for zone 1 is: 01 zone fire alarm; After setting, it is: 01 zone gas alarm. The format of alarm SMS: [01~10] zone [place] alarm. For example, you set the place of zone 4 as “Window”. The alarm SMS you receive is: 04 zone window alarm.
-
Page 19: Setting Defense Zone Modes
5.7. Setting Defense Zone Modes There are different defense zone modes: out arm, home arm, alarm and disarm mode. For example, if you need gas detectors working all the time, then please set ARM, HOME, and DISARM as enabled. Method: enter defense zone setting menu, press “2” or “8” to choose HOME arm status (enable or disable), press ENTER to confirm. -
Page 20: Setting Defense Zone Siren
5.8. Setting Defense Zone Siren The siren can be set on or off when there is an alarm for each defense zone independently. Method: enter defense zone setting, press “2” or “8” to choose siren enable or disable, and then press ENTER to confirm. Operation figures: Fig 1: enter defense zone setting Fig 2: choose siren status... -
Page 21: Alarm Delay Setting
5.9. Alarm Delay Setting Alarm delay: the main unit panel will make alarm call and the siren will go off (if enabled for this zone) after a preset delay time. Method: enter defense zone setting, press “2” or “8” to choose delay enable or disable, and then press ENTER to confirm. -
Page 22: Adding Phone Number
5.10. Adding Phone Number This system can store up to 6 phone numbers. When triggered, the system will call out these numbers in order until someone answers the call. The system will redial three times at most. Without the approval and consent of relevant authorities, do not set any of the dial out numbers to “911”, “112”... -
Page 23: Deleting Phone Number
5.11. Deleting Phone Number Method: enter phone number setting, press “4” or “6” to choose serial number, then press “8” to choose “Delete” and then press ENTER to confirm. Operation figures: Fig 2: choose the number you want to delete Fig 1: enter phone number setting menu Fig 3: choose “delete”... -
Page 24: Adding Sms Cell Phone Number
5.12. Adding SMS Cell Phone Number This system can store 3 SMS receiving cell phone numbers. When alarming, it will send SMS to all these numbers. Method: enter SMS number setting, press “4” or “6” to choose SMS number and then press ENTER. Input the number you want to set, then press ENTER to save. -
Page 25: Deleting Sms Cell Phone Number
5.13. Deleting SMS Cell Phone Number Method: enter SMS number setting, press “4” or “6” to choose serial number, then press “8” to choose “Delete” and then press ENTER to confirm. Operation figures: Fig 2: choose the number you want to Fig 1: enter SMS number setting delete Fig 3: choose “delete”... -
Page 26: Voice Recording
5.14. Voice Recording This system can make 10-second voice recording for user to give instructions to emergency services for example when the system is triggered. Method: enter record setting, and start by choosing “Start recording” and immediately start recording your voice message. The system will stop recoding after 10 seconds. -
Page 27: Voice Recording Replay
5.15. Voice Recording Replay Enter Recording setting, and then press “6” to choose “Play”. The main unit panel will start playing the voice message you have recorded. You can re-record until you are satisfied with the message. Operation figures: Fig 1: enter record setting Fig 2: you’ll see this menu Fig 3: press “6”... -
Page 28: Setting System Date
5.16. Setting System Date The date format is MM/DD/YY. (“YY” setting is from 00-99) Method: enter “Time” menu, and then choose “Date”. Input the exact date you want to set and press ENTER to confirm. Operation figures: Fig 2: choose date setting menu Fig 1: enter time setting menu Fig 3: input the date Fig 4: press ENTER to save... -
Page 29: Setting System Time
5.17. Setting System Time Time in this alarm system is 24-hour system. Enter “Time” menu, you will see “Date” menu, then press “6” to choose “Time”. Input the exact time you want to set and press ENTER to confirm. Operation figures: Fig 1: enter time setting menu Fig 2: you’ll see date setting menu Fig 3: press “6”... -
Page 30: Scheduling Timely Arm
5.18. Scheduling Timely Arm This feature is also called Timely Arm. After setting the required arm start time, the alarm system will arm itself at the preset time. Method: enter “Time” menu, you will see “Date” menu, then press “6” to choose “Timely arm”. -
Page 31: Scheduling Timely Disarm
5.19. Scheduling Timely Disarm This feature is also called Timely Disarm. After setting the required disarm start time, the alarm system will disarm itself at the preset time. Method: enter “Time” menu, you will see “Date” menu, then press “6” to choose “Timely arm”. -
Page 32: Wireless Siren Coding
5.20. Wireless Siren Coding Wireless sirens have to be coded to the main unit panel in order to work correctly. Method: set the wireless siren that you need to code in coding status. Then enter “Wireless Control” menu on the main unit panel, you will see “Control”... -
Page 33: Wireless Siren Code Encryption
The alarm signal code used with the wireless siren is sent from the internal transmitter of the main unit panel. The code of this signal is the same for all wireless alarm systems produced by PiSector Inc. If you and your neighbor are using the same model, the alarm signal from your neighbor may cause your siren to sound off too. -
Page 34: Change Operation Password
Fig 5: press ENTER to save 5.22. Change Operation Password The operation password is used for daily use of the system (disarm or remote control). The default operation password is 1234. Method: Enter “Settings” menu, and then “Operate password”. Input the 4-digit password you want to set, and save it. -
Page 35: Change Program Password
5.23. Change Program Password The program password is used for system setup (default is 888888). Method: Enter “Settings” menu, and then “Operate password”, press “6” to choose “Program password”. Input the 6-digit password you want to set, and save it. Operation figures: Fig 1: enter settings menu Fig 2: you’ll see “Operate password”... -
Page 36: Setting Arm Delay Time
5.24. Setting Arm Delay Time After setting, the system will enter OUT ARM status after the preset delay time. Delay time ranges from 01-99 seconds. The system default time is 60 seconds. Method: Enter “Settings” menu, then you will see “Operate password”. Press “6”... -
Page 37: Setting Alarm (Call Out) Delay Time
5.25. Setting Alarm (Call Out) Delay Time After setting, when there is an alarm, the system will call out after the preset delay time. Delay time ranges from 01-99 seconds. The system default time is 60 seconds. Method: Enter “Settings” menu, then you will see “Operate password”. Press “6”... -
Page 38: Voice Prompt Setting
5.26. Voice Prompt Setting The main unit panel has voice prompt feature. For example when user press arm or disarm on the remote controller, it will give voice prompt. The system default for the voice prompt is on. Users can disable or enable it according to actual need. -
Page 39: Siren Prompt Setting For Remote Controller
5.27. Siren Prompt Setting for Remote Controller If enabled, the siren will sound a short beep each time you press the remote controller. System default is disabled. Method: Enter “Settings” menu, and then you will see “Operate password”. Press “6” to choose “Siren prompt” and choose “Enable” or “Disable”. -
Page 40: Backlight Setting
5.28. Backlight Setting The backlight of the LCD screen and keypad will be off automatically after a certain period of time when there is no operation on the keys. Users can set it keep on if required. System default is disabled. Method: Enter “Settings”... -
Page 41: Siren Setting In "Emergency" Mode
5.29. Siren Setting in “Emergency” Mode When you press the emergency button of the remote controller, the siren does not normally sound as this feature is disabled by default. Users can enable/disable according to the actual need. Method: Enter “Settings” menu, and then you will see “Operate password”. -
Page 42: Arm / Disarm Sms Notification
5.30. Arm / Disarm SMS Notification When a user arms or disarms the system, other users can be notified automatically via SMS notifications to all SMS numbers. The SMS message content will be one of the following arm modes: Out arm | System armed | Out disarm | System disarmed. Method: Enter “Settings”... -
Page 43: Language Setting
5.31. Language Setting This alarm system supports English and Chinese languages. Please enter the “Settings” menu, and you will see “Operate password”. Press “6” to choose “Language”. Press ENTER to switch between languages. Operation figures: Fig 2: you’ll see operate password menu Fig 1: enter settings menu Fig 3: press “6”... -
Page 44: Factory Reset
5.32. Factory Reset If the system ever becomes unstable or if you need to change cellular network, it is recommended to make a full factory reset of the system. Enter “Settings” menu, and then you will see “Operate password”. Press “6” to choose “Factory setting”. After this operation, all the settings will be restored to factory defaults and all sensors and sirens have to be re-coded too. -
Page 45: Password Reset
5.33. Password Reset If users forget the password, they can input 95175308246 in disarm status to retrieve it. The main unit panel will display “Please wait, Back to default password”. After this operation, the operate password will be reset back to factory setting “1234” and program password to “888888”. Operation figures: Fig 1: under disarm status Fig 2: input 95175308246... -
Page 46: System Usage Instructions
6. System Usage Instructions 6.1. Out Arm Out arm means all the defense zones are in arm status. When there is nobody at home, it is recommended to arm the system with all detectors enabled. If any detector is triggered (by intruder, fire, gas leakage, water leak, etc.), the system will make alarm calls and SMS notification. -
Page 47: Home Arm
6.2. Home Arm Home arm means part of the defense zones are in arm status. When there is someone at home, it is recommended, for safety purpose, to enable some of the detectors (such as sensors for door, window, balcony, etc), and disable the others (such as sensors for the hall or some places easy to be triggered by person at home). -
Page 48: Disarm
6.3. Disarm The purpose of disarming the system is to disable all sensors except those set to 24-hour Arm Delay Mode. It can be used while the system is armed or while the system is in alarm state. Use the main unit panel keypad to input user password + #. The screen will display “System disarmed”. -
Page 49: Answer Alarm Call
6.4. Answer Alarm Call When the main unit panel sounds an alarm, it will dial the preset numbers. If no one answers the call, the system will call the next number automatically. If someone answers the call, they will hear your 10-sceond pre-recorded voice message. -
Page 50: Remote Control
6.5. Remote Control Dial the number of the main unit panel by phone, and after 1 ring, you will hear a voice prompt “Please enter password”. If the password is correct, you will then hear a voice prompt “Please enter instruction" then you can press 1 to arm, Press 2 to disarm, Press 3 to monitor, or Press 4 to intercom. -
Page 51: Emergency Alarm Call
6.6. Emergency Alarm Call Sometimes, there may be some accidents happening (such as sudden illness of old people or children, fire accident, burglar intrusion). Press [SOS] button on keypad, or [ ] button on remote controller or wireless panic button, the main unit panel will alarm and make call to the preset user numbers. -
Page 52: Use As Telephone
6.7. Use as Telephone In disarmed state, you can use the main unit panel to make any call just like a normal telephone. Dial telephone number on keypad, press [CALL] button and the main unit panel will make a beep and the LCD screen will display the number you are calling. -
Page 53: Alarm History Review
6.8. Alarm History Review This alarm system can store 30 alarm records. The last alarm is ranked as the first record. And when the record number exceeds 30, the oldest record will be overwritten automatically. Method: In disarmed state, input [00] + ENTER, the main unit panel enters the state of Alarm record. -
Page 54: Technical Specifications
7. Technical Specifications Input Voltage DC12V/1A Standby Current < 35mA Alarming Current < 450mA Wireless Frequency 433MHz, PT2262/EV1527, 4.7M GSM Frequency 900 / 1800 / 850 / 1900 MHz Backup Battery NI-HI AAA*6 DC 7.2V Siren Volume < 110dB Home Alarm Defense Zone Type... -
Page 55: Care And Maintenance
8. Care and Maintenance This wireless alarm system has an excellent design and uses advanced sensitive electronics that require care and dust-free environment. The following suggestions are required to maintain your obligations under the warranty terms, and for prolonging the service life of the system: Place the main unit panel and all accessories out of children reach. - Page 56 If the alarm system will not be used for a long time, disconnect it from the power supply. Do not disassemble, repair or alter the product without permission, or it may cause accidents or fire. PiSector Inc. is NOT responsible for any consequences whatsoever rising from such unauthorized actions.
- Page 57 If any equipment does not work as specified, contact PiSector Inc. [support@pisector.com] or your local authorized sales agent. TAMPERING WITH THE EQUIPMENT IN ANY WAY...
- Page 58 The following sensors are optional and packed separately Choose according to your specific needs...
- Page 59 π 3.1415926535897932384626433832795028841971 693993751058209749445923078164062862089986 280348253421170679821480865132823066470938 446095505822317253594081284811174502841027 019385211055596446229489549303819644288109 756659334461284756482337867831652712019091 456485669234603486104543266482133936072602 491412737245870066063155881748815209209628 292540917153643678925903600113305305488204 665213841469519415116094330572703657595919 530921861173819326117931051185480744623799 627495673518857527248912279381830119491298 336733624406566430860213949463952247371907 021798609437027705392171762931767523846748 184676694051320005681271452635608277857713 427577896091736371787214684409012249534301 465495853710507922796892589235420199561121 290219608640344181598136297747713099605187 072113499999983729780499510597317328160963 185950244594553469083026425223082533446850 352619311881710100031378387528865875332083 814206171776691473035982534904287554687311 595628638823537875937519577818577805321712 268066130019278766111959092164201989380952 572010654858632788659361533818279682303019 520353018529689957736225994138912497217752 834791315155748572424541506959508295331168 6172785588907509838175463746493 Sector.com...
Need help?
Do you have a question about the GSM-03 and is the answer not in the manual?
Questions and answers