
Related Manuals for Sharp CV-P10LJ


Summary of Contents for Sharp CV-P10LJ
- Page 1 PORTABLE TYPE ROOM AIR CONDITIONER INSTALLATION AND OPERATION MANUAL CV-P10LJ CV-P13LJ...
-
Page 2: Table Of Contents
ENGLISH This manual explains the proper use of your new air conditioner. Please read this manual carefully before using the product. This manual should be kept in a safe place for handy reference. CONTENTS USAGE CAUTIONS • ..............E-2 • PRECAUTIONS ..............E-3 •... -
Page 3: Usage Cautions
USAGE CAUTIONS • Ventilate the room periodically during use, especially if using gas appliances. • Be sure to turn the unit off and disconnect the power supply cord before performing any mainte- nance or cleaning. • Do not splash or pour water directly onto the unit. Water can cause electrical shock or equipment damage. -
Page 4: Precautions
PRECAUTIONS OPERATING CONDITIONS • The air conditioner must be operated within the temperature range indicated below. MODE Room temperature 18°C ~ 35°C Cool 15°C ~ 35°C Dehumidifi cation • A built-in safety device may cut off operation if the temperature exceeds these limits. •... -
Page 5: Included
INCLUDED Manual Exhaust hose Rain guard Window exhaust Insect guard net Remote control adapter Battery Foam seal A Exhaust hose (AAA.1.5V) adapter Extension panel Foam seal B (adhesive type) Bracket Screw SUGGESTED TOOLS FOR WINDOW PANEL INSTALLATION 1. Screwdriver(medium size Phillips) 2. -
Page 6: Part Names
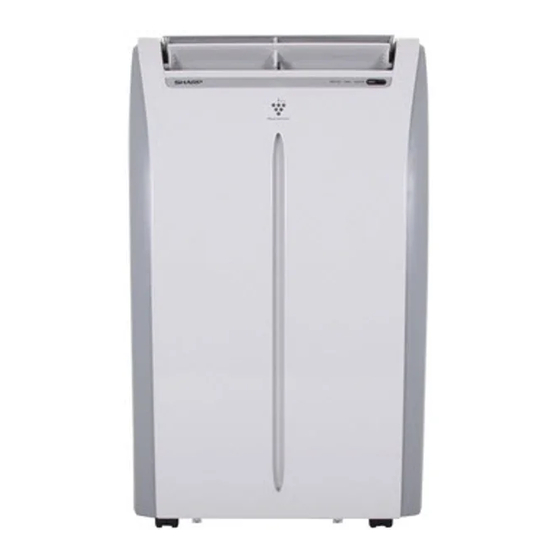
PART NAMES FRONT VIEW 1 Air Outlet 2 Vertical louvers 3 Horizontal louvers 4 POWER Button 5 Remote control signal receiver window 6 OPERATION Lamp (red) 7 TIMER Lamp (orange) 8 MEGA COOL Lamp (green) 9 PLASMACLUSTER Lamp (blue) 0 Air inlet REAR VIEW Remote control hook q Insect guard net... -
Page 7: Remote Control
REMOTE CONTROL 1 Transmitter 2 Display 3 POWER Button 4 LIGHTS Button 5 TEMPERATURE Button 6 PLASMACLUSTER Button 7 SLEEP Button 8 MODE Button 9 ON TIMER Button 0 FAN Button q OFF TIMER Button w CANCEL Button e LOUVERS Button r RESET Button t MEGA COOL Button REMOTE CONTROL DISPLAY... -
Page 8: Install Window Panel
INSTALL WINDOW PANEL Installation in a double-hung sash window (See page 9 for installation in a sliding sash window. ) Hole Connect the rain guards to the insect Rain guard guard net. Insect guard Insert all three projections on each rain guard into the holes in the insect guard net. - Page 9 Adjustment panel If the inner width of the window is between 24" (609mm) and 36.8" (934mm) inclusive. (1) Open the window sash and place the window panel on the window stool. (2) Slide the adjustment panel to fi t the window frame width.
-
Page 10: Installation In A Sliding Sash Window
INSTALL WINDOW PANEL Installation in a sliding sash window "A" Connect the rain guards to the insect guard net. Insert all three projections on each rain Insect guard net guard into the holes in the insect guard net. Hole Side “A” will now be uppermost, as Rain guard indicated in the diagram. - Page 11 If the inner height of the window is b e t w e e n 2 4 " ( 6 0 9 m m ) a n d 3 6 . 8 " Adjustment (934mm) inclusive. panel (1) Open the window sash and place the window panel on the window frame.
-
Page 12: Installation And Removal Of Exhaust Hose
INSTALLATION AND REMOVAL OF EXHAUST HOSE The exhaust hose must be installed or removed in accordance with the usage mode. MODE EXHAUST HOSE COOL, FAN, VENTILATION, DEHUMIDIFICATION with no container Install DEHUMIDIFICATION with container Remove Installation of the exhaust hose Attach the window exhaust adapter to Window ex- the exhaust hose. - Page 13 Removal of the exhaust hose Remove the window exhaust adapter. Pull out and remove the window exhaust adapter by pushing down two “PUSH” "PUSH" markings, and slide and close the exhaust cover in the window panel. Remove the exhaust hose adapter from the unit.
-
Page 14: Pre-Operation Checks
PRE-OPERATION CHECKS LOADING BATTERIES Use two AAA (R03) batteries. Remove the battery cover at the back of the remote control. Insert batteries into the com- partment, making sure the ± and — polarities are correctly aligned. • Lines will appear on the display when batteries are properly in- stalled. -
Page 15: How To Use The Remote Control
HOW TO USE THE REMOTE CONTROL Point the remote control towards the units signal receiver window and press the desired button. beep will sound when the unit re- ceives the signal. • Make sure nothing, such as curtains, blocks the signal receiver window. •... -
Page 16: Cool Mode
COOL MODE Ensure that the stopcock is securely attached the drainpipe. Stopcock Drainpipe Press the MODE button to select COOL mode. COOL DEHUM VENT Press the POWER button to start opera- tion. • The red OPERATION lamp on the unit will light. Press the TEMPERATURE button to set the desired temperature. -
Page 17: Fan Mode
FAN MODE In this mode, the air conditioner simply circulates the air without cooling it. Ensure that the stopcock is securely attached to the drainpipe. Press the MODE button to select FAN mode. COOL DEHUM VENT Press the POWER button to start operation. •... -
Page 18: To Change Air Flow Direction
TO CHANGE AIR FLOW DIRECTION UP / DOWN AIR FLOW DIRECTION Press the LOUVERS button on the re- mote control. • The horizontal louvers will swing continu- ously. Press the LOUVERS button again when the horizontal louvers are at the desired position. -
Page 19: Plasmacluster Operation
PLASMACLUSTER OPERATION Plasmacluster ions released into the room will reduce some airborne mold. Press the PLASMACLUSTER button during operation. • The remote control will display “ ”. • The blue PLASMACLUSTER lamp on the unit will light. TO CANCEL Press the PLASMACLUSTER button again. •... -
Page 20: Mega Cool Operation
MEGA COOL OPERATION In this operation, the air conditioner fan works at extra high speed with a setting temperature of 15°C. Press the MEGA COOL button during cooling mode. • The remote control will display " " . • The temperature display will go off. •... -
Page 21: Timer Operation
TIMER OPERATION ON TIMER Press the ON TIMER button. • The time setting will change as you press the button as follows. Hold the button down to speed through the settings. 0.5h 1.0h 1.5h • The orange TIMER lamp on the unit will light. •... -
Page 22: Main Unit Operation
MAIN UNIT OPERATION Use this mode when the remote control is not available. Press the POWER button on the unit. • The red OPERATION lamp on the unit will light. • If the unit has not been unplugged since it was last operated, it will resume operation at its last settings. -
Page 23: Maintenance
MAINTENANCE Be sure to disconnect the power from the wall socket before performing any mainte- nance. CLEANING THE FILTER If the fi lter is clogged with dust, the airfl ow will be reduced, resulting in poor cooling performance. The fi lter should be cleaned every two weeks. AIR FILTER REMOVE THE FILTER •... -
Page 24: Before Calling For Service
BEFORE CALLING FOR SERVICE If the unit appears to be malfunctioning, check the following points before calling for a service. AIR CONDITIONER DOES NOT OPERATE AT ALL • Is the unit plugged in or is the plug loose? • Has the fuse blown or is the circuit breaker tripped? •... - Page 25 Technical Specifications Parameter Unit Value Model CV-P10LJ Rated Voltage V~ 220-240 Power Rated Frequency Supply Phases Cooling Capacity 2930 Cooling Power Input 1100 Cooling Power Current 4.80 Rated Input 1250 Rated Current 5.80 Air Flow Volume(H/M/L) 350/260/180 Dehumidifying Volume 2.66...
- Page 26 Refrigerant R410A Refrigerant Charge 0.67 LANDA COMPRESSOR Compressor Compressor Model QXA-B102T130 Compressor Oil RB68EP Compressor Compressor Type Rotary L.R.A. 19.00 Compressor RLA 3.90 Compressor Power Input Fan Type Centrifugal Diameter Length(DXL) φ227 X 109 Fan Motor Speed(H/ML) r/min 950/750/500 Output of Fan Motor Fan Motor RLA 0.46 Fan Motor Capacitor...
- Page 27 Technical Specifications Parameter Unit Value Model CV-P13LJ Rated Voltage V~ 220-240 Power Rated Frequency Supply Phases Cooling Capacity 3550 Cooling Power Input 1360 Cooling Power Current 6.00 Rated Input 1550 Rated Current 7.20 Air Flow Volume(H/M/L) 350/260/180 Dehumidifying Volume 2.61 Application Area 18~24 Climate Type...
- Page 28 Refrigerant R410A Refrigerant Charge 0.95 Compressor MITSUBISHI Compressor Model RN125VHFMC Compressor Compressor Oil PVE(FV50S or similar) Compressor Type Rotary L.R.A. 23.00 Compressor RLA 4.70 Compressor Power Input 1030 Fan Type Centrifugal Diameter Length(DXL) φ227 X 109 Fan Motor r/min 950 / 800 / 600 Speed(H/ML) Output of Fan Motor Fan Motor RLA...
- Page 29 Consumer Electronic Products Congratulations on Your Purchase! This Sharp product is warranted against faults in materials and manufacture for a period of twelve (12) months from the date of original purchase. (excluding lamps and air filters. ) If service is required during the warranty period, please contact your nearest Sharp Approved Service Centre.
- Page 30 SHARP APPROVED SERVICE CENTRE VISIT OUR WEBSITE AT www.sharp.net.au OR CALL SHARP CUSTOMER CARE 1300 135 022 (LOCAL CALL COST APPLY WITHIN AUSTRALIA) SHARP CORPORATION OF AUSTRALIA PTY LTD SHARP FOR LOCATION ENQUIRIES WITHIN NEW ZEALAND REGARDING YOUR LOCAL SHARP APPROVED SERVICE CENTRE VISIT OUR WEBSITE AT www.sharp.net.nz...
- Page 32 SHARP CORPORATION OF AUSTRALIA PTY LTD ABN 40 003 039 405 1 Huntingwood Drive HUNTINGWOOD NSW 2148 www.sharp.net.au 66129905937...
Need help?
Do you have a question about the CV-P10LJ and is the answer not in the manual?
Questions and answers
All lights blinking then shuts off
When all lights (TIMER, OPERATION, and MEGA COOL) are blinking and the Sharp CV-P10LJ shuts off, it means the water tank is full and needs to be drained.
This answer is automatically generated