Advertisement
Advertisement
Table of Contents

Related Manuals for Sharp CV-P12PX


Summary of Contents for Sharp CV-P12PX
- Page 1 ROOM AiR CONDITIONER INSTALLATION AND OPERATION MANUAL - Plasmacluster is a trademark ACONDICIONADOR DE AIRE SHARP Corporation. - Plasmacluster es una marca reg- PARA HABITACiON TIPO istrada de SHARP Corporation. PORTATIL MANUAL DE INSTALACION Y FUNCIONAMIENTO CV-P1 CV-P1 CV-PD1 PX...
- Page 2 • MAINTENANCE ............... E-31 • BEFORE CALLING FOR SERVICE ........E-32 Declaration of Conformity SHARP ROOM AiR CONDiTiONER CV=P12PX,CV=P13PX,CV=PD13PX This device complies with Part 18 of FCC rules. Responsible Party: SHARP ELECTRONICS CORPORATION. Sharp Plaza, Mahwah, New Jersey 07430-2135 TEL: 1-800-BE-SHARP...
- Page 3 DATE OF PURCHASE Dealer Name Address City State Telephone TO PHONE: Dial 1-800-BE-SHARP (237-4277) for: SERVICE (for your nearest Sharp Authorized Servicer) PARTS (for your Authorized Parts Distributor) ACCESSORIES ADDITIONAL CUSTOMER INFORMATION TO WRITE: For service problems, warranty information, missing items and other assistance:...
- Page 4 In no event shall Sharp be liable, or in any way responsible, for any damages or defects in the Product which were caused by repairs or attempted repairs performed by anyone other than an authorized servicer. Nor shall...
-
Page 5: Precautions
Points to keep in mind when using your air conditioner. WARNINGS FOR USE • Install the air conditioner in accordance with the installation instructions in the latter section of this manual. • Do not modify any part of this product. •... -
Page 6: Cool Mode
USAGE CAUTIONS • Ventilate the room periodically during use, especially if using gas appliances. • Be sure to turn the unit off and disconnect the power supply cord before performing any mainte= nance or cleaning. • Do not splash or pour water directly onto the unit. - Page 7 OPERATING CONDITIONS • The air conditioner must be operated within the temperature range indicated below. MODE Room temperature Cool 64°F ~ 95°F Dehumidification 59°F ~ 95°F • A built-in safety device may cut off operation if the temperature exceeds these limits. •...
- Page 8 CV=P12PX / CV=P13PX Exhaust hose Rain deflector Washer © assembly Window exhaust Window slider adapter bracket Bolt Exhaust hose Foam seal A adapter A Exhaust hose Foam seal B © Split-ring adapter B (adhesive type) 1 washer Bracket Protective screen Manual Remote control Window panel...
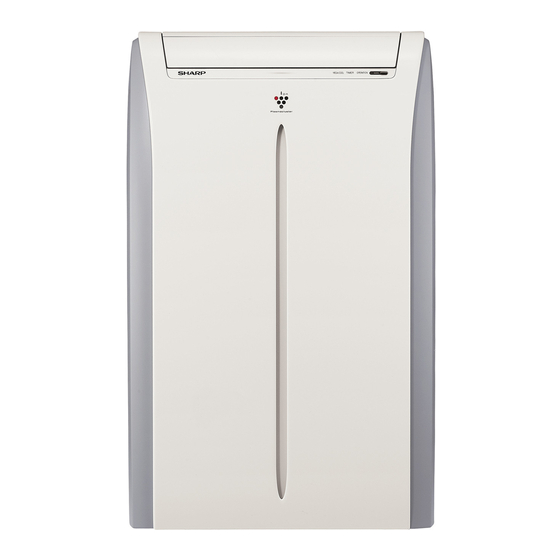
- Page 9 @ OPERATION Lamp (red) (_ TIMER Lamp (orange) @ MEGA COOL Lamp (green) (_ PLASMACLUSTER Lamp (blue) (_ Air inlet REAR VIEW CV-P12PX CV-P13PX CV-PD13PX(Single Duct use) (_ Exhaust air outlet (_ Window exhaust adapter (_ Exhaust hose adapter (_ Exhaust...
- Page 10 REMOTE CONTROL (_ Transmitter ® Display ® POWER Button PORTABLE AIR CONDITIONER (_ LIGHTS Button ® TEMPERATURE Button ® ® @ PLASMACLUSTER Button (_ SLEEP Button ® @ MODE Button ® ® ON TIMER Button ® ® @ FAN Button OFF TIMER Button ©...
- Page 11 Installation in a double-hung sash window (CV=P12PX, CV=P13PX) foam seal A to the proper length and attach it to the window stool. Foam seal A , Window panel Attach window exhaust adapter the window panel inside opening. Window exhaust adapter Inside Attach protective...
- Page 12 Adjustment panel If the inner width of the window is between 28" (718mm) and 36.5" (927mm) inclusive. Open the window sash and place window panel on the window stool. Slide adjustment panel to fit the window frame width. Secure the window panel to the stool with 3 large wood screws.
- Page 13 Installation in a double-hung sash window (CV-PD13PX) Cut the foam seal Ato the proper length and attach it to the window stool. Foam seal A Attach 2 window exhaust adapters the window panel inside opening. Inside Window exhaust adapter Attach 2 protective screens outside...
- Page 14 If the inner width of the window is between Adjustment panel 28" (718mm) and 36.5" (927mm) inclusive. Open the window sash and place window panel on the window stool. Slide adjustment panel to fit the window frame width. (3) Secure the window panel to the stool...
- Page 15 Installation in a sliding sash window (CV=P12PX, CV=P13PX) Cut the foam seal A to the proper length and attach it to the window frame. /'Foam seal A Window panel Attach window exhaust adapter the window panel inside opening. Window exhaust adapter Inside Attach protective...
- Page 16 If the inner height window between 28" (718mm) and 36.5" (927mm) inclusive. Adjustment panel (1) Open the window sash and place window panel on the window frame. 28"N36.5" (2) Slide the adjustment panel to fit the window frame height. (3) Secure the window panel to the window frame with 3 large wood screws.
- Page 17 Installation in a sliding sash window (CV-PD13PX) Cut the foam seal A to the proper length and attach it to the window frame. / Foam seal A Attach 2 window exhaust adapters the window panel inside opening. Window exhaust adapter Attach 2 protective screens...
- Page 18 If the inner height window between 28" (718mm) and 36.5" (927mm) inclusive. Adjustment panel (1) Open the window sash and place window panel on the window frame. 28"N36.5" (2) Slide the adjustment panel to fit the window frame height. (3) Secure the window panel to the window •...
- Page 19 Installation of the exhaust hose (CV=P12P×, CV=P13P×) Attach exhaust hose adapters and B to the exhaust hose. Extend both ends of the exhaust hose and insert them into the exhaust hose adapters A and B respectively, and turn Exhaust hose them until they stop.
- Page 20 Installation of the exhaust hose (CV=PD13PX) Attach exhaust hose adapters and B to the exhaust hoses. Extend both ends of the exhaust hose and insert them into the exhaust hose adapters A and B respectively, and turn Exhaust hose them until they stop.
- Page 21 NOTICE" If the dual-duct type unit is used as single=duct type one, please refer to the follow= ing instructions: Attach the grille and the cover to the unit. Open baffle remove it. Insert the 2 projections on the grille into the 2 holes on the back plate of the unit, and close the grille.
- Page 22 Removal of the exhaust hose Remove the exhaust hose adapter Remove exhaust hose adapter from the window exhaust adapter. Exhaust hose adapter A Window exhaust adapter Remove exhaust hose adapter from the unit. Lift up and remove exhaust hose adapter from the unit by pushing down on the two projections.
- Page 23 This air conditioner uses a fused power plug. Always check the power plug before use. Press the RESET button. insert power plug into the wall socket. Press the TEST button. You will hear a CLICK if the circuit breaker is functioning correctly.
- Page 24 HOW TO USE THE REMOTE CONTROL Point remote control towards units signal receiver window press desired button. beep will sound when the unit ceives the signal. • Make sure nothing, such as curtains, blocks the signal receiver window. • The remote control operates...
- Page 25 Ensure that the stopcock is securely attached drainpipe. Drainpipe Press MODE button to select COOL mode. COOL DEHUM VENT Press POWER button to start opera- tion. PORTABLE AIR CONDITIONER • The red OPERATION lamp on the unit will light. Press TEMPERATURE button to set...
-
Page 26: Fan Mode
in this mode, the air conditioner simply circulates the air without cooling Ensure that the stopcock is securely attached the drainpipe. Press the MODE button to select FAN mode. COOL DEHUM VENT Press the POWER button to start operation. • The red OPERATION lamp on the unit will light. •... - Page 27 UP/DOWN AiR FLOW DiRECTiON Press LOUVERS button on the (W_S i y/jz' mote control. _S_ .J:7 ....... ;:x ....• The horizontal louvers will swing continu- ously. *:coo_ _L_ Press the LOUVERS button again when :DEHUM ...._....the horizontal louvers are at the desired LOUVE...
-
Page 28: Ventilation Mode
Plasmacluster ions released into the room will reduce some airborne mold. Press PLASMACLUSTER button during operation. PORTABLE AIR CONDITIONER'] • The remote control will display "=_on=.. • The blue PLASMAOLUSTER lamp on the unit will light. I TO CANCEL Press the PLASMACLUSTER button again. -
Page 29: Mega Cool Operation
in this operation, the air conditioner fan works at extra high speed with a setting temperature of 59°F. Press the IVlEGA COOL button during cooling mode. • The remote control will display "_ " • The temperature display will go off. •... - Page 30 Press the ON TIMER button. • The time setting will change as you press the button as follows. Hold the button down to speed through settings. 0.5h--_-l.0h-D,-1.5h----_10h-4_llh--_-12h---, • The orange TIMER lamp on the unit will light. • The time setting will count down to show the remaimng time.
-
Page 31: Drainage
Use this mode when the remote control is not available. Press the POWER button on the unit. • The red OPERATION lamp on the unit will light. • If the unit has not been unplugged since it was last operated, it will resume operation at its last settings. -
Page 32: Maintenance
Be sure to disconnect the power from the wall socket before performing any mainte= nance, If the filter is clogged with dust, the airflow will be reduced, resulting in poor cooling performance. The filter should be cleaned every two weeks. AIR FILTER REMOVE THE FILTER... - Page 33 if the unit appears to be malfunctioning, check the following points before calling for a service. AiR CONDiTiONER DOES NOT OPERATE AT ALL • Is the unit plugged in or is the plug loose? • Has the fuse blown or is the circuit breaker tripped? •...
Need help?
Do you have a question about the CV-P12PX and is the answer not in the manual?
Questions and answers