Table of Contents
Advertisement
Quick Links
Series Fans
Motor Ass'y with
Ceiling Fan Ac cessory
Weight 22 lbs
Motor As sembly
#FPH210
Weight 19 lbs
Motor Ass'y with
Wall Accessory
Weight 27 lbs
Motor Ass'y with
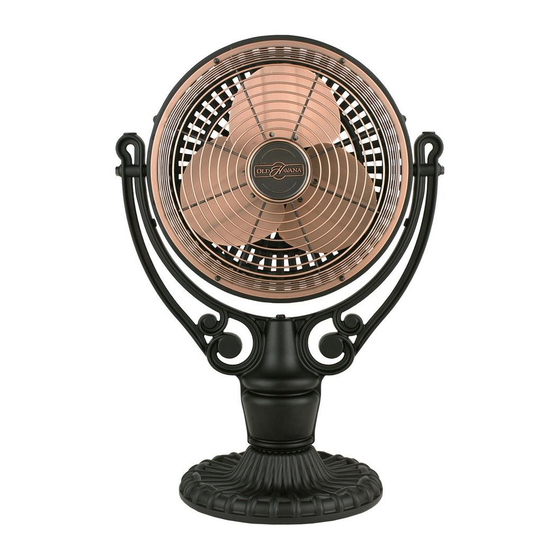
Pedestal Ac cessory
Weight 29 lbs
Motor Ass'y
with Floor/Desk
Accessory
Weight 25 lbs
OWNER'S MANUAL
READ AND SAVE THESE INSTRUCTIONS
Advertisement
Table of Contents

Related Manuals for Fanimation Old Havana Series


Summary of Contents for Fanimation Old Havana Series
- Page 1 Series Fans Motor Ass'y with Ceiling Fan Ac cessory Weight 22 lbs Motor As sembly #FPH210 Weight 19 lbs Motor Ass'y with Wall Accessory Weight 27 lbs Motor Ass'y with Pedestal Ac cessory Weight 29 lbs Motor Ass'y with Floor/Desk Accessory Weight 25 lbs OWNER’S MANUAL...
-
Page 2: Important Safety Instructions
6. All costs of removal and reinstallation of the fan are the sole responsibility of the owner of the fan and not the store that sold the fan or Fanimation. 7. Fanimation reserves the right to modify or discontinue any product at any time and may substitute any part under this warranty. - Page 3 Fanimation. Substitution of parts or accessories not designated for use with this product by Fanimation could result in personal injury or property damage. Contact your retail store for missing or damaged parts. 1. Check to see that you have received the following...
- Page 4 Fanimation. Substitution of parts or accessories not designated for use with this Motor product by Fanimation could result in personal injury Downrod / Coupling or property damage. Contact your retail store for Hanger Ball Cover missing or damaged parts.
- Page 5 How to Assemble the Black Green ¼˝ Thread ed White (Ground) Ceiling Accessory NOTE: Proceed to page 8 for Assembly Instructions if Internal you have purchased a Floor/Desk Model, page 10 for Disc Pedestal Model Assembly Instructions and page 12 for Wall Mount Model Assembly Instructions.
- Page 6 How to Assemble the Ceiling Accessory (cont'd) 10. Remove the ¼˝ rod and thread the third ¼-20 x 1½˝ Green allen head bolt into this hole. Ceiling (Ground) Canopy White 11. Tighten the 3 allen head bolts. Downrod Green /Hanger Ball 12.
-
Page 7: Electrical And Structural Requirements
Electrical and Structural Requirements Your new ceiling fan will require a grounded electrical supply line of 120 volts AC, 60 Hz, 15 amp circuit. The outlet box must be securely anchored and capable of withstanding a load of at least 50 lbs. Figure 6 depicts Ceiling different structural configurations that may be used for mounting the outlet box. -
Page 8: How To Wire Your Ceiling Fan
How to Hang Your Ceiling Fan (cont'd) 3. Carefully lift the fan and seat the downrod/hanger ball Outlet assembly on the hanger bracket that was just attached to the outlet box (Fig. 8). Be sure the groove in the ball is lined up with tab on the hanger bracket (Fig. - Page 9 How to Wire Your Ceiling Fan (cont'd) WARNING Check to see that all connections are tight, including ground, and that no bare wire is visible at the wire connectors, except for the ground wire. Do not operate fan until all parts are assembled. Noise and fan damage could result.
- Page 10 Fanimation. Substitution of parts or accessories not designated for use with this product by Fanimation could result in personal injury or property damage. Contact your retail store for missing or damaged parts. 1. Remove Floor / Desk base from carton.
- Page 11 How to Assemble Your Floor / Desk Fan 1. After removing the Floor/Desk base from the carton, place it on the floor with the flat surface resting on the floor. Floor / Desk Base 5/16˝ x 2½˝ Bolt & Washer Fig.
- Page 12 Fanimation. Substitution of parts or accessories not designated for use with this product by Fanimation could result in personal injury or property damage. Contact your retail store for missing or damaged parts. Floor NOTE: Column is not included and is sold seperately.
-
Page 13: How To Assemble Your Pedestal Fan
How to Assemble Your Pedestal Fan 1. Assemble Column to floor base using 15/16˝-18 x 1½˝ 4. Position the Motor Assembly onto the Column. bolt and washer (Fig. 18). Do not overtighten. 5. Secure the Motor Assembly with a 5/16-18 x 2½˝ bolt 2. - Page 14 Fanimation. Substitution of parts Packaging or accessories not designated for use with this product by Fanimation could result in personal injury or property damage. Contact your retail store for missing or damaged parts. Wall 1. Check to see that you have received the fol lowing...
- Page 15 Mounting Wall Bracket to Wall 1. Determine approximate position of fan. 2. Locate stud in your wall. 3. For stud installation the top and bottom holes on wall bracket will be used. These holes are on 11” #12-3” centers. Screws (2) Stud 4.
- Page 16 Using Your Wall Fan Operating Your Wall Fan 1. Your fan is now ready to operate. 1. Check the operation of the fan by turning the speed control to “high”. 2. Plug the fan into a U.L. approved 120 volt outlet. 2.
-
Page 17: Maintenance
Maintenance Periodic cleaning of your fan is the only main tenance CAUTION that is needed. Do not use water when cleaning your ceiling fan. It could damage the motor or the finish and create the When cleaning, use only a soft brush or lint free cloth possibility of electrical shock. - Page 18 MOTOR ASSEMBLY MODEL # FPH210_ _ Item # Description Part # Motor Assembly FPH210_ _ CEILING FAN ACCESSORY MODEL # FPH81_ _ Item # Description Part # Ceiling Canopy / Hanger Bracket Assembly Hanger Bracket APG510BL Ceiling Canopy PG150_ _ Knurled Knobs (2) 5/32˝...
- Page 19 Ceiling Fan Unit...
- Page 20 MOTOR ASSEMBLY MODEL # FPH210_ _ Item # Description Part # Motor Assembly FPH210_ _ FLOOR / DESK ACCESSORY MODEL # FPH41_ _ Item # Description Part # Floor / Desk Base PHDB Standard Hardware Bag 5/16˝-18 x 2½˝ Bolt 5/16˝...
- Page 21 MOTOR ASSEMBLY MODEL # FPH210_ _ Item # De scription Part # Motor Assembly FPH210_ _ PEDESTAL ACCESSORY MODEL # FPH21_ _ Item # Description Part # Floor Base PHFB Pedestal Column (optional) PHPC Standard Hardware Bag 5/16˝-18 x 2½˝ Bolt 5/16˝...
- Page 22 MOTOR ASSEMBLY MODEL # FPH210_ _ Item # Description Part # Motor Assembly FPH210_ _ WALL MOUNT ACCESSORY MODEL # FPH61_ _ Item # Description Part # Wall Bracket PHWB Standard Hardware Bag 5/16˝-18 x 2 ½˝ Bolt 5/16˝ Flat Washers (3) PHSHB Special Hex Bolt 5/16˝-18 x 1½˝...
- Page 23 Changing the Motor Assembly Position These instructions apply to all four fan models. 1. Loosen 5/16-18 x 2½˝ bolt (Item #22) on Motor Assembly. Position Motor Assembly to desired po sition and retighten bolt (Fig. 27) Fig. 27 2. The fans will not os cillate. To swivel the direction of the Mo tor As sembly follow the instructions be low.