Table of Contents
Advertisement
Quick Links
Advertisement
Table of Contents

Related Manuals for moon Evolution P-8


Summary of Contents for moon Evolution P-8
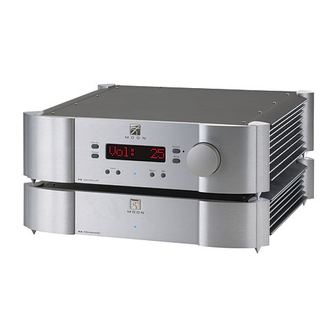
- Page 1 Owner’s Manual MOON Evolution Series Reference Dual-Mono Preamplifier...
-
Page 2: Important Safety Instructions
MOON P-8 Dual-Mono Preamplifier Important Safety Instructions Read these instructions. Keep these instructions. Heed all warnings. Follow all instructions. Do not use this apparatus near water. Clean only with a dry cloth. Do not block ventilation openings. Install in accordance with the manufacturer’s instructions. - Page 3 To prevent shock hazard, all three connections must ALWAYS be used. Connect the MOON P-8 only to an AC source of the proper voltage; Both the shipping box and rear panel serial number label will indicate the correct voltage. Use of any other voltage will likely damage the unit and void the warranty AC extension cords are NOT recommended for use with this product.
-
Page 4: Table Of Contents
Table of Contents Congratulations ..........5 Unpacking............5 Introduction ............. 6 Installation & Placement ........6 Connecting the P-8 Preamplifier & Controller ..7 Front Panel Controls ........8 Software Setup ..........9 Rear Panel Connections ........11 SimLink™ ............12 Operating the P-8 ..........13... -
Page 5: Congratulations
Your new preamplifier is a true dual-mono design, whereby each channel operates completely independent of the other. The performance of your P-8 will continue to improve during the first 400 hours of listening. This is the result of a “break-in”... -
Page 6: Introduction
These cones will easily scratch most surfaces, therefore it’s advisable to follow these instructions: Place your P-8 on a soft surface (i.e. carpet) and carefully turn it so that it rests on its side. Screw one cone onto each of the four posts. -
Page 7: Connecting The P-8 Preamplifier & Controller
Ensure that the AC wall outlet you use has a functioning ground. For the best sonic performance, it is preferable that you plug your MOON P-8 preamplifier directly into a dedicated AC outlet and avoid using an extension cord. -
Page 8: Front Panel Controls
2) engage the effects of the signal processor. The monitor component’s outputs must be connected to the P-8’s “Tape Monitor In” and its inputs must be connected to the P-8’s “Tape Monitor Out”. -
Page 9: Software Setup
Note: To change the balance between the left and right channels, please refer to the section “Remote Control Operation”. The “Input +” and “Input -” buttons allow you to choose which input source you wish to listen to. The MOON P-8 dual-mono preamplifier has a total of seven (7) inputs;... - Page 10 (ii) exit from the Setup procedure by pressing the “Setup” button three times or (iii) continue with the Setup procedure and either assign the 12 Volt trigger outputs or reset the P-8 back to factory default status (see the following examples).
- Page 11 (continued) The MOON P-8 is equipped with two 12 Volt trigger outputs. When an input is assigned to a 12 Volt trigger, the device connected to the trigger will automatically start-up whenever you switch to that input. The default setting for all seven inputs is on.
-
Page 12: Rear Panel Connections
This preamplifier is also equipped with a single-ended tape monitor loop; the input and output connectors for each channel are located on their respective sides of the rear panel. The P-8 has two (2) pairs each of balanced outputs and single-ended outputs. -
Page 13: Simlink
In the event that you plan to be away from your home for a few days, powering off the preamplifier may not be a bad idea. Once fully “broken-in”, please keep in mind that your P-8 will require several hours of playing time before it reaches its peak performance after you’ve powered it up again. -
Page 14: Balanced Operation
For example, when one conductor is carrying a signal of +10 Volts, the other will be carrying a signal of –10 Volts. When these two inverted signals on a balanced line are output from the MOON P-8, any noise picked up by the interconnect will be eliminated since a differential circuit amplifies only the difference between these two signals: Noise on a balanced interconnect will be equal on both conductors and therefore not be processed. -
Page 15: Specifications
Pin 1........ Ground Pin 2........ Positive Pin 3 ......Negative NOTE: In the event that you require the RS-232 codes for your MOON P-8, please contact Simaudio Ltd. directly by either email (service@simaudio.com) or by toll-free telephone (877-980-2400). Fuse Replacement: For the 120V version use a 400mA slow blow (5 x 20mm size).
Need help?
Do you have a question about the Evolution P-8 and is the answer not in the manual?
Questions and answers