Advertisement
Quick Guide
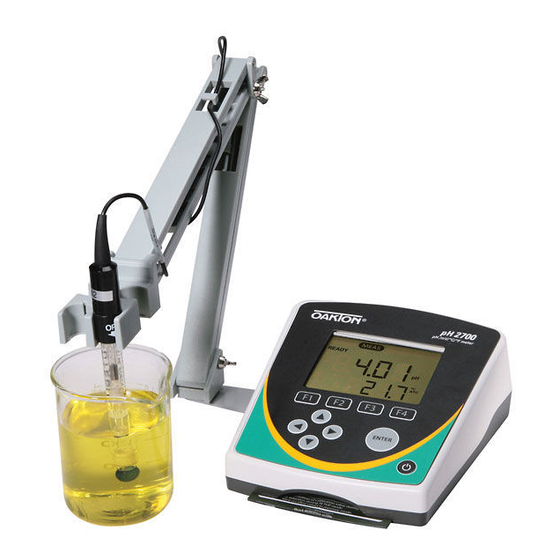
Bench 2700 Series
pH/mV/Ion/Conductivity/TDS/Salinity/
Resistivity/Dissolved Oxygen/ºC/ºF
GETTING STARTED
Keypad And Display
n
Soft Function Keys (F1, F2,
F3, F4): Function varies.
Operation corresponds to
highlighted tab directly above
in the display.
Left/Right: Navigates available
Tabs in Measurement mode. Moves
cursor during certain setup modes.
Up/Down: Use to modify values in
Setup & Calibration modes.
Keys
Functions
Auto Read is enabled. When fl ashing, the instrument has detected a 'Stable'
reading and locked the value. Press MEAS to resume live reading. To disable
this feature go to SETUP...SYSTEM...AUTO READ.
Based on the stability criteria settings in System Setup, the instrument has
detected a stable reading.
Password Protection: Enabled.
Requires password for all calibration and setup menus.
Password Protection: Disabled.
No password required for any menu.
Print Setting Timed interval is active; data is being output at regular intervals.
"High Alarm", "Low Alarm", or "Cal Due" alarm limit had been reached.
High/Low alarms also have an audible notifi cation.
Sample ID: User selectable fi ve digit number to identify samples.
Measuring Range # of displayed value (1 thru 5). Applicable to Conductivity,
TDS, Salinity, or Resistivity measurements only.
Automatic Temperature Compensation is active; temperature is being actively
acquired with attached electrode. ATC is recommended.
Manual Temperature Compensation is active. A temperature sensor may not
be attached so the default temperature is used.
ENTER: Use to accept selection
or confi rm value. In Setup mode,
confi rms selection of modifi ed
values. In Calibration mode,
confi rms calibration values.
POWER: Turns the meter on and
off . Upon power on, the meter
automatically begins in the mode
that was last used. Calibration and
memory values are retained even
if meter is unplugged. The time is
displayed during power off .
1
Part of Thermo Fisher Scientifi c
Advertisement
Table of Contents

Related Manuals for Oakton Bench 2700 Series


Summary of Contents for Oakton Bench 2700 Series
-
Page 1: Getting Started
Quick Guide Bench 2700 Series pH/mV/Ion/Conductivity/TDS/Salinity/ Resistivity/Dissolved Oxygen/ºC/ºF Part of Thermo Fisher Scientifi c GETTING STARTED Keypad And Display Soft Function Keys (F1, F2, F3, F4): Function varies. Operation corresponds to highlighted tab directly above in the display. ENTER: Use to accept selection or confi rm value. -
Page 2: Navigation Of Tabs
Navigation Of Tabs Resumes live Begin Calibration Toggles available Sends data to measurement Mode using current measurement modes printer or PC when Auto measured value Read is flashing MEAS MODE PRINT Enters Setup mode; Inserts measured value Access stored values Access Calibration use to change into memory... -
Page 3: Stability Criteria
SYSTEM SETUP & CONFIGURATION SETUP Use the System Setup to customize operation of your 2700 series meter. Press from the measurement screen and then press ENTER when SYSTEM is highlighted to access these settings. The following settings can be customized for each model: STABILITY STABILITY CRITERIA AUTO READ... -
Page 4: Print Setup
Auto Read If AUTO READ is enabled, the measured value will automatically lock when the Stable indicator appears. A flashing “AR” icon confirms this condition. To resume a live reading again, it is necessary to press MEAS each time Stable appears. Disable this feature to continuously view the active reading. -
Page 5: Clear Datalog
If an incorrect password is entered 3 consecutive times, the meter returns to measurement mode. In the event the password can not be recovered, a password can be provided via a written request to Eutech Instruments/Oakton Instruments. The instrument serial number and your contact information are required. Clear Datalog Select “YES”... - Page 6 pH CALIBRATION GUIDE pH Calibration (Using Custom Buffers) Follow same procedure as below – differences are: 2 point minimum calibration is required, the primary display in cal mode is manually adjusted to the desired custom buffer value, and any pH value can be used in any order –...
- Page 7 3. Press after ‘Stable’ appears. The calibration value is acceptable if it is within 15 to 90 mV/decade and will be visible inside of a beaker icon. 4. Repeat steps 2 & 3 with the next lowest calibration standard (up to 8 standards) or press to save the calibration.
- Page 8 Tip: When calibrating both 100 % and 0 %, always perform 100 % fi rst. For more information on our products, please contact our channel partner or visit our websites listed below: Eutech Instruments Pte Ltd Oakton Instruments Eutech Instruments Europe B.V. Blk 55, Ayer Rajah Crescent, 625 E Bunker Ct, P.O.
Need help?
Do you have a question about the Bench 2700 Series and is the answer not in the manual?
Questions and answers