
Related Manuals for Vantec UGT-ST622


Summary of Contents for Vantec UGT-ST622
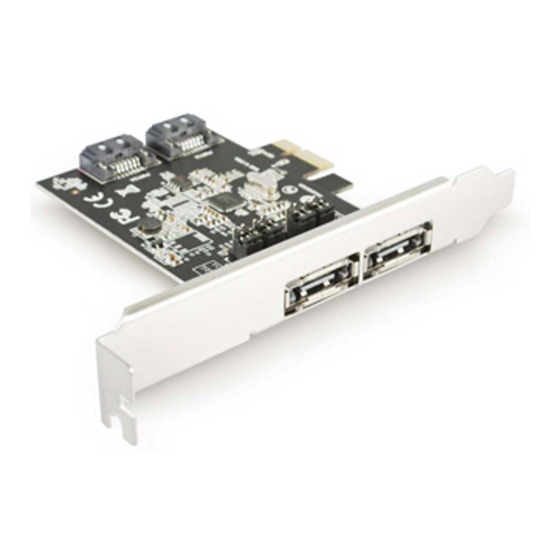
- Page 1 SATA 6G PCIe Card User Manual Model: UGT-ST622 All brand names and trademarks are properties of their respective owners www.vantecusa.com...
-
Page 2: Table Of Contents
2.2 Hardware Installation ..........7 2.3 Driver Installation ............8 2.3.1 Installation for Windows XP/Server 2003 .... 8 2.3.2 Installation for Windows Vista/7/Server 2008 ..11 2.4 Hardware Verify............13 2.4.1 Verifying for Windows XP/Vista/7 /Server 2003/Server 2008 ........13 UGT-ST622 Page 2... -
Page 3: Chapter 1: Introduction
2.0 double the bandwidth of the existing PCI Express bus for faster data throughput. It will enhance system performance for every type of computer user. Each PCI-Express 2.0 lane provides up to 500MB/s of throughput. It also backward compatible with previous generation of PCI Express 1.0 technology. UGT-ST622 Page 3... -
Page 4: Features
Support Port Multiplier Compatible with SATA 6G, 3G and 1.5G Hard Drives Supports Windows® XP/Vista/7/Server 2003/Server 2008(32/64 bit) 1.3 System Requirements Windows® XP/Vista/7/Server 2003/Server 2008(32/64 bit) PCI Express-enabled system with one available PCI Express slot UGT-ST622 Page 4... -
Page 5: Package Contents
SATA 6G PCIe Card circuit board, you will be able to utilize two of the ports simultaneously. Please designate which ports you wish to use, by adjusting jumper setting according to the chart below. By default, Port A & B are working. UGT-ST622 Page 5... - Page 6 UGT-ST622 Page 6...
-
Page 7: Hardware Installation
PCIe slot on the motherboard. Push the board down firmly. Attach your internal devices to the SATA 6G PCIe Card. Replace the slot bracket’s holding screw to secure the card. Replace the computer cover and reconnect the power cord. UGT-ST622 Page 7... -
Page 8: Driver Installation
A new installation requires a floppy disk for the driver installation. To make this floppy disk, copy the contents of the “ UGT-ST622\Driver\XP” folder, found on the driver CD, onto a blank floppy disk then follow the directions below. Follow Microsoft’s Windows installation procedure. - Page 9 A new installation requires a floppy disk for the driver installation. To make this floppy disk, copy the contents of the “ UGT-ST622\Driver\XP” folder, found on the driver CD, onto a blank floppy disk then follow the directions below. Follow Microsoft’s Windows installation procedure.
- Page 10 Please insert the CD driver bound with SATA 6G PCIe Card into your CD-ROM Drive. At the Windows desktop, click Start, then Run. Type D:\UGT-ST622\Setup.exe, click OK. (Change D:\ to match your CD-ROM drive letter) Follow the on-screen instructions to complete the installation.
-
Page 11: Installation For Windows Vista/7/Server 2008
For An Existing Installation Please insert the CD driver bound with SATA 6G PCIe Card into your CD-ROM Drive. At the Windows desktop, click Start, then Run. Type D:\UGT-ST622\Setup.exe, click OK. (Change D:\ to match your CD-ROM drive letter) UGT-ST622 Page 11... - Page 12 At the Windows Setup screen, press Load Driver to install the RAID driver. Insert the CD driver bound with SATA 6G PCIe Card into your CD-ROM Drive, please select Asmedia 106x SATA Controller (D:\UGT-ST622\Driver\Win7\x64\asahci64.inf), then press Next. (Change D:\ to match your CD-ROM drive letter) Continue with Windows OS installation.
-
Page 13: Hardware Verify
Type D:\UGT-ST622\Setup.exe, click OK. (Change D:\ to match your CD-ROM drive letter) Follow the on-screen instructions to complete the installation. Restart Windows to complete the installation. 2.4 Hardware Verify 2.4.1 Verifying Windows XP/Vista/7/Server 2003/Server 2008 Right click My Computer and click Manage.
Need help?
Do you have a question about the UGT-ST622 and is the answer not in the manual?
Questions and answers