Table of Contents
Advertisement
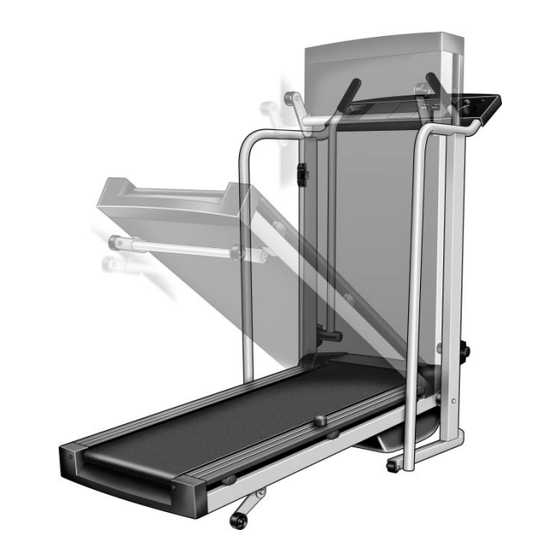
Model No. 831.297380
Serial No.
The serial number is found in the loca-
tion shown below. Write the serial num-
ber in the space above for reference.
CAUTION
Read all precautions and in-
structions in this manual before
using this equipment. Save this
manual for future reference.
®
Serial
Number
Decal
USER'S MANUAL
SEARS, ROEBUCK AND CO., HOFFMAN ESTATES, IL 60179
Advertisement
Table of Contents

Subscribe to Our Youtube Channel
Related Manuals for ProForm Cross Walk 2.5


Summary of Contents for ProForm Cross Walk 2.5
- Page 1 ® Model No. 831.297380 Serial No. The serial number is found in the loca- tion shown below. Write the serial num- ber in the space above for reference. Serial Number Decal CAUTION Read all precautions and in- structions in this manual before using this equipment.
-
Page 2: Table Of Contents
TABLE OF CONTENTS IMPORTANT PRECAUTIONS ..............2 BEFORE YOU BEGIN . - Page 3 14. Never start the treadmill while you are stand- ASSEMBLY on pages 5 and 6, and HOW TO ing on the walking belt. Always hold the MOVE THE TREADMILL on page 11.) You handrails or upper body arms while using the must be able to safely lift 45 pounds (20 kg) treadmill.
-
Page 4: Before You Begin
BEFORE YOU BEGIN Thank you for selecting the PROFORM ® CROSS- Time (excluding holidays). To help us assist you, WALK 2.5 treadmill. The CROSSWALK 2.5 treadmill please note the product model number and serial num- blends advanced technology with innovative design to ber before calling. -
Page 5: Assembly
ASSEMBLY CAUTION: Read and follow step 1 below before removing the restraining tie (see drawing 1). If the restrain- ing tie is removed prematurely, serious bodily injury may result. Assembly requires two people. Set the tread- mill in a cleared area and remove the packing materials except for the restraining tie. Do not dispose of the packing materials until assembly is completed. - Page 6 4. With the help of a second person, carefully lower the Left and Right Uprights (1, 44) until the handrails are resting on the floor. Handrails 5. Attach six Base Pads (57) to the bottom of the Base (59) in the indicated locations. Note: An extra Base Pad may be included.
-
Page 7: Operation And Adjustment
OPERATION AND ADJUSTMENT THE PERFORMANT LUBE WALKING BELT electric shock. This product is equipped with a cord having an equipment-grounding conductor and a grounding plug. Plug the power cord into a surge Your treadmill features a walking belt coated with protector, and plug the surge protector into an ap- PERFORMANT LUBE , a high-performance lubricant. - Page 8 DIAGRAM OF THE CONSOLE Monitor Displays • Misuse of this treadmill may cause serious injury. • Do not stand on walking belt when starting treadmill. • Read User's Manual and follow warnings and operating instructions. • Keep fluids off electronic console. Pulse Clip Sensor...
- Page 9 Insert the key fully into the power switch. CALORIES/FAT CAL- Arrows ORIES/PULSE display—This display Inserting the key will not turn on the dis- shows the approximate calories and plays. The displays will numbers of fat calories you have turn on when the ON/RESET button is burned.
-
Page 10: How To Fold And Move The Treadmill
When you are finished exercising, stop the To vary the intensity of your upper body exercise, the walking belt and remove the key. resistance of the upper body arms can be adjusted. To increase the resistance, turn the resistance knobs clock- Step onto the foot rails, wise;... -
Page 11: To Move/Lower
2. Move your right hand to the position shown and hold the treadmill firmly. Raise the treadmill until the storage latch closes over the frame guide. Make sure that the storage latch closes fully over the frame guide. To protect the floor or carpet from damage, place a mat under the treadmill. -
Page 12: Trouble-Shooting
TROUBLE-SHOOTING Most treadmill problems can be solved by following the simple steps below. Find the symptom that ap- plies, and follow the steps listed. If further assistance is needed, call our toll-free HELPLINE at 1-800-736- 6879, Monday through Saturday, 7 a.m. until 7 p.m. Central Time (excluding holidays). 1. - Page 13 6. SYMPTOM: THE WALKING BELT IS OFF-CENTER WHEN WALKED ON a. If the walking belt has shifted to the left, first remove the key and UNPLUG THE POWER CORD. Using the 3/16” end of the allen wrench, turn the left rear roller adjustment bolt clockwise, and the right bolt counterclockwise, 1/4 of a turn each.
-
Page 14: Conditioning Guidelines
Locate the Reed Switch (38) and the Magnet (39) on the left side of the Pulley (90). Turn the Pulley until the Magnet is aligned with 1/8” the Reed Switch. Make sure that the gap between the Magnet and the Reed Switch is about 1/8”. If necessary, loosen the Screw (19) and move the Reed Switch slightly. - Page 15 High Performance Athletic Conditioning Training Zone Exercise If your goal is high performance athletic conditioning, After warming up, increase the intensity of your exer- set the speed control on the console to PERFOR- cise until your heart rate is in your training zone for 20 MANCE to help you maintain the proper intensity level.
-
Page 16: Hardware Identification Chart
Remove this HARDWARE IDENTIFICATION CHART, EXPLODED DRAWING and PART LIST from the user’s manual. Save this page for future reference. HARDWARE IDENTIFICATION CHART The chart below is provided to help you identify the small parts used in assembly. The number in parenthesis below each part refers to the key number of the part. - Page 17 PART LIST—Model No. 831.297380 R0197A Key No. Part No. Qty. Description Key No. Part No. Qty. Description 135635 Left Upright 119375 Incline Shock Bolt 131882 Front Frame Cover 116927 Wire Tie Holder 113227 Incline Knob Sleeve 013141 Latch-Frame Guide Screw 136012 Handrail Nut 014132...
-
Page 19: Replacement Parts
The model number and serial number of your PROFORM ® Model No. 831.297380 CROSSWALK 2.5 treadmill are listed on a decal attached to the frame. See the front cover of this manual to find the location of the decal. QUESTIONS? All replacement parts are available for immediate purchase or special order when you visit your nearest SEARS Service Center.
Need help?
Do you have a question about the Cross Walk 2.5 and is the answer not in the manual?
Questions and answers