Advertisement
Quick Links
Advertisement

Subscribe to Our Youtube Channel
Related Manuals for thomann Millenium Transformer Bundle


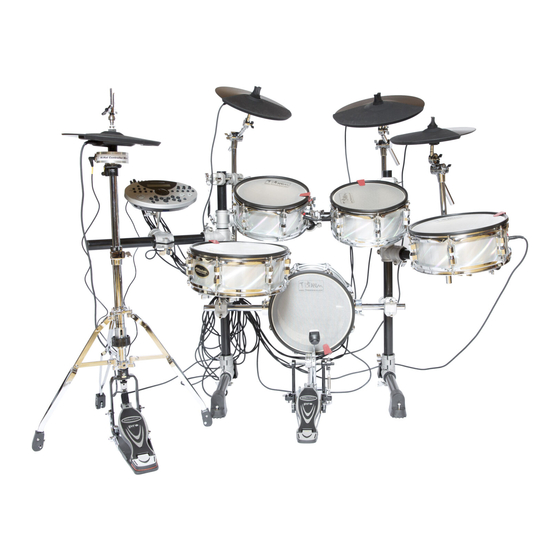
Summary of Contents for thomann Millenium Transformer Bundle
- Page 1 Millenium Transformer Bundle Instruction Manual...
- Page 2 Taking Care of Your Digital Drum Set Thank you for purchasing this digital drum module. The drum module has been developed to act and play like a drum set but with greater ease. Before you use the instrument, we recommend you read through this manual. Location •...
-
Page 3: What's In The Box
What’s in the box The Millenium Transformer Set is packed in three packages: The slightly thinner package contains the complete rack system as well as 3 boom arms and two rubber feet. In the second package, you will find: • 2 Transformer 10“ Pads •... - Page 4 Part 1 – The rack system Please be aware that this is just a guideline. You can adjust the height or width as required. The rack is already partially set up. The two rubber feet should be attached to the pipes on the bottom of the rack. Turn the bottom pipes to you so that you get more stability as shown on the right side here.
- Page 5 Next, put all of the L-pieces upwards and adjust the height of the horizontal pipes. Recommendation: Put all horizontal rack pipes a little higher so that it will become easier for adults to use this drum kit properly.
-
Page 6: Part 2 - The Pads
Part 2 – The Pads All of the pads are packed in the second parcel and include the cables needed. Bass drum pad: Here is included: • The Pad • One short and two longer pipes • Foot plate • Two rack joints. The Millenium Transformer Kickpad contains three brackets for the different pipes: The smaller pipe should be connected to the footplate with the screw, on the other end it should be connected with the centre bracket of the pad. - Page 7 The two longer pipes should be connected to the other two brackets. On the other end of the pipes, you connect the rack clamps. After setting everything up, it should look like this here: Now you can connect the rack clamps onto the vertical pipes of the rack, just as shown on the picture here.
- Page 8 The cymbal pads are mounted onto the boom arms just as you mount acoustic cymbals onto boom stands. Put the cymbal right between the two felts right under the screw as you can see here and tighten the screw slightly. Now it’s nearly complete, but one thing is still missing: the module!
- Page 9 It can get a bit tricky here: You need to turn around the metal part of the multi clamp as you can see here on the picture: Then you can simply connect the clamp to the tom holder on the left side of the rack.
- Page 10 Part 3 – Millenium Hi-Hat Controller Mine The Millenium Hi-Hat controller mine can be mounted onto ANY Hi-Hat stand and can be used as a normal Hi-Hat controller with the feeling of a real acoustic Hi-Hat. Put the Hi-Hat controller mine onto the Hi- Hat stand as you can see here: The e-cymbal is then placed in between the Hi-Hat clutch as you can see here:...
- Page 11 Part 4 - Cables This is the easiest part: On the backside of the module you will see the exact description about which cable should be connected to which input. Meaning: the snare cable should be put into the snare input, tom cable to tom input etc.
Need help?
Do you have a question about the Millenium Transformer Bundle and is the answer not in the manual?
Questions and answers