Table of Contents
Advertisement
Quick Links
Advertisement
Table of Contents

Related Manuals for Polar Electro Xtrainer Plus


Summary of Contents for Polar Electro Xtrainer Plus
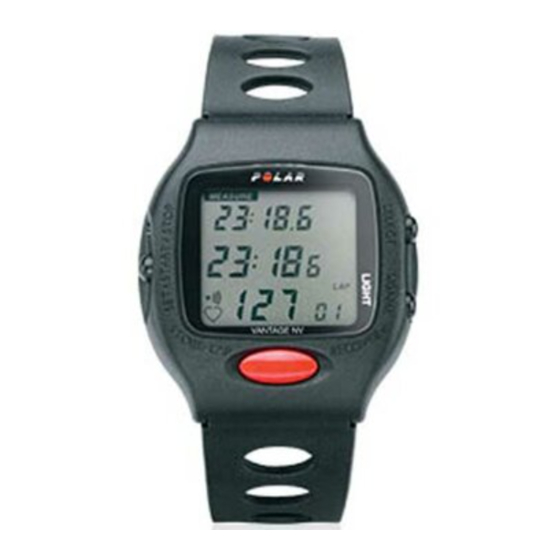
- Page 2 QUICK REFERENCE GUIDE QUICK REFERENCE GUIDE IN HEART RATE MODE FUNCTION BUTTON Illuminate the display SIGNAL/LIGHT Turn the Target Zone sound SIGNAL/LIGHT (press and hold) signal off/on Stop/start the stopwatch SET/START/STOP Check the Secondary Bring Receiver close to the Polar logo Time Display with illumination, of the Transmitter Transmission Code and Heart...
- Page 3 ROAD MAP ROAD MAP...
- Page 4 HOW TO READ THIS GUIDE HOW TO READ THIS GUIDE Visual cues Indicates a tip to do things faster. Indicates important issues. Please, pay attention! Indicates a useful tip. It's good to know these things. See also / Continue from Monitor symbols A flashing heart with borders indicates heart rate measurement with coded transmission.
-
Page 5: Table Of Contents
CONTENTS CONTENTS POLAR XTRAINER PLUS ............... 4 Features ........................5 Parts ..........................7 Installing the Polar Bike Mount ..................8 Installing the Polar Speed Sensor ................. 8 Getting going ........................ 9 SETTING THE WATCH ................. 11 SETTING THE HEART RATE AND CYCLING FEATURES ...... 15 STARTING THE MEASUREMENT ............ -
Page 6: Polar Xtrainer Plus
• three freely programmable Target Zones • visual and audible alarm for each Target Zone limit • lap/split time XTrainer Plus Heart Rate Monitor. We are • average heart rate for each lap • three programmable, alternating timers • Recovery Heart Rate or Recovery Time after each lap •... -
Page 7: Parts
Before starting any exercise program, always consult your physician. If you have a pacemaker or other implanted electronic device, consult your physician and/or the manufacturer of the device prior to using the Polar XTrainer Plus Heart Rate Monitor. 4. Polar Bike Mount 5. Polar Speed Sensor... -
Page 8: Installing The Polar Bike Mount
The sensor should be Lock the other buckle. attached 40-50 cm / /1’4”-1’8” from the bike mounted XTrainer Plus receiver. Note also that both the XTrainer Plus receiver and the Speed Sensor should be mounted on the same side of the bike. -
Page 9: Setting The Watch
It is recommended that you wear the Transmitter against your SETTING THE WATCH SETTING THE WATCH bare skin to ensure flawless operation. However, if you wish to wear the Transmitter over a shirt, moisten the shirt well under the electrodes. It is important that the electrodes are wet during the exercise. - Page 10 SETTING THE ALARM SETTING THE TIME Alarm symbol is flashing. AM/PM (alternatively the hours) is/are flashing. 1. Press SIGNAL/LIGHT to set the alarm on or off. 1. Press SIGNAL/LIGHT to select AM or PM. = alarm is on = alarm is off 2.
-
Page 11: Setting The Heart Rate And Cycling Features
SETTING THE HEART RATE SETTING THE HEART RATE SETTING THE DATE The day is flashing. AND CYCLING FEATURES AND CYCLING FEATURES 1. Press SIGNAL/ LIGHT to select the day. 2. Press STORE/ LAP/ RECOVERY to lock your selection. The month starts Start here to set: flashing. - Page 12 - The uppermost block of the graphic bar representing the setting of the Cadence/Altitude Display starts to flash. 7. Press SET/START/STOP to start setting of Timer 2. The hours of Timer 2 start to flash. - 0 DISP appears in the display. 4.
- Page 13 You have the following two alternatives to continue: SETTING THE HEART RATE LIMITS 1. To start setting Recovery function press SET/START/STOP. 1, 2 & 3 The third block of the graphic bar representing the setting of The upper reading representing the Upper the Recovery function starts to flash.
- Page 14 3. Press SIGNAL/LIGHT to select the desired value. SETTING THE PRIMARY AND In case of RECO HR: Select the desired value for the SECONDARY TIME DISPLAY minutes and press STORE/LAP/RECOVERY to lock your selection. Then press SIGNAL/LIGHT to select the desired The Primary Time Display symbol 1 and 00:00 0 value for the seconds.
- Page 15 activated in the middle row of the display during the heart rate SETTING THE CADENCE / ALTITUDE DISPLAY measurement in the Heart rate mode by bringing the face of the Wrist receiver next to the Polar logo of the Transmitter for a 0 DISP is flashing.
- Page 16 If the calibration is not succesful, ERR indicating failed CALIBRATING THE ALTITUDE calibration appears in the lower right corner of the display right after CAL. Return to Time mode by pressing SELECT ALT is flashing. twice and restart from the beginning of Calibrating the altitude .
- Page 17 You may want to reset the odometer for example 1. Press SIGNAL/LIGHT to set the thousands of millimeters of the if you place the XTrainer Plus on a new bike or wheelsize. if you are about to start a new training season and you prefer having a zero in your 2.
-
Page 18: Starting The Measurement
2. Press STORE/LAP/RECOVERY to lock your selection. STARTING THE STARTING THE The second digit starts to flash. 3. Press SIGNAL/LIGHT to set the second digit. MEASUREMENT MEASUREMENT 4. Press STORE/LAP/RECOVERY to lock your selection. The third digit starts to flash. 5. - Page 19 3. Start the code search in Time mode by pressing SELECT. Cycling info loop includes Trip, Stopwatch, Time of Day, Average The Receiver starts searching for coded speed, Odometer, Total riding time, Maximum speed, meters / transmission for max. 30 seconds. feet ascended (separate Polar Altitude Sensor required) M and INT scan on the display indicating the memory ** Separately sold Polar Cadence Sensor required.
-
Page 20: In The Heart Rate Mode
IN THE HEART IN THE HEART 4. ILLUMINATE THE DISPLAY Press SIGNAL/LIGHT or bring the Wrist Receiver very close to RATE MODE RATE MODE the Transmitter for a moment. 5. CHECK THE SECONDARY TIME DISPLAY WITH TRANSMISSION CODE AND HEART RATE LIMITS IN USE 1. -
Page 21: Check Split/Lap Time With Average Heart Rate
7. CHECK SPLIT/LAP TIME WITH AVERAGE HEART RATE In case of RECO TI: You will hear two Press STORE/LAP/RECOVERY. beeps at the same time you reach the preset Split/lap time with average heart rate of the lap appears in the heart rate reading. -
Page 22: Reset The Stopwatch
11. RESET THE STOPWATCH IN THE CYCLING MODE IN THE CYCLING MODE First press SET/START/STOP to stop the stopwatch. Then press and hold SET/START/STOP until all stopwatch digits are back to zero (alternatively the countdown timer is back in preset starting time). -
Page 23: Check Cycling Information
3. CHECK CYCLING INFORMATION 5. ILLUMINATE THE DISPLAY The following information is available by pressing SIGNAL/LIGHT in Press and hold SIGNAL/LIGHT to illuminate the display. the Cycling mode: Trip Stopwatch Time of Day Average speed 6. SWAP HEART RATE LIMITS When the stopwatch is running press SELECT to activate new limits. -
Page 24: Store Heart Rate, Speed And Cadence/Altitude
10. STORE HEART RATE, SPEED AND 13. SWAP BETWEEN HEART RATE MODE AND CADENCE/ALTITUDE CYCLING MODE Heart rate (bpm), speed (km/h or mph) and cadence* (rpm) / Press simultaneously SET/START/STOP and SIGNAL/LIGHT. altitude** (m/ft) are stored automatically according to the preset recording interval. -
Page 25: Recalling The Recorded Information
RECALLING THE RECORDED SETTING THE RECORDING INTERVAL RECALLING THE RECORDED Start from Recalling the recorded information . LEFT and FILES scan in the display. INFORMATION INFORMATION INT flashes in the display. Heart rate (bpm), speed (km/h or mph) and cadence* (rpm) / altitude** (m/ft) are stored automatically according to the preset recording interval. -
Page 26: Recalling The Training Information
3. To start downloading the training information to your computer, 4. Press STORE/LAP/RECOVERY to see: press STORE/LAP/RECOVERY. LIM 1 Exercising time above the Target Zone 1 The front pages of the last recorded file appear in LIM 1 Exercising time within the Target Zone 1 the display. -
Page 27: Deleting The Most Recent File
You have the following two alternatives to continue: Polar Electro Oy. 1. Cancel the deleting of the most recent file, press SELECT. See back cover for contact details. LEFT and FILES start scanning on the display. -
Page 28: Frequently Asked Questions
...THERE ARE IRREGULAR READINGS? FREQUENTLY ASKED FREQUENTLY ASKED 1. Reset the heart rate monitor and clear the memory by pressing the reset button with a pen tip. The display becomes full of digits. QUESTIONS QUESTIONS 2. Press STORE/LAP/RECOVERY to enter the Time mode. 3. -
Page 29: Polar Glossary
POLAR GLOSSARY POLAR GLOSSARY To avoid cross-talk from another cyclist with a XTrainer Plus, keep the distance of at least 70 cm / 2'4" between your Receiver mounted on your Polar Bike Mount and the Polar Speed sensor of the another cyclist. - Page 30 Date: Indicates the date in Watch settings. PC: Personal Computer. You can download your training information into a computer for further analysis. A separate Polar Interface Plus is required. Del file x: Indicates the possibility to delete the newest file manually. Polar Coded Transmitter: Automatically picks a code to transmit your Electrodes: Pick up the heart’s electrical impulses and are encased in the heart rate to the Wrist Receiver.
- Page 31 During heart rate measurement indicates that the heart rate is below COMPATIBILITY COMPATIBILITY the Target Zone. In File mode this indicates the time spent below the Target Zone. Units of measure: By changing the Time mode from 12 h display to 24 h display you also change all the other units used by the monitor.
-
Page 32: Care And Maintenance
Wrist Receiver Battery should be replaced only by a person authorised by Water resistance: to 20 metres ± 1% or ± 1 beats per minute, Polar Electro Oy. See Service. Accuracy of heart rate measurement: whichever larger, definition applies POLAR CODED TRANSMITTER... - Page 33 POLAR BOOKS AND SERVICE POLAR BOOKS AND SERVICE ACCESSORIES ACCESSORIES To ensure proper servicing of your Polar heart rate monitor, please POLAR BOOKS AND BOOKLETS complete and mail the enclosed Warranty Registration Card within two weeks of the date of purchase. Roy Benson, MPE ....
-
Page 34: Limited Polar Warranty
Polar Electro Oy. Polar logotype, Polar Pacer and Polar Beat are registered trademarks of Polar Electro Oy. Polar XTrainer Plus, Polar Accurex Plus, Polar Vantage NV, Polar Protrainer XT, Polar Protrainer NV, Polar Advantage Interface, Polar Precision Performance, Polar Interface Plus, Polar SmartEdge, Polar Fitwatch, Polar Favor and Polar Heartwatch are trademarks of Polar Electro Oy. - Page 35 Disclaimer ..................62 described herein. In such an event shall Polar Electro Oy not be Downloading the training information in your computer ....47 liable for any damages, direct or incidental, consequential or In the Cycling mode ..............
- Page 36 Stopping the Heart rate mode ..........36 Stopping/starting the stopwatch ..........32 Storing heart rate ..............35 Swapping between Heart rate mode and Cycling mode ..36 Swapping the heart rate limits ..........33 Turning off/on the Target Zone sound signal ......32 Features ..................
Need help?
Do you have a question about the Xtrainer Plus and is the answer not in the manual?
Questions and answers