Table of Contents
Advertisement
Quick Links
Advertisement
Table of Contents

Related Manuals for Jenoptik 5.3z3 EasyShot


Summary of Contents for Jenoptik 5.3z3 EasyShot
- Page 1 5.3z3 EasyShot User’s Guide User’s Guide www.jenoptik-camera.com...
-
Page 2: Table Of Contents
ENGLISH Table of Contents GETTING STARTED ......................3 STANDARD ACCESSORIES ......................3 Attaching the Wrist Strap ......................3 Using the Soft Case ........................4 NAMES OF PARTS ........................... 4 INSTALLING THE BATTERY PACK ....................5 Low Battery Indicator ......................... 5 CHARGING THE BATTERY PACK ....................5 INSERTING A MEMORY CARD ....................... - Page 3 Magnifying and Trimming Still Images ..................19 Playing Back Movie Clips ......................19 PLAYING BACK SOUNDS ......................20 Recording a Voice Memo ......................20 Playing Back a Voice Memo ....................20 DELETING FILES ........................... 20 Deleting a Single File ....................... 20 Deleting All Files ........................
-
Page 4: Getting Started
GETTING STARTED GETTING STARTED STANDARD ACCESSORIES Camera USB Cable Video out Cable Soft Case Strap Rechargeable Lithium-ion Battery (NP-40) Software Installation CD-ROM Quick Start Guide Battery Charger & Adaptor Attaching the Wrist Strap Attach the wrist strap to your camera as shown. Note: Do not swing the camera when carrying by the wrist strap. -
Page 5: Using The Soft Case
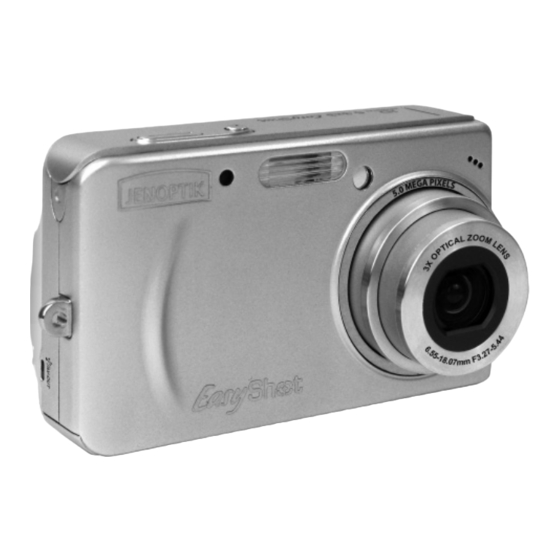
GETTING STARTED Using the Soft Case When not using the digital camera, keep it in the soft case for protection. NAMES OF PARTS Front Flash Self-portrait Shutter button mirror Self-timer Microphone lamp Speaker Strap ring Lens Power button Bottom Back Zoom W button (Thumbnail) Battery/card... -
Page 6: Installing The Battery Pack
GETTING STARTED INSERTING THE BATTERY PACK The camera is powered by a rechargeable lithium-ion battery (NP-40). Charge the Battery Pack before you use it. 1. Slide the battery cover open. 2. Install the battery with the terminal facing inside the camera. 3. -
Page 7: Inserting A Memory Card
GETTING STARTED INSERTING A MEMORY CARD You can use SD Card with this digital camera. The memory card slot is located beneath the battery cover, adjacent to the battery compartment. 1. Be sure that the camera is turned off. 2. Slide the battery cover and open it. 3. -
Page 8: Basic Operations
BASIC OPERATIONS BASIC OPERATIONS Power button TURNING THE POWER ON AND OFF 1. Press the POWER button to turn on the camera in the Record mode. Or you can press the button to turn on the camera in the Playback mode. -
Page 9: Using The Menus
BASIC OPERATIONS USING THE MENUS Recording Menu / Playback Menu When a menu screen is displayed, the arrow button and the SET button are used to make the desired settings. 1. Press the MENU button to display the menu. • The menu displays depends on whether you are in the Record mode or the Playback mode. -
Page 10: Adj. Menu
BASIC OPERATIONS ADJ. Menu You can quickly adjust the White Balance, ISO and Exposure in Record mode. 1. Press the SET button to display the menu. • When movie recording, only White Balance can be adjusted. 2. Press to select a menu item. 3. -
Page 11: Using The Lcd Monitor
BASIC OPERATIONS USING THE LCD MONITOR The LCD monitor is used to compose images while recording, adjust settings and replay images. LCD Screen Indicator In Recording 1 Mode icon 11 Aperture value 2 Flash 12 Shutter speed 3 Macro 13 Metering 4 Self-timer / Burst 14 Exposure 5 Zoom indicator... -
Page 12: Recording
RECORDING RECORDING RECORDING STILL IMAGES 1. Set the camera to the Record mode. 2. Hold the camera with both hands and make sure the camera is stable. 3. Aim the focus area to the subject that you want to take and press the shutter release button halfway. -
Page 13: Using The Flash
RECORDING Using the Flash Press the flash button cycles your camera through the various flash modes. A symbol appears on the LCD screen to indicate the flash mode. The flash cannot be used when movie recording. 1. Set the camera to the Record mode. •... -
Page 14: Using The Macro Mode
RECORDING Display Option Description Single shot Record a single image. The shutter release will be delay for 2 2-SEC seconds. The shutter release will be delay for 10 10-SEC seconds. Record two images in a shot after Double pressing the shutter release button 10 and 12 seconds. -
Page 15: Recording Movie Clips
RECORDING RECORDING MOVIE CLIPS Your camera can record movie clips with audio. 1. Set the camera to the Record mode . • The LCD monitor displays the available recording time. 2. Press the shutter to start recording. 3. Press the shutter again to end recording. •... -
Page 16: Setting The Resolution And Quality
RECORDING Display Option Description Program All settings can be changed in this mode. Portrait Blurring the background to focus on the subject. Landscape Used for the wide scenic views. Shooting the subject while keeping the Night Scene background night scenery. Kids Take a still image to capture moving kids. -
Page 17: Setting The Movie Size
RECORDING Quality Option Description Stores the image with an extremely low compression. Stores the image with a low compression. Stores the image with normal compression. Setting the Movie Size Movie clips can be shot with different size. Option Description 640x480 - Suitable for viewing on TV. 320x240 - Suitable for viewing on PC. -
Page 18: Setting The Iso
RECORDING Setting the ISO With the initial settings, the ISO sensitivity is automatically set according to the brightness of the subject. Option Description Auto Sets the ISO sensitivity automatically. ISO 50 Sets the sensitivity to ISO 50 equivalent. ISO 100 Sets the sensitivity to ISO 100 equivalent. -
Page 19: Setting The Photo Effect
RECORDING Setting the Photo Effect You can add special effects to your images in Record mode. Option Description No effect is added to the image. B&W Convert image to black & white. Sepia Recorded image will be stored in a sepia tone. Neg. -
Page 20: Playback
PLAYBACK PLAYBACK PLAYING BACK IMAGES 1. Set the camera to the Playback mode . 2. Press to play back the previous image; press to play back the next image. Hint: Holding down scrolls images in a high speed. Using the Thumbnail When in Playback mode, you can view all your stored images in thumbnail format. -
Page 21: Playing Back Sounds
PLAYBACK PLAYING BACK SOUNDS 1. Set the camera to the Playback mode . 2. Press to select the audio clip that you want to playback. 3. Press the SET button to start playing the audio clip. 4. Press the MENU button to stop the audio clip, or press the SET button to pause it. -
Page 22: Deleting All Files
PLAYBACK 6. Repeat step 4~5 to delete images. Hint: • To quickly delete the current display image 1. Select the image you want to delete. 2. Press the button to show a confirmation bar. 3. Press the SET button to delete the current display image. Deleting All Files You can use the Playback Menu to delete multiple files. -
Page 23: Editing Images
PLAYBACK EDITING IMAGES Rotating Still Images The still images can be rotated by various degrees. 1. Set the camera to the Playback mode . 2. Press to select the image you want to rotate. 3. Press the MENU button, then press to select ROTATE 4. -
Page 24: Setting The Dpof
PLAYBACK Photo Effect Description B&W Convert color photo into black & white photo. Sepia Add sepia tones to photo to make it looks like old photo. Neg. Art Convert photo color into its opposite color. Mosaic Turn photo into a series of mosaic tiles. PhotoRite is an advanced image processing technology for automatic photo enhancement. -
Page 25: Playing A Slide Show
PLAYBACK 9. After you finished all image settings, press the MENU button to apply it. Hint: • To set the DPOF setting for all images in a time, select ALL in step 3 and press the SET button. • To reset all DPOF settings to initial default, select RESET in step 3 and press the SET button. PLAYING A SLIDE SHOW You can set the camera to display images in a slide show. -
Page 26: Advance Settings
ADVANCE SETTINGS ADVANCE SETTINGS ADJUSTING SOUNDS You can adjust the sound volume and set different sounds as the start-up sound. 1. Set the camera to the Setup Menu . 2. Press to select SOUNDS ( ) and then press the SET button to enter the sounds screen. 3. -
Page 27: Resetting The File Numbers
ADVANCE SETTINGS RESETTING THE FILE NUMBERS Use this function if the camera experiences a “Folder cannot be created” error or if you want to restart numbering, for example, after erasing all files. Resetting the file number is useful for avoiding the file name duplication when images are downloaded to a computer. -
Page 28: Choosing A Startup Image
ADVANCE SETTINGS CHOOSING A STARTUP IMAGE You can choose a recorded image as the start-up image. 1. Set the camera to the Playback mode. 2. Press to select a desired image. 3. Press the MENU button, then press to select S.IMAGE 4. -
Page 29: Making Connections
MAKING CONNECTIONS MAKING CONNECTIONS CONNECTING THE CAMERA TO A TV Images displayed on the camera’s monitor screen can also be displayed on a television. 1. Use the included audio/video cable to connect the camera to the TV set. 2. Set the TV input signal to Video In and Audio In. Refer to the documentation included with your TV for more information. - Page 30 MAKING CONNECTIONS 4. The LCD screen turns off when the connection to the computer has been successfully completed. 5. Open My Computer or Windows Explorer. A “Removable Disk” appears in the drive list. 6. Double-click the “Removable Disk” icon to view its contents.
-
Page 31: Pringting Pictures Directly
PRINGTING PICTURES DIRECTLY PRINGTING PICTURES DIRECTLY There are two ways to print the stored pictures without the help of computer: Printing Pictures by Using SD Card 1. Transfer the stored pictures from internal memory to SD card. 2. Set the DPOF ( refer to the section “Setting the DPOF”). 3. -
Page 32: Software Installation
SOFTWARE INSTALLATION(FOR WINDOWS USERS) SOFTWARE INSTALLATION(FOR WINDOWS USERS) SYSTEM REQUIREMENTS Windows: • PC with processor better than MMX Pentium 233 MHz • Windows XP/2000/ME/98SE • Minimum 32 MB RAM • USB port • CD-ROM drive • 800x600 pixels, 16-bit color display compatible monitor Macintosh: •... -
Page 33: Installing Your Camera Driver
SOFTWARE INSTALLATION(FOR WINDOWS USERS) INSTALLING YOUR CAMERA DRIVER Step 1 Make sure that your camera is not connected to the computer. Step 2 Make sure the computer is powered on and Windows 98SE/ME/2000/XP is running. Step 3 Close any other applications or software you may be running. Insert the supplied CD-ROM into the CD-ROM drive. -
Page 34: Installing Xvid Codec
SOFTWARE INSTALLATION(FOR WINDOWS USERS) INSTALLING XVID CODEC Note: To ensure the video clips can be played, please install XviD Codec. Step 1 Make sure that your camera is not connected to the computer. Step 2 Make sure the computer is powered on and Windows 98SE/ME/2000/XP is running. Step 3 Close any other applications or software you may be running. - Page 35 SOFTWARE INSTALLATION(FOR WINDOWS USERS) Select “I accept the agreement” then click [Next>]. Step 9 Click [Next>]. Step 10 Click [Next>]. Step 11 Click [Next>]. Step 12...
- Page 36 SOFTWARE INSTALLATION(FOR WINDOWS USERS) Click [Next>]. Step 13 Click [Install]. Step 14 Step 15 Install progress bar. Click [Finish]. Step 16...
-
Page 37: Installing Windows Media Player 9
SOFTWARE INSTALLATION(FOR WINDOWS USERS) INSTALLING WINDOWS MEDIA PLAYER 9 Step 1 Make sure that your camera is not connected to the computer. Step 2 Make sure the computer is powered on and Windows 98SE/ME/2000/XP is running. Step 3 Close any other applications or software you may be running. Insert the supplied CD-ROM into the CD-ROM drive. - Page 38 SOFTWARE INSTALLATION(FOR WINDOWS USERS) When the installing is complete, the screen shows welcome page. Click “Next”. Step 10 Choose the privacy options according to your preference, then click “Next”. Step 11 Select or dis-select the file types that will use the Windows Media Player as default player.
-
Page 39: Installing Arcsoft Photoimpression
SOFTWARE INSTALLATION(FOR WINDOWS USERS) INSTALLING ARCSOFT PHOTOIMPRESSION FOR ALL WINDOWS USERS(OPTIONAL) Step 1 Make sure your camera is powered off and not connected to the computer. Step 2 Make sure the computer is powered on and Windows is running. Step 3 Close any other applications or software you may be running. - Page 40 SOFTWARE INSTALLATION(FOR WINDOWS USERS) Click [Yes]. Step 8 Click [Next >]. Step 9 Click [Next >]. Step 10 Step 11 The screen will show the status of the installation You can choose to install DirectX 9 or not, then click [Finish]. Step 12...
-
Page 41: Installing Adobe Acrobat Reader
SOFTWARE INSTALLATION(FOR WINDOWS USERS) INSTALLING ADOBE ACROBAT READER (OPTIONAL) Step 1 Make sure your camera is powered off and not connected to the computer. Step 2 Make sure the computer is powered on and Windows is running. Step 3 Close any other applications or software you may be running. Insert the supplied CD-ROM into your computer’s CD-ROM drive. - Page 42 SOFTWARE INSTALLATION(FOR WINDOWS USERS) “Recomposing data ...” status bar appear. Note for Win 98 SE users: As Adobe Reader 6 requires Internet Explorer 5.01 or greater, you may see below information: Note for Win 2000 users: As Adobe Reader 6 need the support of Win 2000 SP2, you may see below information: Step 7...
- Page 43 SOFTWARE INSTALLATION(FOR WINDOWS USERS) Click [Next >]. The files will be saved into C:\Program Files\Adobe\Acrobat 6.0 automatically. You may change the default folder by clicking [Change Destination Folder...] and selecting a different folder in your computer. Step 10 Click [Install] to start install the Adobe Reader 6. Step 11 Click [Finish].
-
Page 44: Using Arcsoft Photoimpression
SOFTWARE INSTALLATION(FOR WINDOWS USERS) USING ARCSOFT PHOTOIMPRESSION (WINDOWS ONLY) 1. Connect the camera to the computer. 2. Launch ArcSoft PhotoImpression software by clicking on Start-Programs-ArcSoft PhotoImpression 5 and choosing PhotoImpression 5 from the application list on your screen. 3. When the application opens, select Get Photo and you will view all the images in the middle preview area. -
Page 45: Installing Software-For Mac Users
INSTALLING SOFTWARE – FOR MAC USERS INSTALLING SOFTWARE – FOR MAC USERS Note for Mac users: If the video clips recorded with the camera cannot be viewed by using the QuickTime player bundled with your Mac system, please complete the following installation steps. For Mac OS 9 Users 1. -
Page 46: Appendix
APPENDIX APPENDIX TROUBLESHOOTING Problem Cause Solution Battery is inserted in the wrong Reload battery in the correct direction. direction. Power does not turn Batteries are dead. Replace or recharge batteries. The battery compartment door Make sure the battery compartment door is open. -
Page 47: Specifications
APPENDIX SPECIFICATIONS Sensor 5.0 Mega Pixels CCD / Size : 1/2.5 inch Focal Length : f=6.55 ~18.07 mm Lens 3X optical zoom, 4X digital zoom LCD monitor 2.5” LTPS color LCD Normal: 10cm ~ Infinity Focus Range Macro: (W) 10cm ~ 80cm / (T) 9cm ~80cm Aperture F/3.27 ~ 5.44 Shutter... -
Page 48: Getting Help
Website FAQ Please visit our website at www.jenoptik-camera.com to view the Frequently Asked Questions (FAQ). Website Customer Support If the problem you are encountering is not listed in the FAQ section, please send us an email through our web site by clicking on Contact Us. -
Page 49: Safety Tips And Maintenance
APPENDIX SAFETY TIPS AND MAINTENANCE Cleaning the camera body Please use a soft dry cloth to clean the camera. Cleaning the lens and LCD 1. Blow off dirt or dust with a blower or canned air. 2. Gently wipe the lens and/or LCD with a micro-fiber cloth. 3. - Page 50 APPENDIX temperatures may adversely affect the camera’s internal components and could cause a fire. • Always use the camera and its accessories in a well-ventilated area. • Allowing dust to accumulate in the camera over a long period of time is hazardous and in extreme circumstances may cause a fire.
-
Page 51: Regulatory Information
The Jenoptik trademark is used by Concord Camera Corp. and its subsidiaries under license. Concord and the Concord logo are registered trademarks or trademarks of Concord Camera Corp., in the United States and/or other countries. - Page 52 Visit Concord on the Internet www.jenoptik-camera.com Version 1.0 JD 5.3z3 EasyShot User’s Guide 584360-00 Copyright 2006 Concord Camera Corp.
Need help?
Do you have a question about the 5.3z3 EasyShot and is the answer not in the manual?
Questions and answers