Table of Contents
Advertisement
Quick Links
Advertisement
Table of Contents

Related Manuals for Cal Flame BBqI3P04


Summary of Contents for Cal Flame BBqI3P04
- Page 1 LTR50001038, Rev. D 5/15/13...
-
Page 2: Table Of Contents
Do not store an LP cylinder not connected for Copyright 2013 LMS, Inc. All rights reserved. Duplication use in the vicinity of this or any other appliance. without written consent is strictly prohibited. Cal Flame™ is A fire resulting in serious injury or death may registered trademark. -
Page 3: Safety Instructions
Do not use an extension cord to supply power to other combustible materials such as mops, rags or your Cal Flame™ grill. Such use may result in fi re, electrical shock or other personal injury. Do not brooms, as well as solvents, cleaning fl uids, and gasoline. -
Page 4: Maintenance And Repair
• Never use the grill or side burner in windy • When using the grill, do not touch the grill rack, conditions. If used in a consistently windy area a burner grate, or immediate surroundings as these windbreak will be required. Always adhere to the areas become extremely hot and can cause burns. -
Page 5: Built-In Construction
• Electrical supply requirements Location of grill enclosure Cal Flame grills are designed for outdoor use Do not locate your grill enclosure under a sealed only . overhead structure. Do not locate your grill enclosure in an enclosed area,... -
Page 6: Built-In Dimensions
WIDTH DEPTH HEIGHT Minimum WIDTH Clearance 12” Minimum Distance Between Grill and Side Burner The dimensions shown below are for Cal Flame appliances only. DEPTH Model Description Width Depth Height BBQ13P04 P4 4 Burner Grill 30 ¾”... - Page 7 DEPTH HEIGHT Minimum Clearance Built-in Dimensions cont . The dimensions shown below are for Cal Flame appliances only. Model Description Width Depth BBQ08953P Side By Side Flat Burner 24 ¼” 19 ¾” BBQ08852P Single Flat Side Burner 11 ½” 17 ¾”...
-
Page 8: Enclosure Ventilation
Screen Vents Enclosure Ventilation For proper ventilation, the base structure must be constructed using one of two designs: Minimum Clearance An enclosure with one side open Screen Vents An enclosure having four sides, a top, and bottom At least two ventilation openings at cylinder valve be at least two openings. -
Page 9: Plumbing For Side Burners
Do not use an extension cord to supply power to Locate the electrical supply box inside the built-in your Cal Flame grill. Such use may result in fi re, enclosure within reach of the power cord so the electrical shock or other personal injury. -
Page 10: Installation
Installation Installing the Transformer All grills with electrical components such as lights or a convection fan will require the transformer to be installed and plugged in before you can use it. This needs to be done before the grill is inserted in the island. -
Page 11: Installing Grills In Barbecue Islands
Installing Grills in Barbecue Installing the Rotisserie Islands Attach the two brackets to the sides of the grill, one on each side, using two screws as shown below. You will need a second person to help you to avoid damaging the grill, the transformer, or Slide the rotis motor on one of the brackets as your barbecue island . -
Page 12: Gas Connection
If you do not have an updated fi ller valve on your existing propane tank, you will need to purchase one at your local hardware store. Without it you will not be able to attach your tank to your Cal Flame™ grill or refi ll the tank at your local propane refi ll station. -
Page 13: Lp Gas
LP Gas Tank Requirements For plumbed-in LP installation, use a convertible regulator and set it for LP gas. Maximum line pressure for plumbed-in propane is 14” WC (3.5 kPa). Minimum line pressure for propane is 11” WC. The grill unit must be used with the gas pressure regulator. -
Page 14: Natural Gas
Your Cal Flame™ grill for use with natural gas comes equipped with its own regulator that MUST NOT be removed. If, this regulator needs to be replaced use only the type specifi ed by Cal Flame™ for this appliance. Barbecue Grills LTR50001038, Rev. -
Page 15: Using Your Grill
Do not use grill, side shelves, cabinets, Remember to use your Cal Flame grill safely by or any area around grill to store fl ammable following these reminders: materials. -
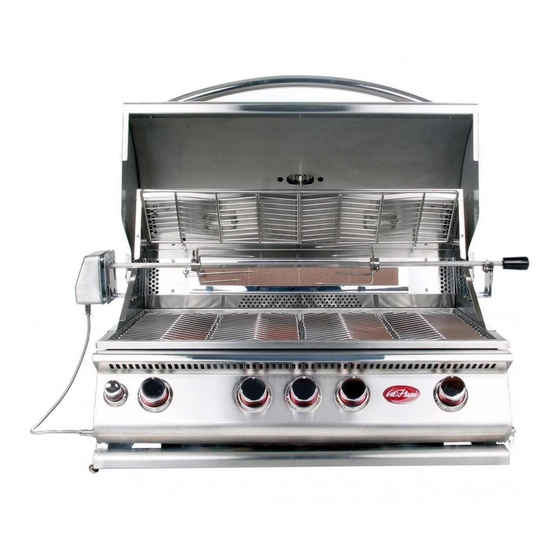
Page 16: Grill Controls
Grill Controls The controls shown below are for Cal Flame drop-in grills. Familiarize yourself with these controls before lighting your grill. The ON / OFF switch controlling the fan and halogen light is located on the control panel at the front lower left side. -
Page 17: Lighting The Burners
Lighting the Burners Each time you light the grill, check the following: • Inspect the hose before using the grill. If there before each use. is excessive abrasion or wear, or if the hose is • Ensure the propane cylinder, regulator, and rub- cut, it must be replaced prior to using the grill. -
Page 18: Heat Distribution On The Cooking Grates
Heat Distribution on the Cooking Grates When you place food your Cal Flame grill, remember that the back of the grill tends to be hotter than the front. As your food cooks, you should periodically shift it to different spots on the cooking grates to ensure everything cooks evenly without burning. -
Page 19: Cooking With The Rotisserie
Cooking with the Rotisserie The rotisserie cooks with the infrared back burner, Before you can use the rotisserie, you need to which provides intense searing radiant heat. The mount the brackets and motor to the grill. See location of the rotisserie and burner allows the page 9 for instructions. -
Page 20: Optional Grill Accessories
Optional Grill Accessories These grill accessories are optional and may be ordered directly from Cal Flame customer service. See page 21 for ordering information. Sear Zone Infrared Burner The Sear Zone infrared burner can be use in place of any regular burner. -
Page 21: Rotisserie Basket
Charcoal Tray Use Turn part of your Cal Flame grill into a charcoal and gas grill. Turn off the gas and wait for the grill to cool before setting the Charcoal Tray in place. Placement Remove two grates (left or right side) and the fl ame tamers (the angular metal pieces covering the burners). -
Page 22: Griddle Tray
(drained). The lid can be removed for easy cleaning. BBQ09902 Griddle Tray The griddle tray is an optional feature installed in Cal Flame barbecue islands. Included with the griddle tray is an enclosure for storage. When sliding the griddle out of the enclosure, always do it slowly as the heavy weight may cause you to suddenly drop the griddle. -
Page 23: Cleaning And Maintenance
Cleaning and Maintenance To ensure safe and proper maintenance, we recommend you follow these directions carefully. Clean internal parts of the grill regularly as determined by the amount of use and foods cooked. The entire grill should be cleaned at least once a year. In addition, keep the area around your grill clear and free from combustible materials, gasoline, and other fl ammable vapors and liquids. -
Page 24: Cleaning The Interior Of Your Grill
Rust removal with WD-40 or Sheila Shine: grain until excess liquid is removed and the surface shines. It should not be oily to the touch, however Spray exterior stainless steel surfaces with WD-40 or some residue is acceptable. Sheila Shine and wipe down with a dry cloth or paper Furniture polish, such as Old English, can be effective towel until surface is free of rust. -
Page 25: Covering Your Grill
(See your Upon reinstallation, inspect the gas valve orifi ces local Cal Flame dealer for details.) The cover will help for cleanliness and condition and the location of the protect your grill from detrimental effects of weather igniters. -
Page 26: Seasonal Cleaning
Seasonal Cleaning If you haven’t used your grill in a few months, we recommend that you clean the burners and the interior of your grill. Cleaning the burners periodically will keep them burning evenly and cleanly and help prevent “fl ashback”, a type of fi re in and around the gas tubes. This happens when spiders and small insects inhabit or make nests in the burner tubes, obstructing the gas fl ow. - Page 27 Clean the grill interior While the burners are out of the grill, you can use this opportunity to clean the interior of your grill thoroughly. You should still have the drip pan in place to catch water and grime as you clean the grill interior.
-
Page 28: Light Bulb Replacement
WARNING: Never touch halogen bulbs with your bare fi ngers. Use a tissue or a small piece of paper to handle bulbs. Oils from your hands will damage halogen bulbs. Cal Flame grills use two different types of light housings. These instructions describe how to change the bulb in both types. -
Page 29: Appendix
Appendix Troubleshooting Problem: Smell of gas is present Solution: Check for loose connections in the gas line. Perform a leak test following the procedure described in this manual. Problem: Burner does not ignite Solution: Note: Turn off the gas at the source while troubleshooting. Use the following procedure with the fi gure below. - Page 30 • Replace cooking components and grease collectors. If an obstruction is suspected in the control valve, contact your local Cal Flame dealer for assistance. Problem: Misalignment of Igniter on Burner Solution: •...
-
Page 31: Converting From Lp To Ng
. Lloyd’s Material Supply (LMS) will not be held responsible for an improperly converted gas grill . All Cal Flame grills are manufactured as standard liquid propane (LP) grills and can be converted to burn natural gas (NG). - Page 32 Gas Conversion (continued) Step 2: Changing the burner orifi ces You will need: • 6mm socket or nut driver Replace the main burner orifi ces • Two to fi ve 1.9mm orifi ces (depending on your grill Remove the grates, fl ame tamers, and drip tray •...
- Page 33 Gas Conversion (continued) Replace the infrared burner orifi ces Replace the side burner orifi ces You will need: You will need: • Either a 13mm or 10mm open end wrench • 7mm wrench, socket, or nut driver • One #50 orifi ce (for single infrared burner) •...
-
Page 34: Installing Sear Zone Burners
Installing Sear Zone Burners Disconnect or shut off the LP or natural gas line connected to the grill. Wait until the burners cool down. Open the hood and remove the grate and fl ame tamer on top of the stainless steel burner you want to replace. -
Page 35: Wiring Diagram
Wiring Diagram LIGHT AND TRANSFORMER ROTISSERIE ROTISSERIE CONVECTION PLUG PLUG PLUG FAN SWITCH WHITE WHITE WHITE WHITE WIRE NUT WIRE HALOGEN HALOGEN LIGHT LIGHT CONVECTION Barbecue Grills LTR50001038, Rev. D www.calflamebbq.com... -
Page 36: Replacement Parts
Replacement Parts See following page for part numbers and ordering information. Barbecue Grills LTR50001038, Rev. D www.calflamebbq.com... - Page 37 BBQ07220170 shield Thermometer BBQ07410350 5 burner BBQ07220171 Flavor bar BBQ04103000 Grill cover (not shown in All -- one size BBQC2345GB Cal Flame logo BBQ04100972 drawing) fi ts all Bezel BBQ08410351 2” knob BBQ04101028 Grates BBQ04100659 Ordering replacement parts 3 burner...
-
Page 38: Limited Warranty
Limited Warranty Limited Warranty All Cal Flame models are manufactured with the highest quality appliances and are warranted to be free from defects in material and workmanship at time of delivery. LMS warrants barbecue grills and associated hardware from deterioration, corrosion, and defects in material and workmanship for a period of one year from the original date of delivery, with the exception of plastic items and glass light covers, which are warranted for 90 days. -
Page 39: Dealer Immediately. If You Need Additional Information
Relations Department at 1462 E. Ninth St., Pomona CA 91766 or call (800) 225-7727. See your Cal Flame barbecue dealer for a copy of the applicable warranty, details and any questions you may have regarding the warranty coverage on your barbecue. - Page 40 Locating the product serial number The serial number of your Cal Flame grill is located on the back and is visible when the hood is down. You will need this number to properly register your grill and activate coverage. Write this information in the space provided below.
Need help?
Do you have a question about the BBqI3P04 and is the answer not in the manual?
Questions and answers