Table of Contents

Subscribe to Our Youtube Channel
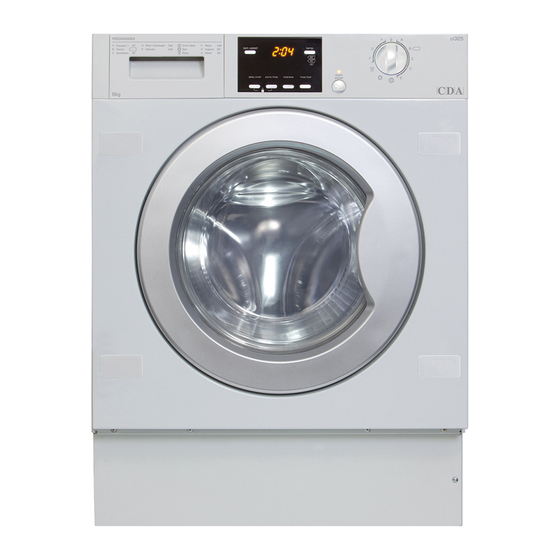
Related Manuals for CDA ci325


Summary of Contents for CDA ci325
- Page 1 Machine Manual for Installation, Use and Maintenance Customer Care Department • The Group Ltd. • Harby Road • Langar • Nottinghamshire • NG13 9HY T : 01949 862 012 F : 01949 862 003 E : service@cda.eu W : www.cda.eu...
- Page 2 Appliance information: Please enter the details on the appliance rating plate below for reference, to assist CDA Customer Care in the event of a fault with your appliance and to register your appliance for guarantee purposes. Appliance Model...
- Page 3 IMPORTANT INFORMATION FOR CORRECT DISPOSAL OF THE PRODUCT IN ACCORDANCE WITH EC DIRECTIVE 2002/96/EC. At the end of its working life, the product must not be disposed of as urban waste. It must be taken to a special local authority differentiated waste collection centre or to a dealer providing this service.
-
Page 4: Safety Warnings
Safety Warnings • If the plug or cord is damaged, do not connect the appliance to the mains power supply. If the cord is damaged it should be replaced by the manufacturer or appointed service agent in order to avoid a hazard. - Page 5 Warnings To avoid the risk of fire, electric shocks, injury or damage when using your washing machine, please take the following precautions: • Please read all the instructions before using the washing machine. • Do not wash items that have previously been cleaned, washed, soaked or treated with petrol, solvents for dry cleaning, other inflammable substances or explosives, as they produce fumes that could catch fire or explode.
- Page 6 Recommendations • Residues of detergent or softener left in the detergent drawer for long periods will dry and stick to the detergent drawer. To prevent this put the detergent and softener into the detergent drawer just before washing. • It is recommended that the pre-wash programme should only be used for very dirty clothes.
-
Page 7: Before First Use
Before First Use When your washing machine has been correctly installed, we recommend that you pre-clean the machine. This is to check that the installation, the connections and the drainage are all correct, and to thoroughly clean the inside of the washing machine before any wash programmes are run. - Page 8 • Fasten all zips and buttons. • Turn garments, such as knitted fabrics, inside out. • Before placing the clothes in the drum, make sure all the pockets are empty. Any small objects may block the drain pump. • We recommend loading the washing machine to its full capacity for best water and energy efficiency.
-
Page 9: Detergents And Additives
Detergents and Additives Your washing machine’s detergent dispenser has three sections as shown in figure 1. Add the required amount of detergent and fabric softener into the specific sections of the detergent dispenser before starting the wash programme. Note: Compartment 1 (Prewash) is only fig. -
Page 10: Loading The Washing Machine
the remainder to the main detergent section. Do not exceed the “MAX” level in the fabric softener section and ensure that concentrated fabric softeners are diluted before use for best washing results. Remember that the amount of detergent to be used will always depend on: •... -
Page 11: Control Panel
Control Panel fig. 2 Programme Selector Display Spin Speed Selection Wash Temperature Delay Timer Button Extra Rinse Button Intensive Button Rinse Hold Button Start / Pause Button... -
Page 12: Starting A Wash Programme
Starting a Wash Programme • Turn the “Programme Selector” knob to the required programme. • Select the required spin speed using the “Speed Speed” button. • Select the wash temperature using the “Wash Temperature” button. • Select any required extra options, as detailed below. •... - Page 13 Wash temperature selection Each selected programme has its own preset wash temperature, as shown in the programme listing below. If you press the “Wash Temperature” button the currently set temperature will show on the display. You can change the wash temperature if required by pressing the “Wash Temperature”...
- Page 14 • Once the required time delay is shown on the display, the washing machine will set after approximately three seconds delay. Extra rinse This function adds up to 3 extra rinse cycles to the programme, which is ideal for large loads and garments belonging to people with sensitive skin.
- Page 15 Start / Pause Press the “Start / Pause” button to start the selected wash programme running, the indicator light stays on. If this is pressed again while the machine is running a programme the washer will pause and the indicator light will flash. Key lock The lock function ensures that the programme will not be affected if any buttons are pressed accidentally.
-
Page 16: Programme Listing
Programme Listing The table below shows the extra functions and temperatures available for each wash programme. Wash Temperature Options Index Programme Cold 60 90 Prewash ** 1000 Cotton 1000 Synthetics 1000 Wool / Handwash Delicate Drum Clean 1000 Spin 1000 Rinse 1000 Rapid... -
Page 17: Programme Details
Programme Details The table below shows the details of each wash programme. Index Programme Detergent Max. Spin Programme Type of Laundry Compart. Load Time Capacity (kg) Prewash ** 1 & 2 2:04 Heavily soiled cotton and linens Cotton 2:49 Cotton and linens Synthetics 1:00 Synthetic textiles... - Page 18 EN60456 Testing Details Index Programme Temp. Energy Water Washing Spin Drying Load (°C) Consumption Consumption Time Performance (kg) (kWh) (Litre) Cotton 0.808 57.7 3:00 Cotton 0.811 45.0 3:00 Cotton 0.602 43.5 2:49 Energy label program settings: 1. “Cotton+ 40°C+Intense Max speed” 2.
-
Page 19: Care And Maintenance
Care and Maintenance Before beginning any care or maintenance you should always disconnect the appliance from the electricity supply, and also turn off the water supply. If a programme has been run recently, wait for the water in the appliance to cool down to prevent risk of scalding. Water inlet filters There are filters on the tap side of the water inlet hose and at the end of the... -
Page 20: Pump Filter
Pump Filter The pump filter system prevents ingress of lint or foreign objects into the drain pump, reducing the risk of damage. The pump filter should be cleaned regularly, every two to three months at least. To avoid injury, do not carry out this operation when the wash water is at a temperature over 30ºC fig. -
Page 21: Detergent Drawer
Please note - failure to replace the filter cover properly or to seal the drain hose will cause water to leak from the machine. Detergent Drawer Detergents may cause residue build up in the detergent drawer and the drawer housing over time. The drawer should be cleaned regularly to remove these residues. -
Page 22: Cleaning The Washing Machine Exterior
Cleaning the Washing Machine Exterior The exterior of the washing machine should be cleaned with warm soapy water or a gentle cleaning agent. Do not use abrasive cleaning products or solvents. It should then be dried thoroughly with a soft cloth. Please note - wipe any detergent spills immediately to minimise the risk of damage to the washing machine exterior. -
Page 23: Practical Information
Practical Information Alcoholic beverages: The stain should first be washed with cold water, then wiped with glycerine and water and be rinsed with water mixed with vinegar. Shoe Polish: The stain should be slightly scratched without ruining the cloth, rubbed with detergent and rinsed. In case it is not eliminated, it should be rubbed with 1 part of pure alcohol (96 degrees) mixed in 2 parts of water and then washed with lukewarm water. - Page 24 Blood stain: Soak the item in cold water for 30 minutes. If the stain still does not disappear, soak in a mixture of water and ammonia (3 table-spoons of ammonia in 4 litres of water) for 30 minutes. Cream, ice-cream and milk: Soak the item in cold water and rub the stained area with detergent.
-
Page 25: Display And Failure Codes
Err1 properly. click then press the “Start / Pause” button. If the error persists, unplug the machine, close the water tap and contact CDA Customer Care. Drainage error, water Clean the filter and check the drain hose for Err2 not emptied within 6 blockage. -
Page 26: Troubleshooting
• Unplug the machine. • Close the water tap. • Contact CDA Customer Care. Fault Probable cause Methods of elimination The machine will not It is unplugged. - Page 27 Fault Probable cause Methods of elimination The machine does The drain hose is obstructed or Check the drain hose. not drain water. bent. The pump filter is obstructed. Clean the pump filter. The drain hose is above 100cm. Install drain hose at specified height of 80-100cm.
-
Page 28: Installation
Installation Transit bolts, located at the rear of the appliance, must be removed prior to using the appliance to prevent damage. • Remove the back cover from the machine. • Loosen the transit bolts (T1, T2, T3 & T4 in fig. 6) using a suitable spanner by turning them anti-clockwise and fig. - Page 29 installed on a flat, non-slippery and solid surface. The machine must be positioned on a solid support, such as the bare floor or a well-fitting riser, ensuring the machine is unable to fall when subjected to the typical vibrations generated by a washing machine.
-
Page 30: Fitting The Furniture Door
Fitting the Furniture Door The machine is supplied with a fitting template that aligns with the top of the ARROWS POINT TO TOP OF DOOR fascia door and has arrows cut out of it HINGE POSITIONS that point toward the door top. TEMPLATE NOTE: If this template is aligned with DOOR... -
Page 31: Connecting To The Mains Water Supply
Connecting to the Mains Water Supply • Fit the seal included in the hose packing at the end of the water inlet hose on the tap side. • Connect the water inlet hose to a 3/4” BSP water tap. Then securely tighten the connecting nut by hand. -
Page 32: Electrical Information
The drain hose must be securely fastened to the outlet to prevent any risk of the drain hose becoming detached and causing flooding. Once the appliance is connected to the water supply and the drain connection, ensure that the water inlet and drain hoses are not folded, twisted, crushed or elongated by stretching when moving the appliance into position. -
Page 33: Technical Specifications
How to connect an alternative plug If the fitted plug is not suitable for your socket outlet, then it should be cut off and disposed of safely to prevent the risk of electric shock. A suitable alternative plug of at least 13 Amp rating to BS 1363 should be used. -
Page 34: International Washing Symbols
International Washing Symbols Washing Do not wash in a Lukewarm iron Medium hot iron temparature washing machine Hot iron Do not iron Do not tumble Hang to dry Drip dry Dry flat Do not bleach Handy to bleach All of these are dry cleaning symbols. The letters are to instruct the cleaner what type of solvent to be used. - Page 35 NOTES...
- Page 36 Please contact our Customer Care Department for Service on the details below. Customer Care Department • The Group Ltd. • Harby Road • Langar • Nottinghamshire • NG13 9HY T : 01949 862 012 F : 01949 862 003 E : service@cda.eu W : www.cda.eu...
Need help?
Do you have a question about the ci325 and is the answer not in the manual?
Questions and answers