Datavideo TLM-700HD Instruction Manual
7" tft lcd monitor
Hide thumbs
Also See for TLM-700HD:
- Quick start manual (14 pages) ,
- User manual (17 pages) ,
- Instruction manual (20 pages)
Table of Contents
Advertisement
Quick Links
Advertisement
Table of Contents

Subscribe to Our Youtube Channel
Related Manuals for Datavideo TLM-700HD


Summary of Contents for Datavideo TLM-700HD
-
Page 1: Instruction Manual
7" TFT LCD Monitor TLM-700HD Instruction Manual Rev 150310 www.datavideo-tek.com... -
Page 2: Table Of Contents
Rear Panel ..............10 Menu Options ..............11 1. Picture ..............11 2. Audio ............... 11 3. Func................ 11 4. Setup ..............12 5. Advance ..............13 Calibrating Datavideo Monitors ........13 Specifications ..............14 Service & Support ............15... -
Page 3: Warnings And Precautions
This product should only be operated from the type of power source indicated on the marking label of the AC adapter. If you are not sure of the type of power available, consult your Datavideo dealer or your local power company. - Page 4 11. Never push objects of any kind into this unit through the cabinet ventilation slots, as they may touch dangerous voltage points or short out parts that could result in risk of fire or electric shock. Never spill liquid of any kind onto or into this unit. 12.
-
Page 5: Warranty
All Datavideo products purchased after 01-Oct.-2008 qualify for a free one year extension to the standard Warranty, providing the product is registered with Datavideo within 30 days of purchase. For information on how to register please visit www.datavideo-tek.com or contact your local Datavideo office or authorized Distributors ... -
Page 6: Disposal
Introduction The Datavideo TLM-700HD is a 7 Inch monitor designed for HD users who work outdoors in the field or in a studio. The TLM-700HD can be powered from a standard V-Mount battery connection or mains power. This enables you to power the monitor using an existing camera battery from a range of manufacturers. -
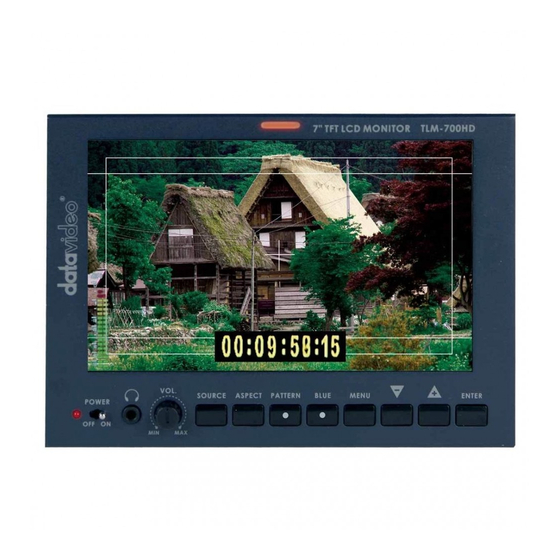
Page 7: Features
Features 7" 16:9 Wide Screen Panel Resolution: 800 x 480 dots View Angle (V)+60/-40°, (H)+60/-60° HD/SD-SDI, YUV, HD-YUV, HDMI & CV Input Internal colour bar Blue only function Audio indicator for SDI, HDMI ... -
Page 8: Connections & Controls
Connections & Controls Front Panel Power Switch Switches the power On / Off. Stereo Headphone Mini Jack socket The level is adjusted by headphone volume control. Listen to embedded audio from HDMI or SDI sources. Headphone Volume Control Allow you to adjust the headphone volume. Source Button Select Input source between SDI, YPbPr, CVBS, and HDMI. - Page 9 output. BLUE Press this button to eliminate the red and green component of input signals. Only the blue component of an input is displayed on the screen. This allows adjustments of chroma and phase. (Phase adjustment is effective with NTSC signals). MENU Calls up the on-screen adjustment menu (See Menu Options for more details).
-
Page 10: Rear Panel
Rear Panel HD/SD - SDI input BNC connector for SDI Input. YUV input BNC connectors for analogue (Component) video inputs. Composite video input BNC connectors for analog (Composite) video inputs. HDMI in interface HDMI digital signal input connecter. Supports HDMI 1.1 Tally In Send in red and yellow colour tally signal to tally LED. -
Page 11: Menu Options
Menu Options 1. Picture - Press the MENU button once to display the Picture setting menu. - Press the ENTER button to highlight the Brightness setting. - Press the UP or DOWN button to highlight the setting that needs to be adjusted. - Press ENTER button to select the Brightness setting. -
Page 12: Setup
4. Setup - Press the MENU button four times to display the Setup setting menu. - Press the ENTER button to highlight the OSD Timer setting. NB: OSD Timer sets how long the setting menus will stay on screen. - Press the ENTER button again to display the OSD Timer setting position. - Press the UP or DOWN button to set the OSD value between 5 to 60 SEC. -
Page 13: Advance
Perhaps the most important way to make sure that your video really looks as good as it can on other monitors is to monitor the video during production with a properly calibrated monitor. For guidance on how to calibrate a Datavideo Monitor using SMPTE colour bars please visit our website http://www.datavideo.info/en/faq.php... -
Page 14: Specifications
Specifications 1x HD/SD-SDI input (SMPTE 272M-C 1.5Gbps, 270Mbps with Embedded Audio) 1x Component Y.U.V Sony Betacam Spec Interface 1x CV input 1x HDMI input 1x D-Sub 15 Pin Plug (Tally Light Signal) SDI/HD-SDI Specifications Standard SMPTE 259M-C (270Mbps - 525/625 Component Video) and SMPTE 292M (1.485/1.001 Gbps) Connector BNC (IEC 169-8) Impedance 75 Ω... -
Page 15: Service & Support
It is our goal to make your products ownership a satisfying experience. Our supporting staff is available to assist you in setting up and operating your system. Please refer to our web site www.datavideo-tek.com for answers to common questions, support requests or contact your local office below.
Need help?
Do you have a question about the TLM-700HD and is the answer not in the manual?
Questions and answers