Festool OF 1400 EQ Instruction Manual
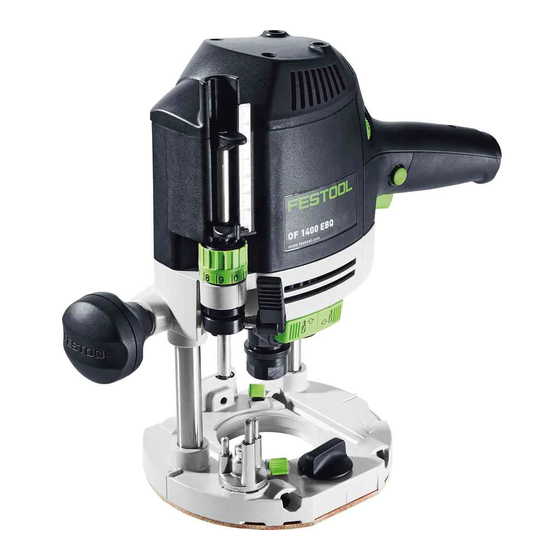
Plunge router
Hide thumbs
Also See for OF 1400 EQ:
- Original instructions manual (110 pages) ,
- Operating instructions/spare parts list (74 pages) ,
- Instruction manual (34 pages)

Related Manuals for Festool OF 1400 EQ


Summary of Contents for Festool OF 1400 EQ
- Page 1 OF 1400 EQ Plunge Router Instruction Manual Important: Read and understand all instructions before using this tool.
-
Page 2: Warranty
Festool without notice. Proprietary Notice All drawings and information herein are the property of Festool, TTS Tooltechnic Systems AG & Co. KG. All unauthorized use and reproduction is prohibited. Written and Illustrated by Rick Christopherson. -
Page 3: Table Of Contents
Contents Warranty ................2 Basic Routing..............12 Conditions of 1+2 Warranty .........2 Fixed Depth...............12 Festool Limited Warranty ..........2 Feed Direction Rules..........12 Liability Statement ............2 Plunge Routing............13 Proprietary Notice............2 Plough Cuts...............13 General Safety Rules............4 Router Speed and Feed Rate........13 Work Area Safety ............4 Advanced Routing Techniques ........14... -
Page 4: General Safety Rules
Such manufacturer for your model. Accessories that may be suitable preventive safety measures reduce the risk of starting the tool for one tool may become hazardous when used on another tool. accidentally. OF 1400 EQ Router... -
Page 5: Service
Service Tool service must be performed only by qualified repair When servicing a tool, use only identical replacement parts. ► ► personnel. Service or maintenance performed by unqualified Use of unauthorized parts or failure to follow maintenance personnel could result in a risk of injury. instructions may create a risk of electric shock or injury. -
Page 6: Tool Description
Tool Description This section provides a quick overview of the components and features of the OF 1400 EQ router. Additional information about these components and features will be discussed later in the manual. i. Depth Post Lock. This lever locks the depth post in Figure 1 position. -
Page 7: Power Controls
Power Controls To operate the router: The OF 1400 EQ router has a removable power cord for added convenience. To install the power cord: Set the motor speed by turning the variable speed control knob to the desired speed according to the router Insert the cord into the receptacle on the router's handle speed settings table on page 13. -
Page 8: Changing Router Bits
To change collets, unscrew the existing collet all the way of the spindle and screw the new collet into the spindle. Examples of 8mm and ½-inch collets are shown to the right. OF 1400 EQ Router... -
Page 9: Dust Collection
Dust Collection Dust Extraction Hood The dust extraction hood can be installed on the top of the router base and connected to a vacuum for dust collection. To install the dust extraction hood, insert the mounting tabs into the router base, and turn the retaining latch to the locked position. -
Page 10: Setting The Plunge Depth
10 mm). Lock the depth stop lever. Release the plunge lock. Operate the router as described in the “Basic Routing” section on page 12. The depth of plunge will be the amount set in step 5.a above. OF 1400 EQ Router... -
Page 11: Using The Depth Stop Turret
Using the Depth Stop Turret The depth stop turret allows you to easily change between One of the most common tasks for the turret is making ► different depths without changing the depth stop settings. successively deeper cuts to achieve a final depth that cannot be completed in a single pass. -
Page 12: Using The Turret For Precision Depths
Begin routing across the end grain first (as indicated with ► When routing around the exterior of a shape, feed the "Start Here" in the figure below). This reduces tearout at ► router counterclockwise. the corners. OF 1400 EQ Router... -
Page 13: Plunge Routing
Plunge Routing Plunge routing is any operation where the router is With the router turned off, place the router on the lowered down into the cutting area after the router has workpiece. been started. Most often this involves router bits that do Firmly grasp both handles of the router and pull up on the not have a guide bearing, but can also be used for interior power switch. -
Page 14: Advanced Routing Techniques
Set the router bit depth and firmly tighten the plunge Finish routing the rest of the edge as normal. lock knob. Set the speed control according to the table on page 13. OF 1400 EQ Router... -
Page 15: Multi-Pass Cuts
Multi-pass Cuts Nearly all routing operations can be improved by making a shallow, clean-up pass. Depending on the type of cut being multiple passes. In some cases the routing operation would made, some multi-pass cuts are made by varying the depth remove too mach material to be completed safely in a single and others are made by varying the position. -
Page 16: Pre-Cutting Dovetails And Keyways
(refer to the image on page Chatter is more noticeable with smaller diameter router bits. ► 17). The following items may cause chatter: Too fast of a feed rate for the router RPM. ► OF 1400 EQ Router... -
Page 17: Climb-Cutting With Small Diameter Bits
Climb-cutting with Small Diameter Bits Disclaimer: Even though Festool does not condone the practice of climb-cutting with a router, the topic is WARNING: Climb-cutting with a router is known to exist in books and other written publications inherently dangerous! Read, understand, and on router techniques. -
Page 18: Accessories
Guide Rail Attachment The guide rail attachment is used to connect the router to Place the other guide block over the free end of the micro- a Festool guide rail system for making straight cuts. adjust thumbwheel. Assembling the Guide Rail Attachment Before assembling the attachment, adjust the guide rail gibs on both guide blocks. -
Page 19: Using The Guide Rail Attachment
Make sure to raise the outrigger out of the way when not in use. Using the Guide Rail Attachment The Festool guide rail is used as a convenient straightedge for routing. The zero-clearance strip does not serve a purpose for ►... -
Page 20: Alternative Method For Using The Guide Rail Attachment
Retighten the thumbscrew. Place the router and guide rail attachment on the guide rail w ith both guide blocks on the ribs of the guide rail. OF 1400 EQ Router... -
Page 21: Edge Guide
Edge Guide The edge guide is used for guiding the router relative to the the operations are similar, there are additional setups edge of a workpiece. This can be used for interior plunge necessary for edge form routing. routing (such as fluted columns) or for edge forming. While Edge Forming Setup When using the edge guide for edge forming, the router bit will be within the cutout of the edge guide (as shown... -
Page 22: Template Guides
The OF 1400 EQ router package may include either a universal guide adapter you provide the template bushing. standard Festool copy ring, a universal template guide This allows you to use template guides that you already own adapter, or both. -
Page 23: Systainer (System Container)
Systainer (System Container) Every Festool product is shipped in its own unique system container, called a "Systainer". This provides protection and storage for the tool and accessories. All Systainers are stackable and can be interlocked together, including stacking and locking atop Festool dust extractors. -
Page 24: Troubleshooting
Make sure the outlet has power. Check the circuit breaker or try ► another outlet. If used with a Festool dust extractor, make sure the selector switch is ► pointing to "Auto". The auxiliary outlet on the dust extractor has power only when the selector is at Auto. -
Page 25: Maintenance
Maintenance Routine Maintenance Any maintenance or repair work that requires opening of As a general rule, keep the tool clean of all dust and ► the motor housing should be carried out only by an debris. Even soft-wood dust can be abrasive over time. authorized Customer Service Center (whose name is Examine all moving parts for dust and debris. -
Page 26: Changing The Motor Brushes
Changing the Motor Brushes The motor brushes wear out over time and need to be replaced by an authorized service center. Festool does not condone brush replacement by the end-user. Completion of this procedure by an unauthorized service center will void the tool's warranty. - Page 27 Replacement Procedure Hold the carbon brush inside the brush body, and insert the brush into the mounting slot (as shown below). Fully seat the brush into the slot. Replace the two brush mounting screws. Replace the two wire connectors to the terminals on the brushes.
Need help?
Do you have a question about the OF 1400 EQ and is the answer not in the manual?
Questions and answers