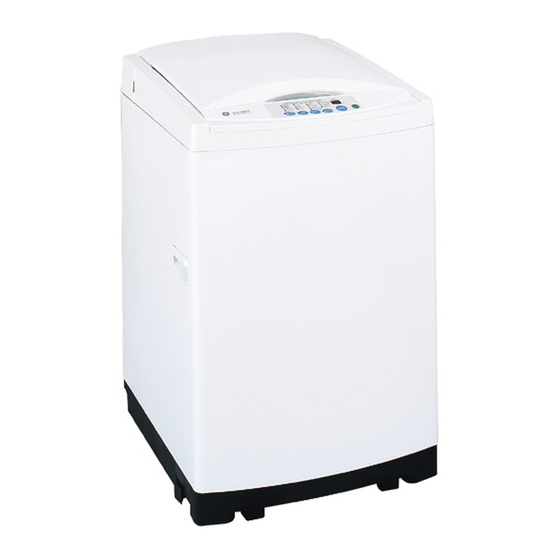
GE WSLS1100 Technical Service Manual
Wsl series
Hide thumbs
Also See for WSLS1100:
- Owner's manual & installation instructions (25 pages) ,
- Service manual (128 pages) ,
- Owner's manual & installation instructions (25 pages)

Subscribe to Our Youtube Channel
Related Manuals for GE WSLS1100


Summary of Contents for GE WSLS1100
- Page 1 GE Consumer Service Training TECHNICAL SERVICE GUIDE “WSL” Model Washers MODEL SERIES: WSLS1100 WSLP1100 WSLM1100 PUB # 31-9044 03/00...
- Page 2 If grounding wires, screws, straps, clips, nuts, or washers used to complete a path to ground are removed for service, they must be returned to their original position and properly fastened. GE Consumer Service Training Technical Service Guide Copyright © 2000 All rights reserved.
-
Page 3: Table Of Contents
Table of Contents Washer Nomenclature ..........2 Installation Highlights . -
Page 4: Washer Nomenclature
Washer Nomenclature Model Number W S L S 1 1 0 0 A 0 W W Product Exterior Color W = Washer WW = White on White Model Engineering Revision S = Space Maker 0 = None Basket Size Model Year L = Large A = 2000 Product Type... -
Page 5: Installation Highlights
Installation Highlights Location • Washer must be installed on firm flooring. Concrete flooring is best, but wood base is 60 sq. in. sufficient providing floor support meets FHA (387.1 sq. cm) standards. • Washer should not be installed on rugs or exposed to the weather. - Page 6 Leveling the Washer Excessive vibration will occur if the washer is not leveled. This will also trip the unbalance switch and stop the washer. Check to ensure the washer is level. With the door open, the spin basket should be centered in the opening as shown in the “leveled”...
- Page 7 Special Washer Features Before starting the washer: 1. Load the laundry in the washer. 2. Add the detergent and fabric softener to the dispenser drawer. 3. Add bleach (if needed) to the bleach dispenser. Detergent and Fabric Softener Dispenser Drawer The detergent and fabric softener dispensers will automatically release their con- tents at the proper time during the cycle.
-
Page 8: Control Settings And Options
Control Settings and Options The washer is designed to operate with hot and cold water. The user can tell by a glance at the LEDs what is going on in the washer. Improved operation of this unit has been simplified by using MICRON (tactile) type touch buttons. - Page 9 3. LOAD SIZE The water level should just cover the clothes. Adjust the load size accordingly. Loosely load clothes no higher than the top row of holes in the washer basket. 4. WASH CYCLE These wash cycles control the length of the washing process (refer to Timetable of Function). The following chart will help match the WASH CYCLE setting to specific laundry needs.
-
Page 10: Timetable Of Function
Timetable of Function ’ 5 ’ 5 ’ 5 ’ 8 1 ’ " 0 ’ 3 ’ 2 ’ 1 ’ 5 ’ 4 1 ’ " 0 ’ 3 ’ 2 ’ 6 ’ 1 3 ’ " 0 ’... -
Page 11: Water System And Filtering
Water System and Filtering Weight Recognition Function (Load Sensing) • The weight recognition function measures the washing load before water is supplied. It does not function in DELICATES or manual function operations (WASH OPTIONS). • The weight recognition function is canceled when water level key is pressed prior to the completion of weight recognition function. -
Page 12: Pcb Assembly
Removal and Replacement Cover-screw Screw Remove PCB Assembly 1. Open lid and insert small screwdriver blade into notch in each of 2 screw covers. Push blade in and pull handle down to remove covers. Screw 2. Remove 2 screws. 3. Lift back of control panel while sliding panel GEA00139 forward. -
Page 13: Unbalance Switch
Remove Unbalance Switch WARNING: The exposed electrical connector for the unbalance switch carries 120 volts. Be sure power to washer is disconnected. Failure to comply can cause injury or death. 1. Disconnect unbalance switch wire harness GEA00326 connectors. 2. Remove 2 screws and the unbalance switch from the washer. -
Page 14: Washer Motor
Remove Washer Motor Scribe Scribe Scribe Scribe 1. Lay washer on back. 2. Scribe motor base position on machine base. 3. Check and record belt deflection to ensure same deflection and belt tension after installation. (Approx. 1/2 inch.) 4. Using channel locks on tabs of connectors, disconnect motor wire harness connector from motor. -
Page 15: Brake Control Motor
Remove Brake Control Motor 1. Lay washer on back. 2. Disconnect both brake control motor wire harness connectors. 3. Disconnect cable link (A) from ratchet assembly by removing 2 cotter pins. 4. Remove 2 screws (B) and brake control motor from machine base. -
Page 16: Self-Diagnostic Functions
Self-Diagnostic Functions i r i r e t s l i o t t " " E I o t t . k r i r i r e t e r f o t t r e t 7 " "... -
Page 17: Water Level And Power Test
Water Level and Power Test Mode Function To see inside of washer while conducting this test, remove the front half of the lid assembly. With lid up, pull forward on locking tab at left end of hinge and slide top half of lid to right and remove. Close back half of lid and place a strip magnet over the reed switch on the left side of washer top. -
Page 18: Schematics And Strip Circuits
Schematics and Strip Circuits WARNING POWER MUST BE DISCONNECTED BEFORE SERVICING THE APPLIANCE PCB CONTROL YELLOW BLACK 2 3 1 4 BLUE WHITE 1 2 3 BLACK 1 2 3 BLUE WHITE CONDENSOR COIL 2 WASHING MOTOR PRESSURE AC250V/12A WHITE SENSOR POWER BLUE... - Page 19 GEA00131 Note: The numbers in the photo of the PCB above correspond to the numbers on the schematic of the PCB Control on the previous page and the connector diagram below. BLUE BLUE YELLOW BLACK GEA00178 – 17 –...
-
Page 20: Drain Pump Motor
Strip Circuits Main Power COIL 2 AC250V/12A WHITE Y ELLOW BROWN POWER BLACK BLUE COIL 1 BLACK EARTH GEA0003 4 Drain Pump Motor DRAIN PUMP MOTOR YELLOW BLUE YELLOW WHITE YELLOW 11.7Ω BLACK BLACK WHITE GEA0003 5 Brake Control Motor BRAKE CONTROL YELLOW MOTOR... -
Page 21: Lid Switch
Strip Circuits Rinse, Cold Water, and Hot Water Lights RINSE YELLOW GREY 1.2 KΩ COLD WATER BROWN YELLOW HOT WATER YELLOW YELLOW YELLOW GEA00038 Unbalance Switch w/ Pressure Sensor UNBALANCE S/W PRESSURE SKY BLUE SENSOR ORANGE ORANGE VIOLET VIOLET PINK PINK WHITE GEA00039... -
Page 22: Troubleshooting Flowcharts
Check for line voltage in: Check pressure sensor (Gray) Check wiring harness, connectors, Replace valve coil, supply, hoses, screen Check frequency in KHz at PCB terminals. (NTR #1-Violet to Org #3.) Check frequency as shown in WATER LEVEL FREQUENCY CHART. Check wiring harness, lid switch, magnet... - Page 23 Motor okay. Motor hums Check for line voltage at PCB Lift Red and Blue terminal from PCB. Check terminal (Yellow #1 to Red and resistance. Check yellow #1 to Red for 5.6 Ohms. Yellow #1 to Blue) Check yellow #1 to Blue for 5.6 Ohms. Check wiring harness and motor for open Does basket...
-
Page 25: Parts List
Parts List – 23 –... - Page 27 Parts List – 25 –...
-
Page 28: Special Tools And Accessories
Special Tools and Accessories Special Tools The removal of the agitator assembly and the basket assembly requires the use of special tools or tools that you might not have on hand. 20-inch Ratchet Extension The removal of the agitator assembly requires the use of a 20-inch long ratchet extension to reach the agitator bolt. -
Page 29: Consumer Services
800.626.2000 800.TDD.GEAC (800.833.4322) to request information or service. You can have the secure feeling that GE Consumer Service will still be there after your Service warranty expires. Purchase a GE contract while your warranty is still in effect and you’ll Contracts receive a substantial discount. -
Page 30: Warranty Information
To know what your legal rights are in your state, consult your local or state consumer affairs office or your state’s Attorney General. Warrantor: General Electric Company. If further help is needed concerning this warranty, write to: Manager—Consumer Affairs, GE Appliances, Louisville, KY 40225 – 28 –...
Need help?
Do you have a question about the WSLS1100 and is the answer not in the manual?
Questions and answers