Table of Contents
Advertisement
Available languages
Available languages
Quick Links
INsTAllATION INsTRUCTIONs
IMPORTANT–PleAse ReAd ANd FOllOw! Please read all instructions thoroughly
before installing the over the range Microwave. two PeoPle are recoMMended
to install this Product. if a new electrical outlet is required, its installation
should be coMPleted by a qualified electrician before the over the range
Microwave hood is installed. see electrical grounding instructions on Page 2.
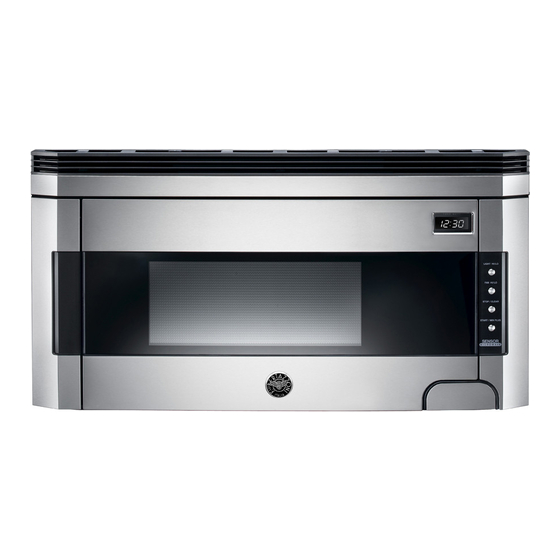
OVER THE RANGE MICROWAVE
Model KO30 PRO X
tinseb315wrrZ
Advertisement
Table of Contents

Related Manuals for Bertazzoni KO30 PRO X


Summary of Contents for Bertazzoni KO30 PRO X
-
Page 1: Installation Instructions
OVER THE RANGE MICROWAVE INsTAllATION INsTRUCTIONs Model KO30 PRO X IMPORTANT–PleAse ReAd ANd FOllOw! Please read all instructions thoroughly before installing the over the range Microwave. two PeoPle are recoMMended to install this Product. if a new electrical outlet is required, its installation should be coMPleted by a qualified electrician before the over the range Microwave hood is installed. -
Page 2: Electrical Grounding Instructions
If there is any damage, do not operate the oven The center of the stud can be located by probing the wall with a and contact your dealer or BERTAzzONI AUTHORIzED small nail to find the edges of the stud and then placing a mark SERVICER. -
Page 3: Tools Recommended For Installation
Model KO30 PRO X • Neither Bertazzoni nor the dealer can accept any liability for damage to the oven or personal injury resulting from failure to observe the correct electrical connection procedures. Figure 3 Figure 2 *Opening for Power Cord TOOls ReCOMMeNded FOR IMPORTANT –... -
Page 4: Preparation Of The Oven
INSTALLATION INSTRUCTIONS PRePARATION OF THe OveN 3. Rotate the HOOD FAN UNIT 180˚ so that the fan blade openings are facing the back of the oven. See Figure 7 (A). Replace HOOD FAN UNIT into the oven. Be careful not to Separate mounting plate from oven by removing two screws. -
Page 5: Vertical Exhaust: Outside Ventilation
Model KO30 PRO X C. veRTICAl exHAUsT: OUTSIDE VENTILATION 1. Remove and save 2 screws from back edge and 3 screws from the top center of the FAN COVER BRACKET. Remove FAN COVER BRACKET by sliding it in the opposite direction Figure 12 of the arrow on the FAN COVER BRACKET. -
Page 6: Mounting Plate
INSTALLATION INSTRUCTIONS MOUNTINg OveN TO THe wAll MOUNTINg PlATe 1. Separate 4 TOGGLE BOLTS, packed in the INSTALLATION HARDWARE, from the TOGGLE NUTS. Match 5/8" holes TwO PeOPle ARe ReCOMMeNded TO ATTACH THe (not in studs), drilled through WALL TEMPLATE into wall to OveR THe RANge MICROwAve TO THe MOUNTINg corresponding holes on MOUNTING PLATE. -
Page 7: Checklist For Installation
Model KO30 PRO X Figure 19 Figure 20 Bottom Plate Screws CHeCklIsT FOR INsTAllATION • Make sure the unit has been installed according to all of the Installation Instructions and the Wall and Top Cabinet Templates. • Plug in the power cord. -
Page 9: Instructions D'installation
FOUR à MICRO-ONDES MONTé AU DESSUS D’UNE CUISINIèRE INsTRUCTIONs d’INsTAllATION Modèle KO30 PRO X IMPORTANT : s’Il vOUs PlAîT lIsez eT sUIvez! veuilleZ lire attentiveMent toutes les instructions avant d’installer le systèMe de four à Micro-ondes Monté au dessus d’une cuisinière. nous recoMMandons que deux Personnes collaborent à... -
Page 10: Instructions De Mise À La Terre
UN SERVICE AGRéé DE DéPANNAGE un petit clou dans le mur pour trouver les bords du montant, BERTAzzONI. Reportez-vous aux instructions d’installation il suffit alors de marquer le centre entre les bords. Le centre pour plus de détails. -
Page 11: Outils Recommandés Pour L'installation
Employez les valeurs entre parenthèses pour • Ni Bertazzoni ni le revendeur ne peuvent accepter aucune calculer l’équivalence de résistance du flux d’air, dont le total responsabilité des dégâts au four, ou des blessures devra être de moins de 140 pi. -
Page 12: Instruction D'installation
INSTRUCTION D’INSTALLATION B. éCHAPPeMeNT HORIzONTAl : VENTILATION EXTéRIEURE 1. Renlevez et conservez 2 vis du bord inférieur et 3 vis du milieu du haut de la ferrure couvercle de ventilateur. Mettez de côté 2 vis qui seront réutilisées plus tard, vous pouvez jeter les 3 autres. -
Page 13: Installation Du Four
Modèle KO30 PRO X 4. Remettez en place la ferrure couvercle de ventilateur en la Conservez le support de fermeture de ventilateur pour glissant dans les fentes dans la même direction que la flèche des instructions ultérieures. marquée dessus. Assurez-vous que les pales de ventilateur sont visibles au travers des ouvertures à... -
Page 14: Plaque De Montage
INSTRUCTION D’INSTALLATION schéma 15 Plaque de montage Plaques graduées Plaque de montage Deje espacio superior al espesor de pared schéma 14 PlAqUe de MONTAge 1. Séparez 4 boulons à bascule 2, pemballés dans le MATéRIEL d’INSTALLATION, des écrous à bascule. Faites correspondre les trous de 5/8 po (1,6 cm) percés au travers du gabarit mural ailleurs que dans un poteau mural Pared... -
Page 15: Montage Mural Du Four
Modèle KO30 PRO X MONTAge MURAl dU FOUR Il ReCOMMANdé d’UTIlIseR deUx PeRsONNes POUR PlACeR le FOUR À MICRO-ONdes eT sA HOTTe sUR lA PlAqUe de FIxATION. 1. Passez le cordon secteur par le trou fait dans le fond du coffret supérieur. - Page 16 BERTAzzONI SPA VIA PALAzzINA 8 42016 GUASTALLA RE ITALY www.BeRTAzzONI-ITAlIA.COM Printed in tHAiLAnd imPrimé Aux tHAÏLAnde...
Need help?
Do you have a question about the KO30 PRO X and is the answer not in the manual?
Questions and answers