Table of Contents
Advertisement
Advertisement
Table of Contents

Related Manuals for Roland FP-50


Summary of Contents for Roland FP-50
-
Page 2: Look What You Can Do
Owner’s manual should be read in its entirety. The manual should be saved and kept on hand as a convenient reference. Copyright © 2013 ROLAND CORPORATION All rights reserved. No part of this publication may be reproduced in any form without the written permission of ROLAND CORPORATION. - Page 3 Look What You Can Do! Designing & & Sounds & e Add reverberation to the sound Page You can add reverberation (ambience) to create the sensation of performing in a concert hall. & e Adjust the tone color (equalizer) Page You can use the equalizers to adjust the sound’s tone color.
-
Page 4: Table Of Contents
Contents Look What You Can Do! . . . . . . . . . . . . . . . . . . . . . . . . . . . . . . . . . . . . . . . . . . . 2 Saving Performance Settings (Registrations) . - Page 5 Contents About the Wireless LAN Function . . . . . . . . . . . . . . . . . . . . . . . . . . . . . . . .43 What Is Wireless LAN Function? .
-
Page 6: Operation Guide
Operation Guide Describing this area Switching Tones Switching tones Layering two tones (Dual Play) Page Page Press any two TONE buttons simultaneously. Press one of the TONE buttons, and then press the [–] [+] buttons. MEMO When using Dual Play, you can adjust the volume balance by pressing the [ BACKING] or [KEYBOARD ] button while holding... - Page 7 Operation Guide Playing Different Tones with the Right and Left Hands (Split Play) Disabling the Buttons (Panel Lock) Locking the panel You can split the keyboard in two, and play one tone Page Page with your left hand and another tone with your right Hold down the [TRANSPOSE] button until “Lock”...
- Page 8 Operation Guide Describing this area Selecting a Song Selecting a Rhythm Access the song screen, and select a song. Access the rhythm screen, and select a rhythm. Page Page Press the [RHYTHM] button to access the rhythm screen . Selecting a song Rhythm Name Press the [SONG] button to access the song screen .
- Page 9 Operation Guide Changing the Tempo and Time Signature Using the Metronome You can adjust the tempo of the metronome and Try using the metronome. Page Page the song. Turning the metronome on Changing the tempo Press the [METRONOME] button so it’s lit. Press the [ ] [ ] (SLOW/FAST) buttons.
-
Page 10: Panel Descriptions
* Carefully insert the USB flash drives all the way in—until it is firmly in place. * Use a USB flash drive sold by Roland. We cannot guarantee operation if any other USB flash drive is used. -
Page 11: Damper Pedal
SOFT/L jack By default, acts as a soft pedal. and spacious resonance. The FP-50 simulates this natural damper resonance. MEMO • When connecting the included pedal, set the pedal’s side switch Sostenuto pedal to “Continuous. -
Page 12: Getting Ready
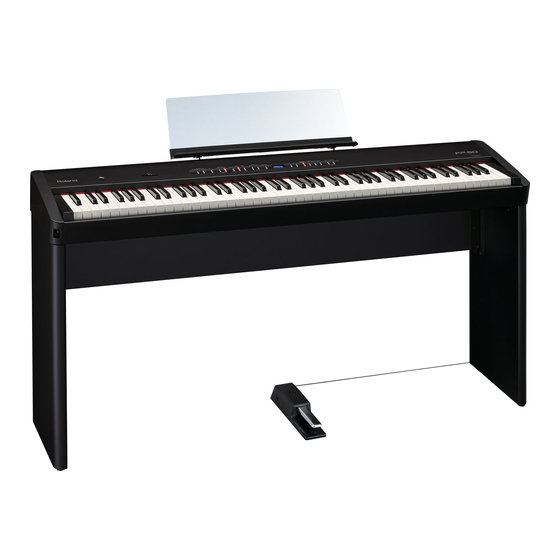
Using a Stand Be careful not to pinch your fingers when setting up the stand. Please use one of the following Roland stands to support your FP-50: KSC-44, KS-G8, KS-18Z, or KS-12. Refer to the following when using a stand. -
Page 13: Turning The Power On And Off
Getting Ready Turning the Power On and Off Listening to the Demos Here’s how to listen to the demo songs. Turning the Power On NOTE Once everything is properly connected (p. 10), be sure to follow the procedure below to turn on their power. If you turn on equipment in the wrong order, you risk causing malfunction or equipment failure. -
Page 14: Performing
Performing with Various Sounds Performing with Two Layered Tones (Dual Play) In addition to piano sounds, the FP-50 lets you enjoy performing with many other sounds (372 different tones). You can play two tones simultaneously from each note of the These sounds are called “Tones. -
Page 15: Playing Different Tones With The Right And Left Hands (Split Play)
Performing Changing the left-hand tone Playing Different Tones with the Right and Left Hands (Split Play) You can play different tones in the left and right sides of the keyboard, divided at a certain key. This feature is called “Split Play, ” and the key at which the keyboard is divided is called the “Split Point. -
Page 16: Performing With The Metronome
Performing Performing with the Metronome Changing the Metronome’s Time Signature You can sound the metronome while you play. You can also change the metronome’s tempo and time signature. If a song or rhythm is playing, the metronome will sound according to the song or rhythm’s tempo and time signature. -
Page 17: Adjusting The Sound To Your Taste
Adding Reverberation (Ambience) Equalizer is off. You can add a pleasant reverberation to the sounds of the FP-50, producing the impression that you are performing in a concert hall. Use the [ ] [ ] (SLOW/FAST) buttons to select “EQ Edit . ”... -
Page 18: Adjusting The Keyboard Response (Key Touch)
Performing Adjusting the Keyboard Shifting the Pitch (Transpose) Response (Key Touch) “Transpose” means to shift the pitches of songs and the keyboard. The Transpose function makes it easy to do the following. The way in which the keyboard responds to your playing strength •... -
Page 19: Adding Accompaniment To Your Performance
This feature is called “rhythm. ” MEMO The FP-50 contains 90 built-in rhythms in various musical • It’s not necessary to strike all the notes of each chord. The FP-50 styles, such as jazz and rock. recognizes various alternative chord voicings (p. 39). -
Page 20: Adding An Ending
Adding Accompaniment to Your Performance Adding an Ending Inserting a Fill-In Here’s how to add an ending to the rhythm. You can insert a short phrase, called a “fill-in, ” to your accompaniment. Fill-ins help add variety to your performances. Play a rhythm . -
Page 21: Selecting Specified Rhythm Parts
Adding Accompaniment to Your Performance Selecting Specified Rhythm Parts Starting the Rhythm by Playing a Chord (Sync Start) As an example, proceed as follows to select a drum-only rhythm part. You can have the rhythm start playing when you press a key. Press the [SONG] and [RHYTHM] buttons simultaneously . -
Page 22: Playing Along With A Song
You can play the keyboard along with a song. Using the Buttons Selecting and Playing a Song ] button Fast-forwards the song. Listen to the available songs. The FP-50 comes with 30 built-in ] button Rewinds the song. songs. Starts or stops song play. -
Page 23: Adjusting The Song's Tempo
Adding Accompaniment to Your Performance Adjusting the Song’s Tempo Transposing an Audio File (Audio Transpose) Here’s how to change a song’s tempo. The selected audio file can be transposed for playback. * In some cases, transposition (a transpose setting other than 0) may cause a change in the song’s tone quality. -
Page 24: Recording Your Performances
The display shows the message “New Song. ” to play along with it. The [REC] button lights up, the [ ] button blinks, and the The FP-50 can record performances into both MIDI files (SMF files) FP-50 enters recording-standby mode. and audio files. SMF and audio recording... -
Page 25: Audio Recording
The display shows the message “New Song. ” The [REC] button lights up, the [ ] button blinks, and the FP-50 enters recording-standby mode. If you decide not to record, press the [REC] button once again. MEMO If you select a song in step 4 that has already been recorded,... -
Page 26: Setting The Save Destination And Song Name
Recording Your Performances Starting and stopping recording Setting the Save Destination and Song Name Press the [ ] button . Recording starts and the [REC] and [ ] buttons light. You can select the save destination and song name for your Press the [ ] button . -
Page 27: Converting An Smf Recording Into An Audio Recording
The song plays back, and conversion begins. Audio Recording MEMO If, during conversion, you play the FP-50 (using its keyboard or by controlling it with an external MIDI device) or those sounds Converting from SMF to audio allows you to listen to the recordings will also be converted. -
Page 28: Burning An Audio Recording (Wav File) Onto A Cd
SMF, you must first convert it to audio (WAV file) (p. 27). Songs recorded on the FP-50 can be Use computer software (such as To burn music from your computer to a CD, you will copied to your computer using a USB iTunes) to burn the song to a CD. -
Page 29: Saving Performance Settings (Registrations)
• For more about the settings saved in a registration, refer to “Settings Saved in Registrations” (p. 49). Variation • You can save registration sets to the FP-50’s internal memory or Button number to a USB flash drive (sold separately; p. 30). -
Page 30: Saving Current Settings Into A Registration
Saving Performance Settings (Registrations) Saving Current Settings into a Saving a Registration Set (Save Registration Registration Set) Saving Performance Settings as Registrations (Buttons [1]–[4]). You can save all registrations held in registration memory ([1]–[4]) into a registration set in internal memory or on a USB flash drive. With the factory settings, recommended performance settings have already been stored. -
Page 31: Loading A Saved Registration Set (Load Registration Set)
Saving Performance Settings (Registrations) Press the [ ] (FAST) button . Loading a Saved Registration Set (Load The registration set will be loaded into buttons [1]–[4] . Registration Set) NOTE Do NOT turn off the power while “Working. ” is displayed. Load a registration set from internal memory or a USB flash drive Press the [SONG] and [RHYTHM] buttons simultaneously into the registration buttons ([1]–[4]). -
Page 32: Deleting A Saved Registration Set (Delete Registration Set)
Saving Performance Settings (Registrations) Press the [ ] (FAST) button . Deleting a Saved Registration Set (Delete Registration Set) Here’s how to delete a saved registration set from internal memory or USB flash drive. Press the [SONG] and [RHYTHM] buttons simultaneously . Press the [–] [+] buttons to select the copy-destination number . -
Page 33: Convenient Functions
Temperament settings, equalizer settings, and other settings reset switched off a certain amount of time after you stop playing or to their default values when the FP-50 is turned on. operating the unit. You can automatically restore the desired settings if you save them If you don’t need the power to turn off automatically, set “Auto Off”... -
Page 34: Copying A Saved Song (Copy Song)
Press the [–] [+] buttons to select the memory that holds the song you want to delete . MEMO If you select “ALL, ” the FP-50 will copy all songs (other than audio Display Explanation files) from the source side. -
Page 35: Disabling The Buttons (Panel Lock)
The memory is reset to its factory values. until “Lock” disappears . Once the memory has been reset, “END” is displayed. Panel lock is also canceled when the FP-50 is turned off. NOTE * If you activate Panel Lock while a song or rhythm is playing, Do NOT turn off the power while “Working. -
Page 36: Reformatting Memory (Format Media)
• If you’re using new USB flash drive (sold separately) with the FP-50 for the first time, you’ll need to initialize (format) the USB flash drive before using it. The FP-50 can’t use USB flash drive that has not been initialized. -
Page 37: Detailed Function Settings (Function Mode)
(Key Touch) REFERENCE For details, refer to “Adjusting the Keyboard Response (Key Touch)” (p. 18). You can add a pleasant reverberation to the sounds of the FP-50, producing the impression that you are performing in a concert hall. Ambience REFERENCE For details, refer to “Adding Reverberation (Ambience)”... -
Page 38: Personalizing Your Piano (Piano Tone)
OFF, ON (Stretch Tuning) If you select “ON, ” a standard tuning curve created for the FP-50 will be used. This adjusts the damper resonance of the acoustic piano sound (the sympathetic vibration produced in strings Dmpr Res other than those actually played when you press the damper pedal). -
Page 39: Chord Recognition When Split Is On (Split-On Chord Recognition)
When Split Play is off, chords are recognized as follows. While the damper pedal is not pressed, the FP-50 recognizes a chord when 3 or more keys are struck. While the damper pedal is pressed, the FP-50 recognizes a chord when 1–5 keys are struck. -
Page 40: Changing The Function Of The Left Pedal (Left Pedal)
For details, refer to “Reformatting Memory (Format Media)” (p. 36). Sending Tone-Change Information (Transmit MIDI Information) When you switch registrations, the FP-50 simultaneously transmits the following: Program Change, Bank Select MSB, and Bank Select LSB. You can also set the transmit channel. -
Page 41: Preventing Doubled Notes When Connected To A Sequencer (Local Control)
Visual Control is a function that lets you control images along with your performance. If you’ve set Visual Control mode to MVC or V-LINK, playing the keyboard of the FP-50 will control the images produced by the Visual Control device connected to the FP-50 using a MIDI cable. -
Page 42: Specifying The Visual Control Channel (Visual Control Channel)
MEMO This setting is automatically saved in the FP-50. The FP-50 settings return to their factory defaults when you turn off the power. But if you backup the current settings into internal memory, Backup they will be restored the next time the power comes on. -
Page 43: About The Wireless Lan Function
LAN access point. Press the [ ] (FAST) button of the FP-50 . If connection is successful, the display will show “Success. ” If not successful, please refer to “Problems when connecting to a wireless LAN”... -
Page 44: Wireless Lan Function Settings
Ad-Hoc mode (p. 45) The Ad-Hoc SSID is shown. Press the [ ] (Fast) Press the [REC] button to return to function mode . FP-50 button to display the Ad-Hoc key. SSID For details, refer to “Connecting in Ad-Hoc Mode”... -
Page 45: Other Settings (Option)
LAN access point. This is a convenient way to use the FP-50 with an iPhone or other wireless device if you’re in a location Press the [REC] button to return to function mode . -
Page 46: Troubleshooting
35 Deactivate Panel Lock. Since the FP-50 uses a liquid-crystal display, you may find that it is unable to display letters or other Screen display is irregular when power is things in environments where temperatures go below 0 degrees Celsius (32 degrees Fahrenheit). This –... - Page 47 Could the FP-50 be set to Dual Play? p. 14 Two sounds are heard when you play the When the FP-50 is connected to an external sequencer, set the Local Control to “OFF. ” Alternatively, the keyboard p. 41 sequencer could be set so its Soft Thru feature is off.
- Page 48 Problems with audio files Problem Cause/Action Page Can’t record along with an audio file/Can’t The FP-50 does not allow recording using audio files, and cannot be used to copy audio files into internal – copy an audio file to internal memory memory. MEMO Functions that cannot be used with audio file playback •...
-
Page 49: Error Messages
This audio format is not supported. Please use WAV format, 44.1 kHz, 16-bit linear audio files. Error 30 The FP-50’s internal memory is full. The FP-50 cannot deal with the excessive MIDI data sent from the external MIDI device. Reduce the amount of data being transmitted by the Error 40 external MIDI device. -
Page 50: Tone List
Tone List PIANO No . Tone name No . Tone name No . Tone name FM EP Jz Scat Orchstra No . Tone name Pop EP Fem Aahs Orch Brs Concert E.Grand Angl Cho Harp Ballade Clav. Beau Vox Violin Bright Wah Clav Male Aah... -
Page 51: Internal Song List
Scrambled Egg Masashi Hirashita * Songs marked by an asterisk “*” are original songs composed for the Roland Corporation. The copyrights to these songs are owned by the Roland Corporation. * No data for the music that is played will be output from the MIDI OUT connector. -
Page 52: Rhythm List
Rhythm List Pop Rock Jazz Blues Tradit World2 No . Rhythm name No . Rhythm name No . Rhythm name A .001 GldMedBt C .001 OgnJzFst F .001 CtrRock A .002 Fnk’sWay C .002 BluEysBn F .002 LvReggae A .003 EasyBld C .003 OgnSwMed... -
Page 53: Chord Fingering List
Chord Fingering List symbol: Indicates the constituent notes of chords. symbol: Chords shown with an “ ” can be played by pressing just the key marked with the “ . ” * These may differ from the chord notation shown in the display. C#M7 E M7 C#m7... - Page 54 Chord Fingering List F#M7 A M7 B M7 F#m7 A m7 B m7 F#mM7 GmM7 A mM7 AmM7 B mM7 BmM7 F#dim Gdim A dim Adim B dim Bdim F#m7 ( 5 ) Gm7 ( 5 ) A m7 ( 5 ) Am7 ( 5 ) B m7 ( 5 ) Bm7 ( 5 )
-
Page 55: Main Specifications
(when using sold USB Flash Memory (*) Audio files (WAV format, 44.1 kHz, 16-bit linear) separately USB Flash * Use USB Flash memory sold by Roland. We cannot guarantee Memory) operation if other products are used. Transpose Playback Transpose: -6–+5 (in semitones) Tempo Audio Playback Speed: 75–125 %... -
Page 56: Index
Index Symbols ] switch ........13 Headphone Jack . -
Page 57: Using The Unit Safely
This unit should be used only with a malfunction, or electric shock. Refer all servicing to your retailer, the stand that is recommended by Roland. nearest Roland Service Center, or an Use only the supplied power cord authorized Roland distributor, as listed Use only the attached power-supply on the “Information”... - Page 58 (e.g., flower vases) on this country, consult with your retailer, the this unit. product. Never allow foreign objects nearest Roland Service Center, or an (e.g., flammable objects, coins, wires) authorized Roland distributor, as listed Cautions when moving this unit or liquids (e.g., water or juice) to enter...
-
Page 59: Important Notes
USB flash drives once it has been • Using the unit near power amplifiers (or other equipment containing lost. Roland Corporation assumes no liability concerning such loss of large power transformers) may induce hum. To alleviate the problem, data. - Page 60 Microsoft Corporation. Care of the keyboard • Roland, GS, and SuperNATURAL are either registered trademarks or trademarks of Roland Corporation in the United States and/or other • Do not write on the keyboard with any pen or other implement, and do countries.
- Page 61 Information When you need repair service, call your nearest Roland Service Center or authorized Roland distributor in your country as shown below. AFRICA EUROPE THAILAND GUATEMALA POLAND IRAN Theera Music Co. , Ltd. Casa Instrumental ROLAND POLSKA SP. Z O.O.
- Page 62 For EU Countries For China...
- Page 63 For the U.K. IMPORTANT: THE WIRES IN THIS MAINS LEAD ARE COLOURED IN ACCORDANCE WITH THE FOLLOWING CODE. BLUE: NEUTRAL BROWN: LIVE As the colours of the wires in the mains lead of this apparatus may not correspond with the coloured markings identifying the terminals in your plug, proceed as follows: The wire which is coloured BLUE must be connected to the terminal which is marked with the letter N or coloured BLACK.
Need help?
Do you have a question about the FP-50 and is the answer not in the manual?
Questions and answers