Table of Contents
Advertisement
Advertisement
Table of Contents

Related Manuals for VTech ES1610A


Summary of Contents for VTech ES1610A
- Page 1 User’s manual Model: ES1610A ht tp: // hk phones.v tec h.c om ES1610-0A...
-
Page 2: Table Of Contents
Location .................. 3 Connect the Base Station ............4 Install and Charge the Handset Battery ........5 Connect the Charger (For ES1610A Twin or ES1610-0A only) ...5 GET TO KnOW yOUr pHOnE ........6 Overview of the Handset............6 Overview of the Base Station..........9 Handset LCD Display Icons and Symbols ...... - Page 3 Turn the Keypad Lock ON/OFF ..........21 4.10 Redial the Last number ............22 4.10.1 Redial a Number from the Redial List.....22 4.10.2 Store a Redial Number into the Phonebook...22 4.10.3 Delete a Redial Number..........23 4.10.4 Delete the Entire Redial List........23 4.11 Find the Handset (PAGING) ..........
- Page 4 6.2.6 Set the Handset Language........33 6.2.7 Rename the Handset..........34 6.2.8 Choose the Information to be Displayed in Idle..34 6.2.9 Set the Auto Answer..........34 Base Settings ................ 34 6.3.1 Set the Base Ringer Melody (Optional)....34 6.3.2 Set the Base Ringer Volume (optional)....35 6.3.3 Set the Dial Mode...........35 6.3.4...
-
Page 5: Important Safety Instructions
Do not overload wall outlets and extension cords as this can result in the risk of fire or electric shock. Unplug this product from the wall outlet and refer servicing to VTech under the following conditions: • When the power supply cord or plug is damaged or frayed. - Page 6 The use of other battery types or non-rechargeable batteries/primary cells can be dangerous. These may cause interference and/or unit damages. The manufacturer will not be held liable for damage arising from such non-compliance. Do not use third party charging bays. The batteries may be damaged.
-
Page 7: Set Up The Telephone
SET Up THE TELEpHOnE package Contents The package contains the following items: • Handset (1 for ES1610A or ES1610-0A, 2 for ES1610A Twin) • 1 Base station • 1 Power adapter for Base • Charger (1 for ES1610A Twin or ES1610-0A) •... -
Page 8: Connect The Base Station
Connect the Base Station Plug the power cable into the base station, plug the other end of the power adapter into the wall outlet not controlled by a wall switch. Plug one end of the telephone line cord into the base station and the other end into a telephone wall jack. -
Page 9: Install And Charge The Handset Battery
• Ensure power cord is fed through the slot on the base so unit sits flush with the desk. Connect the Charger (For ES1610A Twin or ES1610-0A only) Plug the power cable into the charger base. Plug the other end into the power wall socket and switch the power on. -
Page 10: Get To Know Your Phone
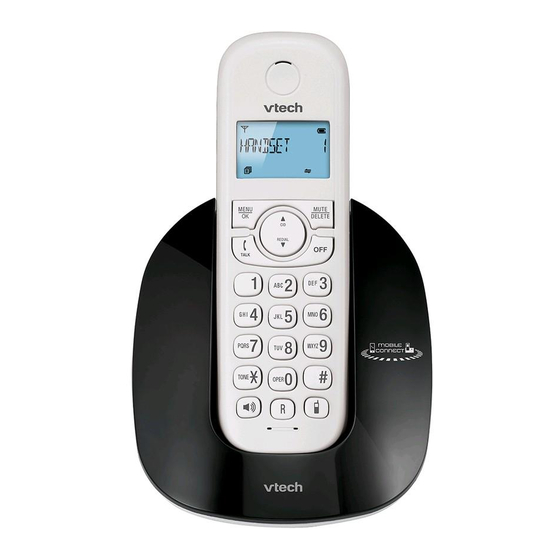
GET TO KnOW yOUr pHOnE Overview of the Handset MENU In idle mode: Press to access the main menu. In sub-menu mode: Press to confirm the selection. During a call: Press to access Intercom/ Phonebook/ Redial List/ Call List. MUTE DELETE In main menu mode: Press to go back to idle screen. - Page 11 In idle mode: Press to access the call list. In menu mode: Press to scroll up the menu items. In Phonebook list/Redial list/Call List: Press to scroll up the list. During a call: Press to increase the volume. In ringing: Press to increase the ringer volume. In idle mode: Press to access the redial list.
-
Page 12: Alphanumeric Keypad
ALpHAnUMErIC KEypAD, Press to insert a digit / character / 1 key in idle mode: Press and hold to access the voice mail. key in idle mode: Press and hold to enable or disable the keypad lock. key during a call (in Pulse mode): Press to switch to tone mode. # key in Idle mode: Press and hold to turn on / off the ringer. -
Page 13: Overview Of The Base Station
Overview of the Base Station Press on the base station to page your handset. It will ring for approximately 60 seconds. 2. CHArGInG CrADLE For charging the handset. -
Page 14: Handset Lcd Display Icons And Symbols
Handset LCD Display Icons and Symbols The LCD display gives you information on the current status of the telephone. Steadily on when the handset is in range of the base. Flash when out of range of the base or not registered to the base. - Page 15 Indicates when the battery needs charging. Flashes when low battery power level is detected. Indicates when a mobile call is in progress. Flashes when a mobile call is on hold. Indicates there is (are) Bluetooth device(s) paired. Flashes when Bluetooth device is being paired. Indicates when Bluetooth device #1 or #2 is connected with the telephone base.
-
Page 16: Menu Structure
Menu Structure When the handset is switched on and in idle mode: MENU Press to enter the main menu. Press to move through the available options. MENU MUTE Press to select a menu option or to return to DELETE MUTE the previous screen, or press and hold to return to DELETE... -
Page 17: Text And Digit Entry Table
Text and Digit Entry Table The following table shows you where each letter and punctuation character can be found. Respective character table will be used when corresponding menu language is selected. This will be helpful when storing a name in the phonebook and renaming your handset. In editing mode, a cursor is displayed to indicate the current text entry position. -
Page 18: Use Your Phone
USE yOUr pHOnE Introducing Bluetooth Your new telephone system with Bluetooth wireless technology has the following features: • Pairing a Bluetooth enabled mobile phone with the telephone base. Two Bluetooth devices can be paired up and connected. • Connecting a Bluetooth enabled mobile phone to make and receive MOBILE calls. -
Page 19: Bluetooth Setup
Bluetooth feature and search for a new device. Once your Bluetooth enabled mobile phone has found the device ES1610A BT, select it. Using your Bluetooth enabled mobile phone, enter the PIN code of the telephone (the default PIN code is 0000) to continue the pairing process. -
Page 20: Replace A Paired Device
Refer to the user’s manual of your Bluetooth enabled mobile phone to learn how to search for or add new Bluetooth devices. NOTEs: • Paired device(s) will be connected automatically and stored into the Paired Devices list. • When a device is successfully connected, corresponding device icon will be displayed on screen and Bluetooth device LED on base will be on. -
Page 21: Paired Devices
4.2.3 paired Devices The mobile(s) paired up will be displayed in the paired devices list, no matter it(they) is(are) connected or not. You can choose to connect, or remove the mobile from this menu. MENU Press and then to select pAIrED UnITS. Display will show the mobile name of paired device(s). -
Page 22: Make A Call
Make a Call 4.3.1 preparatory Dialling Using the home line: Enter the phone number and press to dial the number with home line. Using the mobile line: Enter the phone number and press to dial the number with mobile line. If there are two mobile devices connected, you have to select one device from the list. -
Page 23: Call From The Phonebook
4.3.3 Call from the phonebook MENU MENU Press then to select pHOnEBOOK. Press Press to select the desired phonebook entry. Using the home line: 3. Press to dial the selected phonebook entry with home line. Using the mobile line: 3. Press to dial the selected phonebook entry with mobile line. -
Page 24: Call Timer
4.3.6 Call timer Your handset automatically times the duration of every call. The call timer will display a few seconds after the call ends. It is shown in hours, minutes and seconds format (HH:MM:SS). Answer a Call Answering a home call: If handset is not on the charging cradle: When the phone rings, press to answer the call. -
Page 25: Mute A Call
Mute a Call You can mute the microphone so that you can talk to someone nearby without letting the caller hear you during a call. During a call: MUTE Press to mute the microphone and “MUTED” will display DELETE on the LCD. Your caller cannot hear you. MUTE Press again to unmute the microphone. -
Page 26: Redial The Last Number
4.10 redial the Last number You can redial up to 5 of the last numbers called. If you have stored a name in the phonebook to go with the number, the name will be displayed instead. The most recent last number will display at the top of the redial list. -
Page 27: 4.10.3 Delete A Redial Number
4.10.3 Delete a redial number Follow Steps 1 and 2 in the section of redial a number from the redial List. MENU Press to select DELETE. MENU Press to confirm. 4.10.4 Delete the Entire redial List Follow Steps 1 and 2 in the section of redial a number from the redial List. -
Page 28: 4.12.1 Call Another Handset
4.12.1 Call Another Handset MUTE In idle mode, press and the screen displays all registered DELETE handsets except the calling handset. Enter the desired handset number to intercom with. The called handset rings and press on the called handset to establish the internal call. -
Page 29: 4.12.4 Make A 3-Way Conference Call
4.12.4 Make a 3-way Conference Call The conference call feature allows one external call to be shared with two handsets (in intercom). The three parties can share the conversation and no network subscription is required. During an external call: Follow Steps 1 to 4 in the section of Transfer an External Call to Another Handset on page 24. -
Page 30: Private Phonebook
prIVATE pHOnEBOOK Your phone can store up to 20 private phonebook entries with names and numbers. Each phonebook entry can have a maximum of 20 digits for the phone number and 12 characters for the name. You can also select different melodies for your phonebook entries. -
Page 31: Writing Tips
5.1.2 Writing Tips MUTE Press to delete the last character or digit. DELETE MUTE Press and hold to delete all characters or digits. DELETE Press to move backward or forward through the characters / digits. Press and hold 0 to insert to pause (will appear as p) review a phonebook Entry MENU In idle mode, press... -
Page 32: Delete A Phonebook Entry
Delete a phonebook Entry MENU MENU Press to select pHOnEBOOK. Press Press to select the desired phonebook entry. MENU Press to select DELETE. MENU Press to confirm. Delete the Entire phonebook Entries MENU MENU Press to select pHOnEBOOK. Press Press to select the desired phonebook entry. -
Page 33: Phone Settings
pHOnE SETTInGS Your phone comes with a selection of settings that you can change to personalize your phone the way you like it to work. Date and Time Settings You will need to set the correct time and date so that you know when you received answering machine (applicable to model with answering machine) or call list entries. -
Page 34: Set The Date
6.1.3 Set the Date MENU Press to select HS SETTInGS. MENU Press to select DATE & TIME. MENU to select SET DATE. Press MENU Press then enter the date according to DD-MM-yy or MM-DD-yy format. The date will be in the format you set. MENU Press to confirm. - Page 35 • The alarm volume level is the same as the settings of the handset ringer volume. If the handset ringer is set to VOLUME OFF, the alarm still sounds at VOLUME 1 level. • During an external call or an internal call, if an alarm is set and when the alarm time is reached, “ALArM On”...
-
Page 36: Set The Ringer Melody For External Calls
6.2.2 Set the ringer Melody for External Calls You can set the melody to personalize your internal ringer. A total of 10 melodies are provided for your selection. MENU Press to select HS SETTInGS. MENU Press to select rInG SETUp. MENU Press to select EXT rInG. -
Page 37: Set The Ringer Volume
6.2.4 Set the ringer Volume You can set the ringer volume level. A total of 6 ringer volume levels including VOLUME OFF are provided for your selection. MENU Press to select HS SETTInGS. MENU Press to select rInG SETUp. MENU Press to select rInG VOLUME. -
Page 38: Rename The Handset
6.2.7 rename the Handset MENU Press to select HS SETTInGS. MENU Press to select rEnAME HS. MENU Press and enter the name of your handset. MENU Press to confirm. 6.2.8 Choose the Information to be Displayed in Idle You can choose to display time or handset name in your idle screen. MENU to select HS SETTInGS. -
Page 39: Set The Base Ringer Volume (Optional)
6.3.2 Set the Base ringer Volume (optional) MENU Press to select BS SETTInGS. MENU Press to select rInG VOLUME. MENU Press to select the desired ringer volume (a total of 6 ringer volume levels including VOLUME OFF). MENU 4. Press to confirm. -
Page 40: Change The System Pin Code
6.3.5 Change the System pIn Code A 4-digit system PIN code is used for changing the system settings of the base station. It is used to protect your phone against unauthorized use. The default system PIN code is 0000. MENU Press then to select BS SETTInGS. -
Page 41: Register A Handset
register a Handset Your handset is pre-registered to the base station. Up to five handsets can be registered to a a single base station. If for some reason, the handset is not registered to the base station, flashes even when the handset is near the base station. Register your handset following the process below. -
Page 42: Deregister A Handset
Deregister a Handset You may need to deregister your handsets if you wish to change the designated handset number of your registered handsets. You are requested to enter the 4-digit PIN in order to de-register a handset from the base station. NOTE You cannot deregister the handset that you are currently using. -
Page 43: Caller Display (Network Dependent)
CALLEr DISpLAy (nETWOrK DEpEnDEnT) Call List This feature is available if you have subscribed to the Caller Line Identification service from your telephone company. Your phone can store up to 10 received calls with date/time information in the Call List. The number will be shown on the LCD when the phone is ringing. -
Page 44: Store A Call List Number Into The Phonebook
Store a Call List number into the phonebook Follow Steps 1 and 2 in the section of View the Call list on page 39. MENU Press to select ADD TO pB. MENU Press to enter the name. (See Entering names on page 26) MENU Press... -
Page 45: Voice Mail (Network Dependent)
VOICE MAIL (nETWOrK DEpEnDEnT) Voice Mail Waiting Indication (VMWI) is an indication given to you when a new voice mail message is waiting on the network service provider. This feature is available if you have subscribed to the voicemail service from you network service provider. You can press and hold 1 to dial out to the voice mail number directly to listen to your voice mail messages. -
Page 46: Delete Vmwi Entries
Delete VMWI Entries To delete a single VMWI entry from the call list: MENU Press to select CALL LIST. Press in idle to access the call list. Press to select the desired VMWI entry. MENU Press to select DELETE. MENU Press to confirm. -
Page 47: Troubleshooting
TrOUBLESHOOTInG If you have difficulty with your phone, please try the suggestion listed below. problem Solutions My telephone does • Make sure the batteries are installed not work at all. and charged correctly. For optimum daily performance, return the handset to the telephone base after use. - Page 48 Low battery shows • Place the handset in the telephone on screen. base for recharging. • Remove and re-install the batteries and use it until fully depleted, then recharge the handset in the telephone base. • If the above measures do not solve the problem, replace the batteries.
- Page 49 There is • The handset may be out of range. interference Move it closer to the telephone base. during a telephone • If you subscribe to high-speed conversation. Internet service (digital subscriber My calls fade out line - DSL) through your telephone when I am using line, you must install a DSL filter the handset.
- Page 50 There is • If your telephone is plugged in with interference a modem or a surge protector, plug during a telephone the telephone (or modem/surge conversation. protector) into a different location. My calls fade If this doesn’t solve the problem, out when I am re-locate your telephone or modem using the handset...
-
Page 51: Technical Support
Therefore some of the functions may be limited when used in PBX systems. Technical Support For technical support, please call VTech Technical Inquiry Hotline 852-2667 7433. Please read out the serial number of this telephone to Technical Center. The serial number can be found... -
Page 52: 10. Technical Specifications
10. TECHnICAL SpECIFICATIOnS Free Field Range Up to 300 metres* Indoor Range Up to 50 metres* Handset Battery Life 10 hours talk time** (average values) 100 hours standby** Number of Handsets Up to 5 Electrical Connection/ Base mains adaptor: Base Mains Adaptor/ Model No.: Charger VT04EUK06045 / S003IB0600045... -
Page 53: Care And Maintenance Instructions
11. CArE AnD MAInTEnAnCE InSTrUCTIOnS Take care of your telephone • Your cordless telephone contains sophisticated electronic parts, so you must treat it with care. • Avoid rough treatment. • Place the handset down gently. • Save the original packing materials to protect your telephone if you ever need to ship it. - Page 54 Suite 1601, Lever Tech Centre, 69-71 King Yip Street, Kwun Tong, Kowloon, Hong Kong. Customer Service Hotline: (852) 2666 5558 Technical Inquiry Hotline: (852) 2667 7433 VTECH TELECOMMUnICATIOnS LTD. A member of THE VTECH GrOUp OF COMpAnIES. © 2013 VTech Telecommunications Ltd. All Rights Reserved.
Need help?
Do you have a question about the ES1610A and is the answer not in the manual?
Questions and answers