
Related Manuals for VTech CD1153


Summary of Contents for VTech CD1153
- Page 1 Go to www.vtechphones.com to register your product for enhanced warranty support and the latest VTech product news. CD1153 Speakerphone with caller ID/call waiting User’s Manual...
- Page 2 This manual has all the feature operations and troubleshooting necessary to install and operate your new VTech telephone. Please review this manual thoroughly to ensure proper installation and operation of this innovative and feature rich VTech product. For support, shopping, and everything new at VTech, visit our website at www.vtechphones.com or call 1 (800) 595-9511.
- Page 3 Important safety information The applied nameplate is located at the bottom of the product base. This symbol is to alert you to important operating or servicing instructions that may appear in this user’s manual. Always follow basic safety precautions when using this product to reduce the risk of injury, fire, or electric shock.
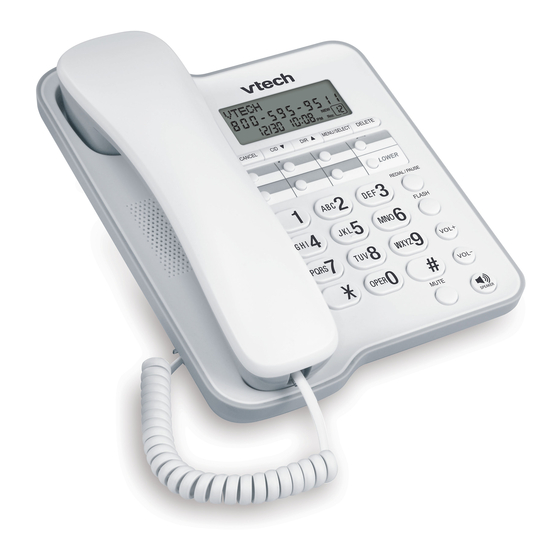
- Page 4 Telephone base Handset Coiled handset cord Telephone line cord Go to www.vtechphones.com to register your product for enhanced warranty support and the latest VTech product news. CD1153 Speakerphone with caller ID/call waiting Abridged user's manual Abridged user's manual...
- Page 5 STOP! Make sure to install four See page 4 for easy AA alkaline batteries instructions. (not included). If you subscribe to high-speed Internet service (DSL - digital subscriber line) through your telephone line, you must install a DSL filter between the telephone line cord and the telephone wall jack (page 6).
-
Page 6: Table Of Contents
User’s manual CD1153 Speakerphone with caller ID/call waiting Table of contents Call waiting ..........17 Mute ............17 Getting started Chain dialing ..........18 Introduction ...........1 Directory Quick reference guide ......2 Directory overview ......19 Battery installation ........ 4 Directory memory capacity ....19 Telephone installation ...... - Page 7 Caller ID history ........28 How the caller ID history (caller ID log) works ........ 28 Missed (new) call indicator ....28 Memory match ........29 Caller ID operation ......30 Review the caller ID history ....30 View dialing options ......30 Dial a call log entry ........31 Delete call ID log entries ......31 Save a caller ID log entry to the...
-
Page 8: Getting Started
Getting started Introduction This CD1153 telephone requires four alkaline AA batteries (not included). When there is no battery installed or the power of the installed batteries is low, this telephone will work only to make or answer calls with the handset. -
Page 9: Quick Reference Guide
Getting started Quick reference guide /CALL LOG /DIRECTORY • Press to review the call log (page 30). • Press to enter the directory (page 21). • While using the menu, press to scroll • While using the menu, press to scroll through the through the settings (page 12). - Page 10 Getting started Quick reference guide LOWER • Press with a speed dial key to enter the lower speed dial memory location. REDIAL/PAUSE • While using the handset or speakerphone, press to dial the last number dialed (page 16). • While the telephone is idle, press to display the last number dialed.
-
Page 11: Battery Installation
Getting started Battery installation Before using the telephone, you should install four new AA alkaline batteries (not included) to provide memory backup and enable the use of some features. The four AA batteries are required for the following features to work: speakerphone, mute, flash, caller ID, display, menu, directory, redial, clock, and the INCOMING CALL light. - Page 12 Getting started Battery installation If no batteries are installed or the batteries are depleted, you can make or answer calls using only the handset. • Use disposable AA alkaline batteries only. Do not use rechargeable batteries. • If you do not use the telephone for a long time, remove the batteries from the telephone to prevent possible leakage.
-
Page 13: Telephone Installation
Getting started Telephone installation Install the telephone base as shown below. If you subscribe to high-speed Internet service (DSL - digital subscriber line) through your telephone line, you must install a DSL filter between the telephone line cord and the telephone wall jack. The filter prevents noise and caller ID problems caused by DSL interference. -
Page 14: Installation Options
Getting started Installation options If you want to mount your telephone on a wall, use the mounting bracket to connect with a standard dual-stud telephone wall mounting plate. If you do not have this mounting plate, you can purchase one from many hardware or consumer electronic retailers. - Page 15 Getting started Installation options 3. Plug one end of the telephone line cord into the TEL LINE jack on the back of the telephone base. Route the telephone line cord through the slot. Bundle the telephone line cord and secure it with a twist tie. Place the bundled telephone line cord inside the bracket.
-
Page 16: Wall Mount To Tabletop Installation
Getting started Installation options Wall mount to tabletop installation To change the telephone base from the wall mount position to tabletop position, follow the steps below. 1. Slide the telephone base upwards, then remove it from the wall mounting plate. 2. - Page 17 Getting started Installation options 4. Hold the telephone base with both hands. Press on the tabs as indicated below and pull the mounting bracket up to release it from the telephone base. 5. Plug the other end of the telephone line cord into a telephone wall jack or a DSL filter. Replace the handset in the telephone base.
-
Page 18: Telephone Settings
Telephone settings Menu setup Menu operation The screen display prompts help you set up the telephone when you first install it. You can always get back to these setup screens by pressing MENU/ SELECT You can exit feature setup at any time by CANCEL pressing or by lifting the handset... -
Page 19: Feature Summary
Telephone settings Menu setup Feature summary Default settings are indicated by * in the following list. FEATURE/OPTION FUNCTION DATE/TIME Set the date and time. Use the dialing keys to edit. Use # (pound key) to select AM or PM. 1/01 12:00 AM Refer to Set date and time on page 13 for details. -
Page 20: Set Date And Time
Telephone settings Telephone settings Set date and time When the telephone is idle, the screen shows the date and time. If you subscribe to caller ID service, the day, month and the time are set automatically with each incoming call. You may also set the DATE/TIME date and time manually (see Review the caller ID history on page 30). -
Page 21: Home Area Code
Telephone settings Menu setup Home area code If you dial seven digits to make a local call (no area code required), enter your area code into the telephone as the home area code. When you receive a call from within your home area code, the caller ID history only displays the seven digits of the number, and when you dial from the call log, only seven digits are dialed. -
Page 22: Telephone Operation
Telephone operation Telephone operation Making a call Lift the handset or press SPEAKER, then use the dialing keys to dial a number. 0:00:01 The screen displays the elapsed time as you talk (in hours, 8887227702 minutes and seconds). 11/20 12:00 On hook dialing (predialing) 1. -
Page 23: Last Dialed Number
Telephone operation Telephone operation Last dialed number The telephone stores the last number dialed (up to 24 digits). To dial the last dialed number: 1. Lift the handset or press SPEAKER. 2. Press REDIAL to dial the number. -OR- 1. When the telephone is idle, press REDIAL to display the last dialed number. -
Page 24: Options While On Calls
Telephone operation Options while on calls Volume control You can set the listening volume to one of four levels. While on a call, press VOL+/VOL- to adjust the listening volume. The volume level indicator briefly displays on the screen to indicate the setting. VOLUME Handset volume: When you are on a call using the handset, press VOL+ to... -
Page 25: Chain Dialing
Telephone operation Options while on calls Chain dialing Use this feature to a dialing sequence from the numbers in the directory, speed dial memory or caller ID history while you are on a call. Chain dialing is useful if you need to access numbers other than telephone numbers (such as bank account numbers or access codes) from the directory, speed dial memory locations or call log. -
Page 26: Directory
Directory Directory overview Directory memory capacity This telephone can store up to 25 entries, with a maximum of 15 alphanumeric characters for names and 24 digits for telephone numbers. Directory entries are stored in alphabetical order, according to the first character. You may wish to enter names with the last name first to maintain consistency with information stored through the caller ID features of this telephone. -
Page 27: Create Directory Entries
Directory Create directory entries Store a directory Follow the steps below to store a new entry in the irectory. Blinking 1. When the telephone is idle, press /DIRECTORY to enter the directory menu. REVIEW STORE 2, Press until STORE is blinking. 3, Press SELECT. -
Page 28: Review The Directory Entry
Directory Review the directory entry Review directory entries 1. When the telephone is idle, press to enter directory REVIEW STORE menu. until REVIEW is blinking. 2. Press 3. Press SELECT to display the first directory entry. 4. Press to browse the first directory entry. Entries appears alphabetically by the first letter in the name. -
Page 29: Dial Or Edit Directory Entry
Directory Dial or edit directory entry Dial a directory number 1. Search for the desired directory entry (see Review directory CHRISTINE SMITH entries on page 21). 2. When the desired entry displays, lift the handset or press 8887227702 SPEAKER to dial. 0:00:01 8887227702 12:00... -
Page 30: Delete Directory Entries
Directory Delete directory entries Delete a directory entry 1. Search for the desired directory entry (see Review directory entries on page 21). CHRISTINE SMITH 2. Press DELETE to delete the displayed entry. Then the 8887227702 screen displays DELETE ENTRY? 3. Press SELECT, the screen then displays DELETED. You cannot retrieve a deleted entry. -
Page 31: Speed Dial Memory Overview And Storage
Directory Speed dial memory overview and storage Speed dial memory overview This telephone has 14 speed dial memory locations where you can store telephone numbers you wish to dial more quickly. Each speed dial memory location can store a telephone number with up to 24 digits. Speed dial memory storage Use the following steps to store a telephone number in a desired speed dial memory location. -
Page 32: Speed Dial 3
Directory Speed dial To review a speed dial number 1. Press the speed dial key or press LOWER + the speed dial key to choose a desired speed dial memory location (1-14) when the elephone is idle. 2. The screen shows the telephone number stored in that memory location. -
Page 33: To Edit A Speed Dial Number
Directory Speed dial To edit a speed dial number 1. See To review a speed dial number on page 25 to show the desired dial entry. SPEED DIAL #1 2. Press SELECT. 8887227702 3. The screen shows EDIT NUMBER and the telephone number. -
Page 34: Caller Id About Caller Id
Caller ID About caller ID This product support caller ID services offered by most telephone service providers. Caller ID allows you to see the name, number, date and time of caller. The available caller ID information will appear after the first or second ring. Information about caller ID with call waiting Caller ID with call waiting lets you see the name and telephone number of the caller before answering the call, even while on another call. -
Page 35: Caller Id History
Caller ID Caller ID history How the caller ID history (caller ID log) works The telephone stores caller ID information about the last 60 incoming callers. Entries are stored in reverse chronological order. The phone deletes the oldest entry when the log is full to make room for new calls. -
Page 36: Memory Match
Caller ID Caller ID history Memory match If the incoming telephone number matches the last seven digits of a telephone number in your directory, the name that appears on the screen matches the corresponding name in your directory. For example, if Christine Smith calls, her name appears as CHRIS if this is you entered it into your directory. -
Page 37: Caller Id Operation
Caller ID Caller ID operation Review the caller ID history Review the caller ID history to find out who called, to return the call, or to copy the caller’s name and number into your directory. CALL LOG EMPTY appears if there are no records in the caller ID history. -
Page 38: Dial A Call Log Entry
Caller ID Caller ID operation Dial a call log entry /CALL LOG to enter the caller ID history when the 1. Press telephone is idle. CHRISTINE SMITH 2. Press to scroll to the desired entry. 888-722-7702 3. Lift the handset or press SPEAKER to dial the displayed 11/20 12:00... -
Page 39: Save A Caller Id Log Entry To The Directory
Caller ID Caller ID operation Save a caller ID log entry to the directory 1. Press /CALL LOG to enter the caller ID history when the CHRISTINE SMITH telephone is idle. 888-722-7702 2. Press to scroll to the desired entry. 3. -
Page 40: Store A Call Log Entry To A Speed Dial Memory Location
Caller ID Caller ID operation Store a call log entry to a speed dial memory location: 1. When the telephone is idle, press /CALL LOG to enter the caller ID history. CHRISTINE SMITH 2. Press to scroll to the desired entry. 888-722-7702 3. -
Page 41: Reasons For Missing Caller Id Information
Caller ID Reasons for missing caller ID information There are occasions when other information or no information shows for various reasons. On-screen message Reason PRIVATE NUMBER The caller prefers not to show the phone number. PRIVATE NAME The caller prefers not to show the name. PRIVATE CALLER The caller prefers not to show the phone number and name. -
Page 42: Appendix
Appendix Screen messages and icons Screen icons NEW caller ID log --new and missed calls. CHRISTINE SMITH 888-722-7702 Caller ID entry counter - Caller ID entry number. 12:00 11/20 LOWER Ringer off - the ringer is off. Low battery indicator - the power of the installed batteries is low. -
Page 43: Screen Display Messages
Appendix Screen messages and icons Screen display messages CALL LOG EMPTY There are no call history entries. DELETED All the entries stored in the call history have been deleted. -OR- The current call log, directory entry, redial or speed dial memory location entry is deleted. -
Page 44: Troubleshooting
Appendix Troubleshooting If you have difficulty with your telephone, please try the suggestions below. For www.vtechphones.com Customer Service, visit our website at or call 1 (800) 595-9511 www.vtechcanada.com . In Canada, please visit or call 1 (800) 267-7377. My telephone does not work at all. •... - Page 45 Appendix Troubleshooting • Disconnect the telephone base from the telephone wall jack and plug in another corded telephone. If calls are still not clear, the problem is probably in the wiring or telephone service. Contact your telephone service provider (charges may apply). •...
- Page 46 Appendix Troubleshooting The telephone does not receive caller ID or the telephone does not display caller ID during call waiting. • Make sure you subscribe to caller ID with call waiting features provided by the telephone service provider. • The caller might not be calling from an area that supports caller ID. with •...
-
Page 47: General Product Care
Appendix General product care To keep your telephone working well and looking good, follow these guidelines: • Avoid putting it near heating appliances and devices that generate electrical noise (for example, motors or fluorescent lamps). • DO NOT expose it to direct sunlight or moisture. •... -
Page 48: Fcc And Acta Information
Appendix FCC and ACTA information If this equipment was approved for connection to the telephone network prior to July 23, 2001, it complies with Part 68 of the Federal Communications Commission (FCC) rules. If the equipment was approved after that date, it complies with the Part 68 rules and with the Technical Requirements for Connection of Equipment to the Telephone Network adopted by the Administrative Council for Terminal Attachments (ACTA). - Page 49 Appendix FCC and ACTA information that you can still dial the emergency number manually if the memory dialing feature doesn’t work. b. This feature is provided only as a convenience, and the manufacturer assumes no responsibility for customer reliance upon the memory feature. c.
-
Page 50: Part 15 Of Fcc Rules
Appendix Part 15 of FCC rules Some telephone equipment generates, uses, and can radiate radio-frequency energy and, if not installed and used properly, may cause interference to radio and television reception. This product has been tested and found to meet the standards for a class B digital device, as specified in part 15 of the FCC rules. These specifications are designed to provide reasonable protection against such interference in a residential installation. -
Page 51: Limited Warranty
1. What does this limited warranty cover? The manufacturer of this VTech product warrants to the holder of a valid proof of purchase (“CONSUMER” or “you”) that the product and all accessories provided in the sales package (“PRODUCT”) are free from defects in material and workmanship, pursuant to the following terms and conditions, when installed and used normally and in accordance with the PRODUCT operating instructions. - Page 52 Appendix Limited warranty limited warranty. Transportation, delivery or handling charges are prepaid. The manufacturer assumes no risk for damage or loss of the PRODUCT in transit. If the PRODUCT failure is not covered by this limited warranty, or proof of purchase does not meet the terms of this limited warranty, the manufacturer notifies you and requests that you authorize the cost of repair prior to any further repair activity.
- Page 53 And your life. VTech Communications, Inc. A member of THE VTECH GROUP OF COMPANIES. VTech is a registered trademark of VTech Holdings Limited. Specifications are subject to change without notice. © 2019 VTech Communications, Inc. All rights reserved. 10/19. CD1153_WEBCIB_V5.0...
Need help?
Do you have a question about the CD1153 and is the answer not in the manual?
Questions and answers
can I set speed dial without the phone plugged to wall jack
No, the phone must be plugged into a wall jack to set speed dial, as it requires access to a dial tone.
This answer is automatically generated
I had a VTech digital answering system that has been working sometimes, then no dial tone. I bought a newer one, thinking I knew how to set it up but can't see where to plug in power cord. It is a VTech cd1153. It reads in use/no line. I am paid up with Frontier.
How do I set back to zero the missed calls log without erasing the date and time screen?