
Related Manuals for HobbyZone Super Cub Z1


Summary of Contents for HobbyZone Super Cub Z1
-
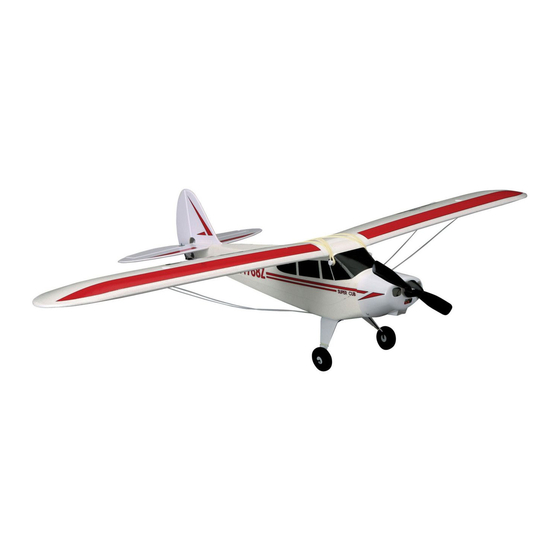
Page 1: Instruction Manual
HobbyZone ® products are distributed exclusively by Horizon Hobby, Inc. 4105 Fieldstone Road Champaign, IL 61822 ©2006 Horizon Hobby, Inc. 9035 Instruction Manual HBZ7115... - Page 2 ® level, the top sensor sees the sky, while the bottom sees the Congratulations on your purchase of the HobbyZone Zone 1 Crash damage is not covered under the warranty. ground, and they tell the onboard computer that the plane is Super Cub.
- Page 3 Installation of Batteries into the Transmitter Motor Test and Battery Discharging 1. Remove the battery cover and install 1. Turn on the transmitter. 4. Keep the throttle advanced until the the included 8 AA batteries. 2. Install the fl ight battery into the propeller slows and fi...
-
Page 4: Charging The Aircraft Battery
Charging the Aircraft Battery AC peak charger features: DC Peak Charger Maximum 1. Select the charge rate of 1.2A for Your Super Cub comes with a variable • Delta peak charging circuitry safely Charge Rates charging the included 8.4V 1000mAh rate DC peak charger, as well as an AC charges your battery pack 4.8V 600mAh Ni-MH... -
Page 5: Landing Gear Attachment
Landing Gear Attachment Attaching the Wing 1. Locate the wing and wing strut 1. Locate the included wire landing gear. screws that are included. 2. Slide landing gear into the allotted 2. Place the wing so that it is centered slot on the bottom of the fuselage. -
Page 6: Attaching The Tail
Attaching the Tail 6. Attach the clevis from the rudder 1. Locate the rudder and horizontal pushrod into the outermost hole stab assemblies and carefully remove of the control horn on the rudder, and them from the box. It may be helpful slide the clear rubber sleeve down to watch the included video when over the clevis. -
Page 7: Tail Control Test
Tail Control Test 4. Push the stick full forward (elevator 1. Make certain the throttle slider is 6. If your airplane is not responding, control). When this is done, the in the “off” position. Turn on the DO NOT FLY IT! Call the Horizon horizontal control surface should transmitter. - Page 8 Making Adjustment to the Control Surfaces Choose a Large, Open Grass Field a. Turn on the transmitter. In order to have the most success, 1. Any changes necessary to bring both b. Insert the battery pack into the and to protect property and your the rudder and elevator to neutral fuselage and plug the battery into Super Cub, it is very important to...
-
Page 9: Choose A Calm Day
Range Test Choose a Calm Day We know you want to fl y your Super Prior to your fi rst fl ight, you will need Warning: The person holding the airplane needs to Cub as soon as you have it. However, to perform a range test. -
Page 10: Anti-Crash Technology (Act)
Anti-Crash Technology (ACT) ® Your HobbyZone Super Cub comes Remember, the purpose of Anti-Crash The electronic system connected to the equipped with exclusive Anti-Crash Technology is to help you learn to fl y sensors knows that the airplane (with Technology. ™... -
Page 11: Act Flying Tips
ACT Flying Tips Using Elevator (Pitch Control) ® Your HobbyZone Super Cub is Just after a stall occurs, the nose of the • Never fl y at too low of an altitude anything else that can refl ect light ™ equipped with a third channel for pitch airplane will go down, and the airplane and expect ACT... -
Page 12: Hand Launch
Hand Launch Runway Takeoff (ROG) ® On fi rst fl ights, it is a good idea to have hand and the transmitter in your Your HobbyZone Super Cub can be 1. Make sure your landing gear is a second person, ideally an adult, help left hand. - Page 13 Flying ® 1. After you have launched your Super 4. Don’t let your airplane get too far 7. It may be helpful to fl y in smooth Rudder Trim: If the HobbyZone Super Cub, it will begin climbing at full downwind from you.
-
Page 14: Throttle Adjustment
Throttle Adjustment Landing ® 1. When launching, the throttle should When you notice that your HobbyZone the motor to run briefl y, and may allow be all the way on. Super Cub no longer climbs well under you to better adjust your landing. Do 2. -
Page 15: Aerobatic Flight
Aerobatic Flight Repairing Minor Damage It is recommended in the directions that If you happen to crash, and part of the the Super Cub controls be set for softer tail or wing breaks, it can be repaired responses and at the outer holes of the by using packing tape to cover the control surfaces. -
Page 16: Warnings And Safety Checklist
Warnings and Safety Checklist 1. Read and follow this manual and 5. Only use a battery charger that is 7. Hold the plane securely, and keep included video CD completely, compatible for use with the Super all body parts away from the pro- observing all instructions and safety Cub battery. -
Page 17: Troubleshooting
Success Tips Troubleshooting 1. Don’t fl y in winds over 7 mph (11 K/h). 4. Don’t attempt to fl y or do maneuvers PROBLEM POSSIBLE CAUSE SOLUTION First-time pilots should get help from beyond your fl ying abilities without an experienced radio control pilot seeking the assistance of an experi- Unit does not operate 1. - Page 18 Warranty and Follow-Up Procedures other than an authorized Horizon As Horizon Hobby, Inc. has no control or other property. This product is not Limited Warranty Period Hobby, Inc. service center. This warranty over use, setup, fi nal assembly, modi- intended for use by children without Horizon Hobby, Inc.
- Page 19 Warranty and Follow-Up Procedures (continued) Questions or Assistance during business days, RMA number, and repairs. Please advise us of your pre- Electronics and engines requiring in- a brief summary of the problem. Be sure ferred method of payment. Horizon spection or repair should be shipped to For questions or assistance, please your name, address, and RMA number Hobby accepts money orders and...
-
Page 20: Replacement Parts
Replacement Parts Replacement parts are available at your local hobby shop or www.horizonhobby.com. PART# DESCRIPTION RETAIL PART# DESCRIPTION RETAIL PART# DESCRIPTION RETAIL PART# DESCRIPTION RETAIL PKZ1005 Propeller $3.49 HBZ7151 ESC/Receiver Ch.1 $29.99 HBZ7076 Transmitter, Ch. 6, 27.255 $32.99 PKZ1536 Motor Screws (2): M 2.5 x 6 $0.99 HBZ7104 Prop Shaft with Tires $2.49 HBZ7152 ESC/ Receiver Ch.
Need help?
Do you have a question about the Super Cub Z1 and is the answer not in the manual?
Questions and answers