Table of Contents
Advertisement
Quick Links
Advertisement
Table of Contents

Related Manuals for HobbyZone FireBird


Summary of Contents for HobbyZone FireBird
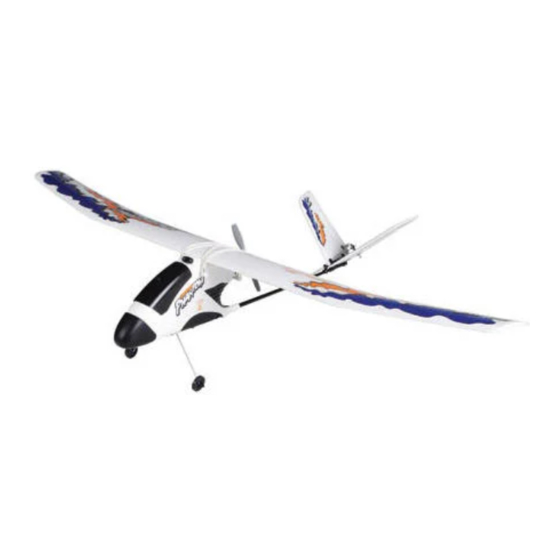
- Page 1 Instruction Manua ™...
- Page 2 Hey, nice move! You just snagged the world’s neatest radio control aircraft— the Firebird from HobbyZone. Our mission at HZ is to make sure you have Welcome to the a great experience with your ‘Bird— HobbyZone ™ to have safe fun and learn a few things along the way.
- Page 3 “click. ” Plug charger into a 1 10V AC wall outlet. OPTIONAL ACCESSORY • Charge battery for 2 hours. The FireBird Fast Field Charger charges your DO NOT OVERCHARGE. FireBird’s aircraft battery in just 20-30 minutes • See “Warnings and Safety”...
-
Page 4: Step 2. Wing Assembly
STEP 2. Wing Assembly • Lay wing flat on table, place book on center section to hold it flat. Needed for STEP 2 • Position wing tip 2" above table top by placing transmitter under wingtip. Wing Brace (x2) • Remove sticky tape backing from wing brace and attach as shown. - Page 5 STEP 3. Wing Brace Tape • MAKE SURE wing tip is positioned at Needed for STEP 3 2" height. Brace tape (x4) - located on decal sheet • Add wing brace tape (4 yellow rectangles as shown, labeled #1 located on decal sheet) directly over ™...
- Page 6 STEP 4. Wing Cap Wing cap, full-size side view. Note FRONT EDGE that front edge has more “curve. ” Wing Wing Center • Locate wing center marked by molded “dots. ” • Determine front of wing. FRONT • Locate front of wing cap (see above). •...
- Page 7 STEP 5. Propeller Needed for STEP 5 Propeller • Push prop firmly into place on motor shaft.
- Page 8 STEP 6. Hatch Cover Fastener • Remove thumbscrew installed in front top of fuselage • Install thumbscrew in canopy hole as shown in order to secure canopy.
-
Page 9: Step 7. Wing Mounting
STEP 7. Wing Mounting Needed for STEP 7 Remember: straight edge is rear! Rubber bands (x4) IMPORTANT • Center wing on fuselage EXACTLY. • Secure wing in place with at least 4 rubberbands (1 per side and 2 crossing) or poor flying will result. - Page 10 STEP 8. Decals Needed for STEP 8 Decal Sheet - the numbers on this page refer to the corresponding number on the decal sheet. ™ Fuselage (repeat on both sides) NOTE: Decals wrap around to underside of fuselage. ™ Tail Main Wing...
- Page 11 STEP 9. Transmitter Needed for STEP 9 “AA” Alkaline Batteries (x8 - not included) • Remove transmitter back cover by pushing down with thumbs as arrows show. • Install batteries. Use fresh 1.5V “AA” alkalines only. • WATCH POLARITY. Replace cover. •...
-
Page 12: Step 10. Tail Control Test
• Switch on transmitter– check LED. • Install battery in fuselage and plug it in. • View Firebird from rear. • Move the right stick side to side. The tail flaps should move as shown on the following page. - Page 13 Moves Up Moves Up...
-
Page 14: Motor Test
11. Motor Test WARNING: KEEP EVERYTHING CLEAR OF THE PROPELLER • Make sure the throttle “offset” switch is in down (off) position. • Turn on the transmitter. • Push the start button on the side of the plane and move the transmitter’s left stick up. - Page 15 12. Choose a Field • A LARGE open, tall-grass field is best. Your Firebird flies approx. 20 mph, so it covers ground fast. The bigger the field, the better! VERY IMPORTANT: DO NOT fly over or near people, buildings, vehicles, trees, water, pavement, gravel, any hard surface, or any object you don’t want to crash into.
- Page 16 • Hold the transmitter flat so the antenna wind. Be smart, follow this tip and protect is parallel to the ground and note how your Firebird— you’ll be glad you did. much the flag moves in the wind. If the flag hangs down, you’re good to fly.
- Page 17 STEP 1 4. Range T est • One person holds the transmitter; the other person walks 100 paces away with the airplane. You will need two people to do the • Turn on transmitter. range test—one to hold the transmitter •...
- Page 18 20 feet away. IMPORTANT On first flights, have a second person (adult recommended) launch the Firebird while the pilot controls with the transmitter. Adult assistance is always recommended with pilots 12 years of age or younger.
- Page 19 STEP 16. Flying • After launching, model will gently climb. Keep throttle full on. Begin turn at 50 ft altitude. Keep upwind so wind will not take it too far away. TURNING–Hold the right stick in the direction you want the model to turn. TRIMMING–If the model always turns one direction or the other, first follow adjustments on p.23, then use the trim control lever below...
-
Page 20: Step 1 7. Throttle Adjustment
WATCH OUT! If you’re flying with the full throttle motor off or at low speed, allow your Firebird more area for turns. • To achieve a level “cruising” altitude, reduce power by moving the throttle stick down a small amount (to approx. 85–90% of full on). - Page 21 • Line the model up, heading directly into the wind, toward the desired landing spot. At 20 feet of altitude, release the throttle stick to turn off motor. Firebird will glide in for landing. Expert Tip: As you get more experienced at flying, try adding a small “blip” of power just before touchdown.
- Page 22 If a Crash Occurs • If you happen to crash and part of the foam wing or tail breaks, it can be repaired using packing tape to cover missing pieces. • If damage is severe, replacement parts are available. See page 27 of this manual.
-
Page 23: Making Adjustments
Making Adjustments • Pinch or pull apart the U- bend in the control wires to adjust the control flaps up or down to make your plane fly straight. • If plane flies to right, pull apart U-bend so the right control flap is 1/16”... -
Page 24: Warnings And Safety
Never allow anyone to attempt to catch the Firebird while it is in flight or serious injury can 7.When operating your Firebird, ALWAYS turn on result. Please remember: CRASH DAMAGE the transmitter BEFORE you plug the battery into IS NOT COVERED BY THE WARRANTY. -
Page 25: Troubleshooting
2. Push connectors together until they “click” 2. No electrical connection 3. Charge battery for 2 hours 3. Firebird battery not charged 4. Don’t forget to push the start button 4. Airplane receiver is not activated on side of fuselage just before flight 5. -
Page 26: Success Tips
Firebird. 3. WATCH OUT! Holding the right stick full-over for too long can cause the Firebird to spiral dive and crash. At the very first sign of your Firebird beginning to spiral or banking steeply, immediately release the stick or give the opposite control to level the wings. -
Page 27: Replacement Parts
Replacement Parts Keep that Firebird flying! Spare parts are available from your dealer or from Horizon Hobby direct (horizonhobby.com). Please check with your dealer first— by supporting your dealer, he’ll be there when you need him. SUGGESTED SUGGESTED PART #... - Page 28 Include complete name and address receipt. Champaign, IL 61822 information inside the carton, as well Phone: (217) 355-9511 ™ ©2000 Horizon Hobby, Inc. HobbyZone products are exclusively distributed by Horizon Hobby, Inc. 4105 Fieldstone Road, Champaign, IL, 61822 horizonhobby.com HBZ1035...
Need help?
Do you have a question about the FireBird and is the answer not in the manual?
Questions and answers