Table of Contents
Advertisement
HBZ7300
HobbyZone
products are distributed exclusively by
®
Horizon Hobby, Inc.
4105 Fieldstone Road
Champaign, IL 61822
©2009 Horizon Hobby, Inc.
Horizon Hobby UK
Units 1-4 Ployters Rd
Staple Tye
Harlow, Essex
CM18 7NS
United Kingdom
Horizon Hobby Deutschland GmbH
Hamburger Strasse 10
25335 Elmshorn
Germany
PRC patent number ZL 2005 1 0028326.6
13792 Printed 3/09
Advertisement
Table of Contents

Related Manuals for HobbyZone SuperCub


Summary of Contents for HobbyZone SuperCub
- Page 1 HBZ7300 HobbyZone products are distributed exclusively by ® Horizon Hobby, Inc. 4105 Fieldstone Road Champaign, IL 61822 ©2009 Horizon Hobby, Inc. Horizon Hobby UK Units 1-4 Ployters Rd Staple Tye Harlow, Essex CM18 7NS United Kingdom Horizon Hobby Deutschland GmbH...
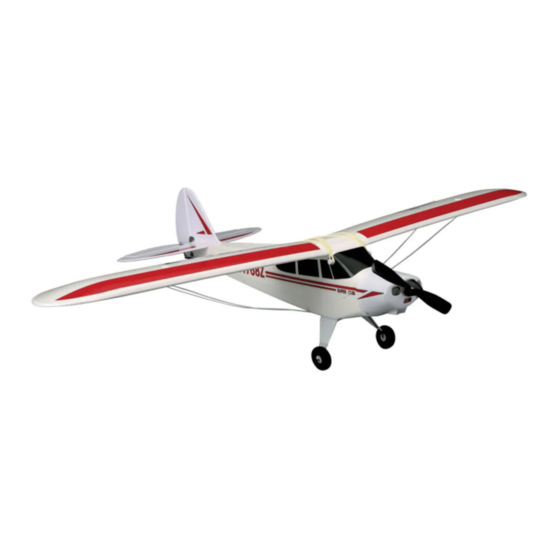
- Page 2 Congratulations on your purchase of the HobbyZone Zone 1 ® Crash damage is not covered flying correctly. If the plane enters a dive and the sensors detect Super Cub LP. Your Super Cub LP comes with everything needed under the warranty.
-
Page 3: Charging The Aircraft Battery
Charging the Aircraft Battery The charger included with your DC Li-Po Balancing Charger Features 1. The 12V DC 3S Li-Po balancing battery charges. It is not Super Cub LP uses unique circuitry that charger provides a charge current recommended to charge batteries •... -
Page 4: Landing Gear Attachment
Installation of Batteries into the Transmitter Landing Gear Attachment 1. Remove the battery cover and install 1. Locate the included wire landing the included 8 AA batteries. gear. 2. Be certain that you observe proper 2. Slide the landing gear into the polarity when installing the allotted slot on the bottom of the batteries, and then replace the... -
Page 5: Attaching The Wing
Attaching the Wing Attaching the Tail 1. Locate the wing and strut screws 1. Locate the rudder and horizontal stabilizer assemblies and carefully that are included. remove them from the box. 2. Place the wing so that it is centered on the top of the fuselage. -
Page 6: Tail Control Test
Attaching the Tail (continued) Tail Control Test 6. Attach the clevis from the rudder 1. Make certain the throttle slider is 4. Push the stick full forward pushrod into the outermost hole of in the “off” position. Turn on the (elevator control). -
Page 7: Making Adjustments To The Control Surfaces
Tail Control Test (continued) Making Adjustments to the Control Surfaces 6. If your airplane is not responding, 1. Any changes necessary to bring b. Insert the battery pack into the DO NOT FLY IT! Please refer to the both the rudder and the elevator fuselage and plug the battery into Troubleshooting section at the back to neutral (zero degrees) should be... -
Page 8: Choose A Calm Day
Choose a Large, Open Grass Field Choose a Calm Day In order to have the most success, and We know you want to fly your Super to protect property and your Super Cub Cub LP as soon as you have it. How- LP, it is very important to select a place ever, flying in too much wind can place too windy... -
Page 9: Range Test
Range Test Anti-Crash Technology (ACT) Prior to your first flight, you will need Your Super Cub LP comes equipped The electronic system connected to the Warning: The person holding the airplane to perform a range test. Two people with exclusive Anti-Crash Technology. sensors knows that the airplane (with needs to make sure the propeller are needed to do this—one to hold the... - Page 10 Anti-Crash Technology (ACT) (continued) Anti-Crash Technology (ACT) (continued) released the steering stick and To turn off ACT, simply move the switch and/or when the sun is close to the returned it to neutral. on the top of the transmitter to the horizon.
-
Page 11: Using Elevator (Pitch Control)
Using Elevator (Pitch Control) Hand Launch Your Super Cub LP is equipped with a Just after a stall occurs, the nose of the On first flights, it is a good idea to have 5. If you are hand launching the aircraft third channel for pitch control (elevator). -
Page 12: Runway Takeoff (Rog)
Runway Takeoff (ROG) Flying Your Super Cub LP can be launched by 1. Make sure your landing gear is 1. After you have launched your Super 4. Don’t let your airplane get too far way of a runway takeoff (ROG). properly installed. -
Page 13: Throttle Adjustment
Flying (continued) Throttle Adjustment 7. It may be helpful to fly in smooth Rudder trim: If the Super Cub LP 1. When launching, the throttle should Note: If you’re flying with the motor off, or at large ovals at higher altitudes so you seems to drift in one direction when the be all the way on. -
Page 14: Aerobatic Flight
Landing Aerobatic Flight When you notice that your you to better adjust your landing. Do It is recommended in the instructions Super Cub LP no longer climbs well not re-arm the motor more than once. that the Super Cub LP controls be set under full power, normally after about for softer responses and at the outer Warning: Do not attempt to catch the... -
Page 15: Optional Floats
Also, any type of CA mounts installed for the optional will help repair the foam fuselage and HobbyZone Super Cub LP floats wing. However, if damage is severe, or (HBZ7390). Refer to the float manual for if the wing and/or tail are bent, replace installation and tips on float flying. -
Page 16: Warnings And Safety Checklist
Warnings and Safety Checklist 1. Read and follow this manual and the 5. Only use a LiPo battery charger that 8. After you have finished flying, or at included DVD completely, observing is compatible for use with the Super any time you have the radio system all instructions and safety directions. -
Page 17: Troubleshooting
Success Tips Troubleshooting 1. Don’t fly in winds over 7 mph gently to level flight and level the PROBLEM POSSIBLE CAUSE SOLUTION (11km/h). First-time pilots should wings. Unit does not operate 1. Transmitter AA batteries are depleted 1. Check polarity installation or replace with get help from an experienced radio 4. -
Page 18: Replacement Parts
Replacement Parts PART# DESCRIPTION RETAIL PART# DESCRIPTION RETAIL HBZ7310 Decal Sheet: Super Cub LP $3.99 HBZ7363 Fuselage Replacement parts are available at your local hobby shop or www.horizonhobby.com. w/Electronics, Ch. 3 $73.99 HBZ7351 ESC/Receiver Ch. 1 $26.99 PART# DESCRIPTION RETAIL PART# DESCRIPTION RETAIL HBZ7364 Fuselage... -
Page 19: Warranty
Warranty damage due to acts of God, accident, use, setup, final assembly, modification misuse, abuse, negligence, or misuse, no liability shall be assumed Warranty Period (b) Limitations- HORIZON MAKES NO nor accepted for any resulting damage commercial use, or modification of or to Exclusive Warranty- Horizon Hobby, Inc., WARRANTY OR REPRESENTATION, any part of the Product. - Page 20 property. This Product is not intended Inspection or Repairs sales receipt must also be included for available upon request. You must for use by children without direct adult If this Product needs to be inspected or warranty consideration. Be sure your include this request with your repair.
-
Page 21: Ce Compliance Information For The European Union
CE Compliance Information for the European Union United States Horizon Hobby UK Electronics and engines requiring Units 1-4 Ployters Rd Staple Tye Instructions for Disposal of WEEE by Users in the European Union inspection or repair should be shipped to the following address: Harlow, Essex This product must not be disposed of with other waste. -
Page 22: Declaration Of Conformity
Declaration of Conformity (in accordance with ISO/IEC 17050-1) No. HH20090202 Product(s): Super Cub LP RTF Item Number(s): HBZ7300 Equipment class: The objects of declaration described above are in conformity with the requirements of the specifications listed below, following the provisions of the European R&TTE directive 1999/5/EC: EN 301 489-1 v.1.6.1 General EMC requirements...
Need help?
Do you have a question about the SuperCub and is the answer not in the manual?
Questions and answers