Advertisement
Quick Links
Advertisement

Related Manuals for iNFinuvo CleanMate QQ2 LT Series


Summary of Contents for iNFinuvo CleanMate QQ2 LT Series
- Page 1 CleanMate CleanMate QQ2 LT Series Robotic Vacuum Cleaner USER MANUAL QQ2 LT Series Robotic Vacuum Cleaner If you have question or issue on the product, do not return it to store. Please contact technical support first with live chat at: http://cleanmate.metapo.com...
- Page 2 QQ2 LT Series ** Before using this product, please remove 2 white protection pads inside front bumper. ** Please follow all normal saety precautions to avoid the occurrence of situations such as fire, short-circuit, and injury. Please make sure that you observe all the following safety precautions:...
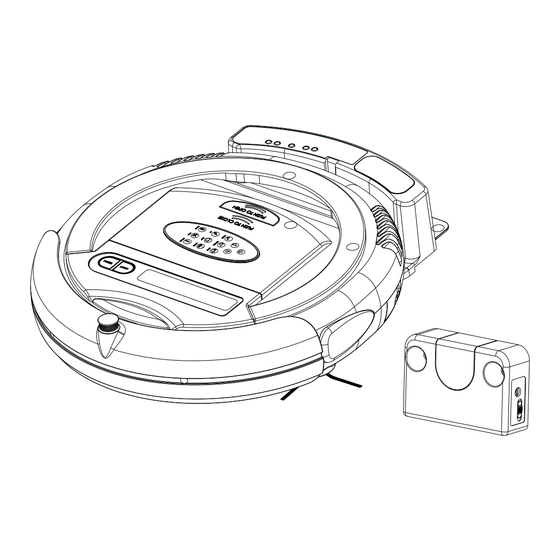
- Page 3 QQ2 LT Series QQ2 LT Series 1. This product is a revolutionary robotic vacuum cleaner. It utilizes high vacuum suction, a roller brush on the bottom, a side brush for cleaning along walls and QQ2 LT other objects, an ultraviolet light to help with disinfection, and even has a compartment for adding fragrance to the air as it cleans.
- Page 4 QQ2 LT Series QQ2 LT Series Item Description QQ2 LT Series Main Unit Sonic Wall Sensor Remote control (for QQ2 LTV only) Filter Rechargeable battery Charger User manual Hand brush Self charging base Fragrance (not included) Sonic Wall (included for QQ2...
- Page 5 QQ2 LT Series QQ2 LT Series Function of each Button: 1.Start Button: Press the Start Button to begin the automatic cleaning of the room. 2.Stop Button: Press the Stop Button to stop the activity of the unit, and it will emit a long sound.
-
Page 6: Sonic Wall Setup
QQ2 LTV Sonic Wall Setup QQ2 LT Series The Sonic Wall only works with CleanMates that have the Sonic Wall Press the "Mode" button again (6 times) to return to "Automatic" Sensor on their bumper (refer to diagram on page 5). It will create an mode (all 5 cleaning patterns). -
Page 7: Wall Outlet
Scheduler QQ2 LT Series Operations QQ2 LT Series QQ-1 QQ-1 Clean Mate 365 QQ2 LT QQ2 LT Connect the battery charger to the power input socket on the back of home base The scheduler LCD panel is located on the top of the QQ2 LT self-charging first. - Page 8 Operations QQ2 LT Series Operations QQ2 LT Series Once powered on, the scheduler will enter Clock Display Mode and display initial default setting of Sunday 00:00 (in 24 hours time format) Press “SET” to set up the clock time (enter Clock-setting mode and display SET and CLK icon).
- Page 9 Operations QQ2 LT Series QQ2 LT Series Roller Brush Installation and Removal Press “GO” (for about 1 second) on the self-charging base, and you will see Ensure that the power of the CleanMate is 'Off', and turn the CleanMate upside Battery, Brush and GO icons turned on (as shown below) on the left side of LCD down so that the bottom of the unit is facing you.
- Page 10 QQ2 LT Series QQ2 LT Series battery The operation and maintenance of the CleanMate is very simple. To maintain top performance of the unit, it is recommended that you follow a routine cleaning and maintenance schedule after each use. 1. Make sure to clean empty the Dust Bin and to brush off the Air Filter after every cleaning cycle.
- Page 11 QQ2 LT Series QQ2 LT Series 9. While the Dust Bin is removed from its compartment, turn the unit over, and using the Hand Brush to brush any excess dust that might have accumulated in the compartment into a trash can.
-
Page 12: Useful Tips
QQ2 LT Series Useful Tips QQ2 LT Series Clear the area where the QQ2LT is to clean of any items can be easily knocked over, or caught with the Roller Brush or Side Brush. Cleaning the Roller Brush In order to provide the QQ2LT a... - Page 13 QQ2 LT Series QQ2 LT Series Useful Tips Fixing jams: Objects can get caught in the Roller Brush and prevent it from working properly. Immediately turn the unit off, clear the object causing the jam, and resume normal use. When something is...
-
Page 14: Troubleshooting
If problem persists, please contact your local warranty provider or Infinuvo provides you, as the owner of this Infinuvo product, with the www.infinuvo.com for further assistance. following Limited Warranty Policy. The repairs that marked * needs to be done by qualified service personal.
Need help?
Do you have a question about the CleanMate QQ2 LT Series and is the answer not in the manual?
Questions and answers