Table of Contents
Advertisement
Advertisement
Table of Contents

Related Manuals for iNFinuvo Hovo 600


Summary of Contents for iNFinuvo Hovo 600
- Page 1 MODEL NO.:HOVO620...
-
Page 2: Table Of Contents
Safety Instrucions Product Features Product Illustrations Main unit and acceccories Main Unit and Dust Bin Charging Station and Virtual Blocker Remote Control Unit Unit Display Panel Product Operations 8-11 Battery Charging Methods Cleaner Operations Schedule Cleaning Time Cleaner Operations Virtual Blocker Usage Product Maintenance 12-13 Clean Side Brushes... -
Page 3: Safety Instrucions
Safety Before using this product, please read the following safety instructions and follow all normal safety precautions. Read this user manual thoroughly and carefully before using this product. Save this user manual. Follow these precautions to reduce the risk of injury or damage. Only a certified technician can disassemble and/or repair the product. -
Page 4: Product Features
This product will adjust its suction power according to the different floor types.It will clean the floor more effectively and also save power consumption. User Friendly Design Easy operation Voice message guidance and touch screen operations. Just touch CLEAN key to start cleaning floor. Wash Dust Bin Empty and wash dust bin with water regularly for cleaning effectiveness. -
Page 5: Product Illustrations
Main unit and acceccories Unit Self Charging Base included) Virtual Blocker (battery not included) AC Adapter Cleaning Brush Tool Spare Side Brushes HEPA Filter User Manual 收音 音乐 电影 上一曲 下一曲 音 量-... -
Page 6: Main Unit And Dust Bin
Main Unit and Dust Bin Receiver Front Wheel Right Side Brush Vacuum Intake Right Wheel Module Left Wheel Module Bottom Cover Power Switch and Socket... -
Page 7: Charging Station And Virtual Blocker
Charging Station and Virtual Blocker Charging Contacts Contacts Installing virtual blocker battery Install two D type batteries into the virtual blocker as shown; blocker. Note:Take out the batteries if you won't use virtual blocker for long period of time. -
Page 8: Remote Control Unit
Remote Control Unit 收音 音乐 电影 上一曲 下一曲 音量- Use the remote control to wirelessly control the cleaner unit. Make sure the unit is switched on before using the remote. Point the remote towards the unit and press button to control unit operation. -
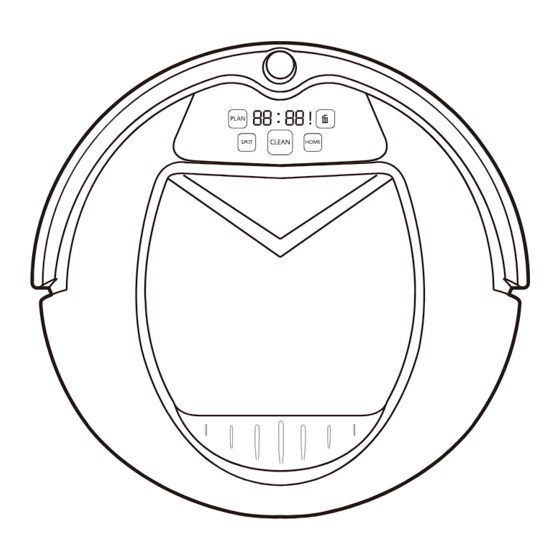
Page 9: Unit Display Panel
Unit Display Panel Illustration Display Illustration numeric display: Shows timer, unit status, battery charging status, and error codes. display: Shows an error has occurred. display: Flashes constantly when dust bin is full or when vacuum intake is blocked. Control Button Clean: Press to complete following operations: ed mode;... -
Page 10: Product Operations
Product Operations Battery Charging Methods Place self charging base Note: Put self charging base against the wall and remove obstacles about 3 ft at two sides and about 6 ft in front. Turn on the Power Switch at the side of cleaner, then display will flash. -
Page 11: Cleaner Operations
Product Operations Press CLEAN on the cleaner unit or remote control unit to start cleaning. Note: If cleaner is in sleeping mode, press CLEAN button to wake up the cleaner. The press CLEAN for a second time, the cleaner starts cleaning automatically. Changing modes Changing modes while unit is cleaning A.Press PLAN, CLEAN, or HOME on cleaner or CLEAN on remote... -
Page 12: Schedule Cleaning Time
Product Operations You can schedule the cleaner to do cleaning at pre-defined time every day. There is no real time clock setting function. You can set schedule cleaning time hh:mm hours and minutes (delay time) from current time on your clock. Time delay can be set up to 24 hours. For example, it is 9:00AM on your clock, you set 6:30 delay time on the cleaner, and the cleaner will start cleaning after 6 hours and 30 minutes which is 3:30PM. -
Page 13: Cleaner Operations
Product Operations Auto Cleaning Mode The cleaner will clean the area and adjust its cleaning routine according to its environment. Note: Press CLEAN on cleaner or remote to start auto cleaning mode Spot Cleaning Mode Place cleaner near dirty area. Press SPOT to start cleaning and press CLEAN to stop. -
Page 14: Product Maintenance
Product Maintenance Clean Side Brushes A. Check side brushes for damage or foreign object on the brush. Remove the screws of the side brushes Replace brushes with new ones Use screws to lock the new brushes in place Note: Make sure the “L” and “R” on the brush matches with the “L” and “R” on the cleaner. -
Page 15: Clean Sensors
Clean Sensors Wipe the sensor window and auto charging sensors with cleaning tool or a soft dry cloth. Clean charging contacts on self charging base. Clean vacuum intake and dust sensor as shown in figure below. Assembly & Disassembly The Mop Reverse the cleaner, tear out the mop , unplug the fastener at the bottom of the cleaner to release the trailing bar(refer to figure A and B). -
Page 16: Troubleshooting
Error Codes Chart Error code will show on display panel if there is a problem with the cleaner Remove hair and debris from the cleaner's left wheel. Push it in and out and check if the wheel Left wheel error can turn freely. -
Page 17: Replaceable Modules
Front Wheel Module Vacuum Guard... -
Page 18: Battery Installation And Replacement
Battery Installation and Replacement A. Remove two screws from battery cover with screw driver B. Open the battery cover. C. Take out the battery using the 2 strip holder on its sides D. Disconnect the wire connector that connects the battery and unit. E. -
Page 19: Product Specification
13.4” (340mm) 3.54” (90mm) 6.6 Lbs (3. 0Kgs) Battery 2000mAH 100—240V 50/60Hz 0.8A Input AC Adapter Specification Output 24. 0V/1. 0A 0.4Liters 3 - 4 hours Main Unit Button Type... - Page 20 M e t a p o I n c . h t t p : / / w w w. i n f i n u v o . c o m h t t p : / / w w w. m e t a p o . c o m...
Need help?
Do you have a question about the Hovo 600 and is the answer not in the manual?
Questions and answers