Table of Contents
Advertisement
Advertisement
Table of Contents

Related Manuals for Wildview Infrared Xtreme TGLX8IR Series


Summary of Contents for Wildview Infrared Xtreme TGLX8IR Series
- Page 1 INSTRUCTION MANUAL For TGLX8IR Series For French language manual: Please visit our website to download a PDF version. Pour consulter le manuel en français: S'il vous plaît visitez notre site Web pour télécharger une PDF version. Toll Free 1-888-304-6125 www.wildviewcam.com Version 1.0...
- Page 2 Wildview Limited Warranty Your Wildview scouting camera is covered by a One Year Limited Warranty on parts and labor from the date of original purchase, and purchases must be made through an authorized dealer. The warranty covers defects in workmanship and materials. The warranty does not apply to units, which have been damaged or abused intentionally or unintentionally.
-
Page 3: Table Of Contents
TABLE OF CONTENTS Camera Overview Camera Kit contents General Information Battery and Memory Installation Setup and Programming Using the camera Viewing and Deleting files Memory Compatibility chart Technical Specs Camera Features and Specs Image Capacity Chart Moon Phase Chart Frequently Asked Questions (FAQs) FCC Compliance www.wildviewcam.com Toll Free 888-304-6125... -
Page 4: Camera Overview
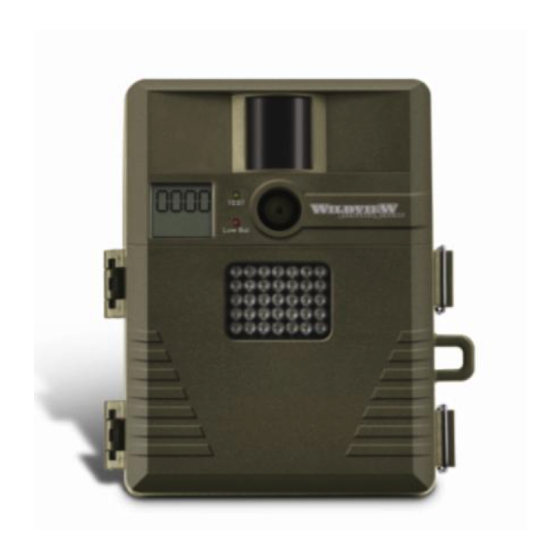
CAMERA OVERVIEW Front view Side view www.wildviewcam.com Toll Free 888-304-6125... - Page 5 Open view image with major parts indication www.wildviewcam.com Toll Free 888-304-6125...
-
Page 6: Camera Kit Contents
CAMERA KIT CONTENT Model TGLX8IR Digital Scouting Camera User manual Strap GENERAL INFORMATION www.wildviewcam.com Toll Free 888-304-6125... -
Page 7: Battery And Memory Installation
Special Care Instructions Operating Environment: 14 to 104 deg F (-10 to 40 deg C). 20-85% relative humidity, non-condensing. The camera is designed to be weather resistant. Never attempt to immerse the unit in water or any other liquid. This will damage the unit and void the warranty. - Page 8 Removing batteries or memory card while the camera is ON may damage the camera. Your Wildview Digital Scouting Camera is designed to operate using two different types of battery power options. Batteries “C” cell The internal battery compartment accepts 4 “C”...
- Page 9 The camera will automatically switch to external power when it is connected, even if the internal batteries are installed. NOTE: Please make sure the voltage and polarity (+/-) are correct before connection. Incorrect voltage or polarity (+/-) will damage the camera. When both internal and external batteries are connected, the camera will draw power from the higher voltage source first.
- Page 10 Inserting SD memory card NOTE: Make sure camera is in the OFF position whenever adding or removing memory. Insert SD memory card in to the SD card slot completely and in the correct direction, as shown by the picture shown on the Open View image above (see page 5).
-
Page 11: Setup And Programming
SETUP AND PROGRAMMING When the camera is first turned on, the internal LCD screen displays the camera status. The following information is present on this screen. Definitions Cam: To set which mode you want the camera to be in. ... - Page 12 Video: Sets the length of time how long you want to capture video. 15s = 15 seconds 30s = 30 seconds 60s = 60 seconds Burst: To set the number of pictures or video length the camera will take per PIR triggering.
- Page 13 Programming your Wildview Camera NOTE: The following setting must be performed before you turn on the camera. Select the time out interval by sliding the TIME OUT toggle switch to the desired preset time interval in minutes. Select the resolution setting by sliding the RESOLUTION toggle switch to the desired resolution setting.
- Page 14 h. The word DATE and DD will blink. Press [UP] or [DN] button to adjust the date. Press [SET] button to enter year setting. The word DATE and YY will blink. Press [UP] or [DN] button to adjust the year. Press and hold [SET] button for 2 seconds to exit the setting mode and enter into PIR count down mode.
-
Page 15: Using The Camera
USING THE CAMERA Once all program settings have been setup properly, your Wildview camera is ready for field use. Getting started Listed below are some helpful pointers on how to use your camera to get the best results. Mount the camera about 4-5 feet high with the camera pointed at a slight downward angle. - Page 16 Mounting the camera with the supplied strap: Insert the strap through the strap slots on the rear housing. Wrap the strap around the mounting surface. Secure the strap and tighten the buckle in order to secure the camera. NOTE: In order to obtain proper weather resistance, please make sure that both door latches are securely locked in place.
- Page 17 (Example: Mounting) (Example: Trail Setup) www.wildviewcam.com Toll Free 888-304-6125...
- Page 18 Testing the camera coverage area: One of Wildview Scouting Camera’s features is the ability to test the coverage area. After mounting the camera, open front housing and slide the CAM toggle switch to TEST position. The front LCD will display the word “tESt”.
-
Page 19: Viewing And Deleting Files
VIEWING AND DELETING FILES Your Wildview Scouting Camera is a plug and play USB storage device for users of Windows 2000 / ME / XP / Vista / Windows 7 operating systems. This camera is not MAC compatible. Viewing files from your computer download: FIRST, slide the CAM toggle switch to the OFF position. - Page 20 At this point you have several options: To view your images or play your videos: Click on the Removable Storage device and then drill down to the file you want to see and double click on the file name. ...
- Page 21 Deleting files in the field: Your camera provides you with a few options for deleting files stored on the internal or external memory while in the field. (Option #1) Slide the CAM toggle switch to ON position. The LCD screen will display the number of images stored in the memory.
- Page 22 (Option #2) Simply remove the batteries from the battery compartment. If you are using an SD memory card as your storage device, you must delete images by following the step described above. WARNING: Do not remove the batteries until you have downloaded all the images off the internal SDRAM.
-
Page 23: Memory Compatibility Chart
MEMORY COMPATIBILITY CHART The following cards have been tested and approved for use with the STC- TGLX8IR model. Kingmax SanDisk 2G, 4G, 8G Toshiba 2G, 4G, 8G, 16G. Kingston 2G, 4G, 8G, 16G. First Champion 1G, 2G, 4G, 8G, 16G. -
Page 24: Technical Specs
TECHNICAL SPECIFICATIONS System Requirements and Compatibility Windows Me/2000/XP/Vista/ Windows 7 Pentium 4, 2GHz or above 1GB RAM (2GB recommended) 32 bits color, resolution 800 x 600 or above. Built in 128MB video memory 2GB free hard disc space ... -
Page 25: Camera Features And Specs
CAMERA FEATURES AND SPECIFICATIONS Mega Built in Resolution Option Model Pixel Memory High Video STC-TGLX8IR 8.0M 8.0M 5.0M Auto white balance and auto expose IR Emitter Range – 50ft 4 digits LCD Image counter Battery low indicator ... -
Page 26: Image Capacity Chart
IMAGE CAPACITY CHART High High Video Video SD card Color B&W Color B&W Color B&W Based on File 80MB 50MB 4.7MB 2.7MB 3.6MB 0.75MB Size of (30sec.) (30sec.) 1024 1516 1136 2048 1736 3032 2272 4096 3472 6064 4544 8192 16GB ... -
Page 27: Moon Phase Symbol Chart
SD Card Capacity and Compatibility Due to the rapidly changing memory card market please consult www.wildview.com for the most up to date information regarding memory cards. MOON PHASE SYMBOL CHART www.wildviewcam.com Toll Free 888-304-6125... -
Page 28: Frequently Asked Questions (Faqs)
A: We do not recommend viewing memory card images taken in your game camera on any other digital camera, you may experience compatibility issues. Q: Does the Wildview camera have a Date/Time stamping built into it? A: With the exception of the TGL1, all our models have the Date/Time stamp function. - Page 29 A: With technology changing as fast as it does, we suggest checking our website for the most up to date information regarding memory cards. Q: Do any of the Wildview cameras have a 10 second video clip mode? A: Yes, Most of our cameras have a 10 second video clip mode option.
-
Page 30: Fcc Compliance
Consult the dealer or an experienced radio/TV technician for help. Product specifications are subject to change. Wildview is not responsible for any photographic or typographical errors. May be protected by one or more U.S. Patent numbers: 6,735,387 / 6,768,868 / 6,834,162 / 7,149,422 / 7,308,196 / 7,593, 632 / 7,710,457 www.wildviewcam.com...
Need help?
Do you have a question about the Infrared Xtreme TGLX8IR Series and is the answer not in the manual?
Questions and answers
what does 8AHo in view screen mean