Table of Contents
Advertisement
Advertisement
Table of Contents
Troubleshooting

Related Manuals for InFocus IN2124a


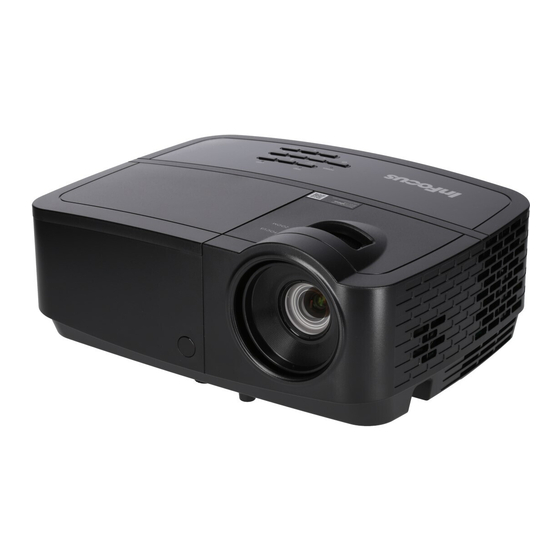
Summary of Contents for InFocus IN2124a
-
Page 2: Declaration Of Conformity
Texas Instruments and BrilliantColor™ is a trademark of Texas This product is considered Class A for EU market. Instruments. InFocus, In Focus, and INFOCUS (stylized) are either registered trademarks or Canada trademarks of InFocus Corporation in the United States and other countries. - Page 3 Agency Approvals cMETus Other specific Country Approvals may apply. Please see product certification label. This document applies to regulatory model IN2124a/IN2126a Input ratings: 100-240Vac, 3.2A, 50-60Hz InFocus reserves the right to alter product offerings and specifications at any time without notice.
-
Page 4: Table Of Contents
Table of Contents Displaying pictures with a USB storage device LiteBoard™ Wand Introduction How to Use the Wand Positioning the projector Using More than One Wand Connecting a computer source Wand Features VGA connection Troubleshooting LiteBoard™ USB connection Maintenance HDMI connection Cleaning the lens Connecting power Using the security lock... - Page 5 Place the projector in a horizontal position no greater than 15 degrees off • Only genuine InFocus lamps are tested for use in this projector. Use of non axis. InFocus lamps may cause electrical shock and fire, and may void the projector •...
-
Page 6: Introduction
It is a versatile projector that is flexible enough for business presentations and home video keypad viewing too. IN2124a has native XGA 1024 x 768 resolution, and IN2126a has native WXGA 1280 x 800 resolution. It is compatible with a wide variety of computers and video devices. - Page 7 Monitor out, for VGA pass through to an external monitor. Liteboard composite • Audio inputs for video and computer. radio video • Audio output to external speakers. security lock • RS-232 serial control. Command control codes are on our support website at USB mini B www.infocus.com/support.
-
Page 8: Positioning The Projector
Size of the Distance to screen Diagonal Screen Projected Image • Position the projector on a flat surface at a right angle to the screen. IN2124a Size (inches/m) Width Minimum distance Maximum distance must be at least 45.3” (1.2m) from the projection screen, and IN2126a must... -
Page 9: Connecting A Computer Source
Connecting a computer source connect VGA cable VGA connection Connect one end of the provided computer cable to the Computer 1/Computer 2 connector on the projector and the other to the VGA connector on your computer. If you are using a desktop computer, you will need to disconnect the monitor cable from the computer’s video port first. -
Page 10: Displaying An Image
Displaying an image press Power button Power Press the button. The Power LED lights blue, and the fans start to run. When the lamp comes on, the start up screen displays. It can take up to a minute for the image to achieve full brightness. Note: When the feature, AC Power On, is enabled, the projector automatically turns on when power is connected. -
Page 11: Adjusting The Image
Adjust the Contrast or Brightness in the Basic Menu. See page 26 for help with these menu adjustments. adjust Basic Menu Basic Menu MDL: IN2124a FW: 1.10 Aspect Ratio ◄ Auto ► Auto Image Execute... -
Page 12: Connecting A Video Device
(Note: A separate audio connection is not required for HDMI source inputs.) through the projector’s Basic Menu. See page 26 for more information. Video device connections No video cables are provided with the projector. You can order cables from InFocus or provide your own. HDMI connection HDMI is a standard, uncompressed, all-digital audio/video interface. -
Page 13: Shutting Down The Projector
LAMP: Blinking red The lamp failed to ignite. POWER: Solid blue Contact Technical Support if the problem TEMP: Blinking red persists. Visit www.infocus.com/support LAMP: Blinking red to contact service. POWER: Solid blue The lamp has reached its end of life and must be replaced. - Page 14 Problem Solution Result No start up screen Correct image Plug power cord into the projector press the Power button Press the SOURCE button. Computer image projected Only start up screen appears activate laptop’s external port Restart laptop...
- Page 15 Problem Solution Result Press the Auto Image button on remote Computer image projected No computer image, just the words “Signal out of Adjust computer refresh rate (Windows 7: Control range” Panel > Display > Screen Resolution > Advanced Settings > Adapter tab). Varies per operating system. You may also need to set a different resolution on your computer, as shown in the following problem, “image fuzzy or cropped”...
- Page 16 (Windows 7: Control Panel > Display > Screen Resolution). Varies per operating system. Move projector, adjust height Correct image Image not centered on screen MDL: IN2124a FW: 1.10 Force Wide Adjust horizontal or Phase Prevent PC Screen Saver...
- Page 17 Problem Solution Result Image not square Adjust Keystone on keypad Square image Adjust Sharpness in the Basic Menu Image not sharp Correct image Basic Menu MDL: IN2124a FW: 1.10 Aspect Ratio Auto Auto Image Execute Brightness Contrast Auto Keystone Keystone...
- Page 18 Problem Solution Result Turn off Ceiling Mount in Basic menu Correct image Image upside down Basic Menu MDL: IN2124a FW: 1.10 Aspect Ratio Auto Auto Image Execute Brightness Contrast Auto Keystone Keystone Presets Presentation Sharpness Volume Ceiling Mount ◄ Off ►...
- Page 19 Problem Solution Result Turn off the internal LCD display on your laptop The video embedded in my PowerPoint presentation Embedded video plays correctly does not play on the screen Make sure vents aren’t blocked, turn off the projector Lamp turns on Lamp won’t turn on, the projector is overheating and allow it to cool for one minute Overheating...
- Page 20 Still need assistance? www.infocus.com/support If you need assistance, visit our website at or call us. See the Quick Start Guide for support contact information. This product is backed by a limited warranty. An extended warranty plan may be purchased from your dealer.
-
Page 21: Using The Remote Control
Using the remote control • Auto Image button to resynch the projector to the source. • Resize button to switch among aspect ratios (see page 26). The remote uses two (2) AAA batteries (not provided). They are easily installed • Help button to get help with connecting sources and improving the picture. -
Page 22: Using The Audio
Using the audio connect audio cable Using the projector’s speakers Connect the audio source to the Audio 1/Audio 2 connectors to hear audio through the projector speakers. Amplified speakers may also be connected to the projector using the Audio Out connector. -
Page 23: Using The Keypad Buttons
Using the keypad buttons Most buttons are described in detail in other sections, but here is an overview of their functions: Power–turns the projector on and off (page 9). Right arrow - When the menu is displayed, the right arrow button navigates through the menu. -
Page 24: Optimizing Computer Images
Optimizing computer images Presentation features After the projector is running and the image is on the screen, you can optimize the Several features are provided to make giving presentations easier. Here is an image using the onscreen menus. For general information on using the menus, see overview, details are found in the menu section. -
Page 25: Optimizing Video Images
Optimizing video images Customizing the projector After your video device is connected properly and the image is on the screen, you You can customize the projector for your specific setup and needs. See page 28 can optimize the image using the onscreen menus. For general information on for details on these features. -
Page 26: Using The Menus
The menus are grouped by usage: • The Basic Menu provides common adjustments. • The Advanced Menu provides more complex adjustments. Advanced Menu Basic Menu MDL: IN2124a MDL: IN2124a FW: 1.10 FW: 1.10 Image 3D Control... Aspect Ratio ◄ Auto ►... -
Page 27: Basic Menu
Basic Menu Basic Menu Basic Menu MDL: IN2124a To adjust the following settings, highlight the setting, use the right and left arrows FW: 1.10 to adjust the values. Aspect Ratio ◄ Auto ► Auto Image Execute Aspect Ratio: Aspect ratio is the ratio of the image width to image height. TV Brightness screens are usually 4:3. -
Page 28: Advanced Menu
Auto, then choose RGB for computer sources or choose either Advanced Menu REC709 or REC601 for component video sources. Advanced Menu MDL: IN2124a FW: 1.10 Color Temperature : changes the intensity of the colors. Select a listed relative Image 3D Control... - Page 29 Setup: Freeze Screen • : pauses the projected image. Source Info • : the default action. Shows the Source Info menu. Audio Setup... Projector Info • : shows the Projector Info menu. Internal Speakers : turns the internal speaker on or off. Overscan •...
- Page 30 If you lose or forget Power-up Source : determines which source the projector checks first for active your custom PIN, contact InFocus Technical Support. video during power-up. To enter the PIN at projector startup:...
- Page 31 Timer Wireless LAN Auto Off Time : automatically turns the projector off after no signals are detected for SSID: Display the projector’s SSID information. a preset number of minutes. If an active signal is received before the projector powers IP Address: a read-only display of IP Address. down, the image will be displayed.
-
Page 32: Controlling The Projector Through A Lan Environment
Press v to highlight Apply and press >. Please wait for around 15 - 20 seconds, and then re-enter the Network page. Wired LAN MDL: IN2124a FW: 1.10 The IP address, Subnet Mask, Default Gateway, DNS and MAC Address DHCP ◄... - Page 33 Wireless connection How to setup client mode: To connect to the projector wirelessly, you need to plug an optional InFocus Select Type-A from source list. wireless dongle (p/n SP-WIFIUSB-2) to the USB Type A connector on the projector. Go to Settings > WiFi, select Client Mode and set it to ON. See page 47.
-
Page 34: Web Controlling The Projector
Web controlling the projector iii. The Crestron (eControl) page displays the Crestron eControl user inter- face. See page 34 for details. Once you have the correct IP address for the projector and the projector is on or To access the Admin page, enter the password. The default password is in standby mode, you can use any computer that is on the same local area network “0000”. -
Page 35: About Crestron E-Control
® The Tools page allows you to manage the projector, configure the LAN About Crestron e-Control control settings and remotely access the network operations of this projector. ® The Crestron e-Control page provides a variety of virtual keys to control the projector or adjust the projector’s image. - Page 36 Please pay attention to the input length and character limitations (including The Info page displays the information and status of this projector. character and punctuation restrictions) listed below: Maximum Number of Category Item Input-Length Characters IP Address Crestron Control IP ID Port Projector Name Projector...
-
Page 37: Displaying Images Through Ez Display
For the Crestron RoomView user guide and information about RoomView settings and commands, go to: http://www.crestron.com/products/ roomview_connected_embedded_projectors_devices/resources.asp For more information about the applications EZ USB and EZ Display, review these manuals at www.infocus.com/support: • EZ USB Display Manual(Win+Mac) • EZ Display Manual-Mac •... -
Page 38: Projecting From Smartphones/Tablets
Projecting from Smartphones/Tablets Using EZ Display EZ Display is a special program to project your iOS or Android device display to a projector through a WiFi connection. You can remotely control the projector, decode document files, link to your dropbox account, surf the web, view photos, display a live camera feed and transfer files wirelessly. - Page 39 EZ Display Select WLAN from source list. AP Info page displays. Launch EZ Display and it will scan for and list the device's IP address. When you click the device, a passcode is required. Enter the 4 digit number shown on your AP Info projector.
- Page 40 EZ Display: Streaming Doc EZ Display: Pix Viewer To stream your documents, transfer the documents you want from the computer To display your photos, select Photo Gallery and select your photo. You can also to your mobile device and disconnect your mobile device. Documents will be draw on it with the Sketch feature.
- Page 41 EZ Display: Streaming Web EZ Display: Dropbox The web browser will be displayed over WiFi. The Sketch and Save functions are Once you have allowed EZ Display to access your Dropbox account, you will be also supported. This feature requires a Client Mode internet connection. See able to log in using your Account ID and password, and choose the documents and page 32 for more details.
-
Page 42: Ez Usb Display
EZ USB Display EZ Display: Quad Split Screen EZ Display allows 4 different sources to be displayed in the same screen. Through Split Screen Control, you can decide where your current display should be placed. The EZ Display software is an easy to use software application for Windows-based and Mac OS 10.7 and later operating systems which allows you to display PC content through the NOTE: projector's USB connection. -
Page 43: Displaying Pictures With A Usb Storage Device
Recommended Mac Book series and iMac series after E/2011 Models For information about this, refer to the EZ USB Display Manual at www.infocus.com/ Use the arrow keys to navigate up and down, left and right. The right-hand menus change support. - Page 44 Photo mode Displaying a picture Internal Memory Photo Video Audio Office viewer EZ Suite Browse Mode • To open/close the Photo View toolbar: press the Menu key. Press to Exit • To navigate through the toolbar: press the arrow keys ^/</>. •...
- Page 45 Video mode When a video is playing Internal Memory Photo Video Audio Office viewer harrypotter7.mp4 EZ Suite 00:00:02 00:00:00 00:04:12 Press to Exit • To open the Video Viewer toolbar: press the Menu key. • To return to video playlist: press the Select/Enter key when the toolbar is closed.
- Page 46 Audio mode When audio is playing track1 Internal Memory sort by name Photo sort by time Video Audio Office viewer EZ Suite Press to Exit The Audio playlist is displayed on the screen. • To return to audio playlist: press the Menu key. Action Toolbar icon Action...
- Page 47 Office viewer mode When an Office file is displaying Office viewer Internal Memory sort by name Photo sort by time Video Audio Office viewer EZ Suite Press to Exit The file list is displayed on the screen. • To go to the next page: press the down arrow key. Action •...
- Page 48 System Client Mode Sets Client mode on/off. See page 32 for more details. Photo Video * WiFi only works when the InFocus wireless dongle (p/n SP-WIFIUSB-2) is connected. Audio WiFi EZ Suite • Press the Select/Enter to enter the selected item. Press the Menu key to exit.
- Page 49 Supported file formats • Video • Images File Audio/Video Codec Profile/ Explanation Level Support Extensions Image Format Profile Color Space Size Limitation MJPEG No limitations Baseline YUV400 No limit H.264/AVC Up to High Profile , Only supports 1-3 YUV420 No limit Levels 1- 4.1 (1080P reference frames.
- Page 50 • Subtitle Format Font Subtitle Size Standard SRT UTF-8 / UTF-16 4bits up to 448x200 2bits up to 896x200 Note: Mixed subtitle codes are NOT supported. • Office Viewer File Format Support Pages/Lines Limitation Size Limitation Comment Version PDF 1.0 PDF 1.1 Up to 1000 pages (One Adobe PDF...
-
Page 51: Liteboard™ Wand
LiteBoard™ Wand Connect the projector and your computer with a VGA cable. Make sure the wand's battery is charged or charging. The optional LiteBoard™ Wand (p/n HW-LBWAND-02), when combined with the LiteBoard Wand dongle (p/n HW-LBRADIO), works like a wireless mouse - Turn on the projector and make sure it's displaying the computer's screen - but one that works in midair, not on your desktop. -
Page 52: Using More Than One Wand
NOTE: If the wand is up close to the screen, you can press its tip against the Pens. projection surface to click and drag. Not recommended for use with fabric screens. Keypad/Remote MDL: IN2124a FW: 1.10 Blank Key Factory Logo Custom Key... -
Page 53: Wand Features
Wand Features USB Connector The wand's USB connector is behind a flap on the right side of the wand. The USB connector is only used for charging the wand's battery - using a USB power adapter (not included), or a computer. NOTE: You can use the wand while charging the battery, but after the battery is charged (battery light turns off), you can unplug the USB cable and continue to use the wand without a cable. -
Page 54: Troubleshooting Liteboard
• If accurate clicking is difficult, try one of these solutions: - If the wand still won't charge, contact InFocus support at: www.infocus.com/ - Hold the wand steadier when clicking. support. -
Page 55: Maintenance
Maintenance Cleaning the lens Apply a non-abrasive camera lens cleaner to a soft, dry cloth. • Projector must be off and the lens must be at room temperature. • Avoid using an excessive amount of cleaner, and don’t apply the cleaner directly to the lens. -
Page 56: Replacing The Projection Lamp
NOTE: Be sure to use the InFocus lamp module designed for this projector. You can order new lamps from www.infocus.com (in select areas), your retailer or your dealer. Only genuine InFocus lamps are tested for use in this projector. Use of non InFocus lamps may cause electrical shock and fire, and may void the projector warranty. - Page 57 Replace the lamp door by (a) aligning the hinges, (b) putting the lamp door down and (c) locking it back into place. Replace the lamp door screw and tighten securely. Advanced Menu MDL: IN2124a FW: 1.10 Plug in the power cord and press the Power button to turn the projector back Image Source Info...
- Page 58 Internal Speaker 28 Computer 2 28 IP Address 30 Connecting Video device 11 Keypad 28 Connecting a video device 11 Keypad buttons 22 Contacting InFocus 19 Keystone 26 Contrast 26 ® Crestron e-Control Lamp Low Power 29 Crestron RoomView 36 LAN 31...
- Page 59 MAC Address 30 Screen Aspect 11 Magnify Level 28 Search Screen 29 Menu Transparency 29 Sensor 52 menu usage 25 Service 30 Mute 28 Set Black Level... 27 Sharpness 26 Show Messages 29 Network 30 Source 28 Source Info 28, 30 only 27 SSID 30 Overscan 27, 28...
- Page 60 zoom 10...
Need help?
Do you have a question about the IN2124a and is the answer not in the manual?
Questions and answers