Table of Contents
Advertisement
Advertisement
Table of Contents

Related Manuals for InFocus IN2102


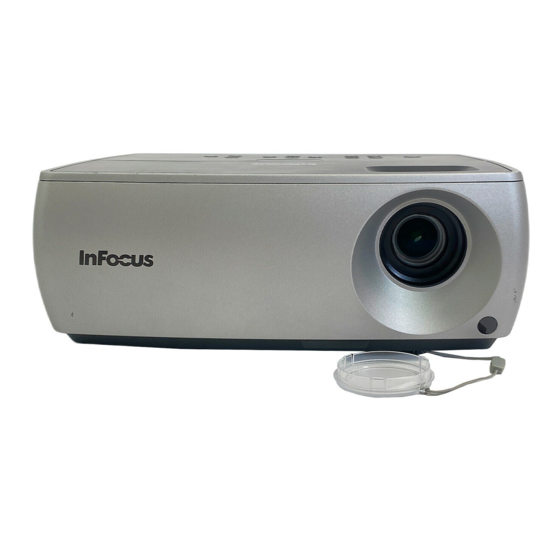
Summary of Contents for InFocus IN2102
- Page 2 Manufacturer: InFocus Corporation, 27500 SW Parkway Ave. Wilsonville, Oregon 97070 USA European Office: Louis Armstrongweg 110, 1311 RL Almere, The Netherlands We declare under our sole responsibility that this projector conform to the following directives and norms: EMC Directive 2004/108/EC...
-
Page 3: Table Of Contents
• Locate the projector in a well-ventilated area without any obstructions to intake or exhaust vents. Do not place the projector on a tablecloth or other soft covering that may block the vents. • Locate the projector at least 4' (1.2 m) away from any heating or cooling vents. -
Page 4: Introduction
Your new digital projector is simple to connect, easy to use, and straightfor- ward to maintain. It is a versatile projector that is flexible enough for busi- ness presentations and home video viewing too. The IN2102 has native SVGA 800x600 resolution, the IN2104 has native XGA 1024x768 resolution, and the IN2106 has WXGA 1280x800 resolution. - Page 5 5 volt DC output The 3.5mm mini-jack triggers provide a 5 volt, 2 amp DC output. It provides a constant output while the projector is on. It is designed to provide power for an InFocus LiteShow II wireless device, which allows wireless projec- tion.
-
Page 6: Positioning The Projector
Here are some general guide- lines: • Position the projector on a flat surface at a right angle to the screen. The projector must be at least 4.9 feet (1.5m) from the projection screen. •... -
Page 7: Projector And Device Connector Guide
Projector and device connector guide The following illustration and table should help you find the connectors to use and obtain the best resolution possible from your input devices, such as computers, standard VCRs, DVD players (progressive and interlaced), HDTV sources (1080i and 720p HDTV formats), TV and satellite tuners, camcorders, video games (progressive and interlaced), and laser disc play- ers. - Page 8 Standard Video Camera NTSC, PAL, and SECAM formats Standard Video Game Attach to Adapter If Your Device or Labeled Connector Is Connector on Projector Composite video Video 2 or S-video or Video 1 Composite video Video 2 or S-video or Video 1...
- Page 9 Progressive Video Game Component 480p and 480i Attach to Adapter If Your Device or Labeled Connector Is Connector on Projector Computer 1 or Computer 2 Component video Computer 1 or Computer 2 via optional VESA to Component adapter Computer 1 or...
-
Page 10: Connecting A Computer Source
Connect one end of the provided computer cable to the Computer 1 or Computer 2 connector on the projector and the other to the VESA connec- tor on your computer. If you are using a desktop computer, you will need to disconnect the monitor cable from the computer’s video port first (you can... -
Page 11: Displaying An Image
If using a laptop, make sure it’s external video port is active. Many laptops do not automatically turn on their external video port when a projector is connected. Usually a key combination like FN + F8 or CRT/LCD key turns the external display on and off. Locate a function key labeled CRT/LCD or a function key with a monitor symbol. -
Page 12: Adjusting The Image
Keystone button to reduce the lower part. If the left or right side of the screen is larger or smaller the other, you can turn the projector to the left or to the right a few degrees to square the image. -
Page 13: Connecting A Video Device
You can connect video devices such as VCRs, DVD players, camcorders, digital cameras, video game consoles, HDTV receivers, and TV tuners to the projector. You can connect the audio directly to the projector to get sound from the built-in speaker, or you can bypass the projector’s audio system and connect the audio directly from your source to a stereo or home theater system. -
Page 14: Composite Video Connection
Video device connections No video cables are provided with the projector. You can order cables from InFocus or provide your own. Composite video connection Plug the composite video cable’s yellow connector into the video-out con- nector on the video device. Plug the other yellow connector into the yellow Video 2 connector on the projector. -
Page 15: Shutting Down The Projector
The projector also has a Auto Off Time feature that automatically turns the lamp off after no active sources are detected and no user interaction with the projector is performed for 30 minutes. By default, this feature is off. You can change the length of time, see page 30. - Page 16 Problem no start up screen only start up screen appears Startup Screen Solution plug power cord into the projector press power button press the Source button activate laptop’s external port restart laptop Result correct image Startup Screen computer image projected...
- Page 17 no computer image, just the words “Signal out of range” Only my laptop’s background appears, not the Desktop icons press the Auto Image button on keypad adjust computer refresh rate in Control Panel>Display>Settings>Advanced>Adapter (location varies by operating system) you may also need to set a different resolution on your computer, as shown in the following problem, “image fuzzy or cropped”...
- Page 18 Problem image fuzzy or cropped image not centered on screen Solution set your computer’s display resolution to the native resolution of the projector (Start>Settings>Control Panel>Display>Settings tab) For a laptop, disable laptop monitor or turn-on dual- display mode move projector, adjust zoom, adjust height...
- Page 19 Problem image not square image not sharp image does not fit 4:3 or 16:9 screen Solution adjust Keystone on keypad adjust Sharpness in the Basic Picture menu change aspect ratio to 4:3 or 16:9 in Basic Picture>Aspect ratio menu Result square image correct image correct image...
- Page 20 Problem image upside down image reversed left to right projected colors don’t match source COLOR Solution turn off Ceiling Mount in Setup menu turn off Rear Project in Setup menu adjust color, tint, brightness, contrast in the Basic Picture menu Result correct image correct image...
- Page 21 Temperature light is on Temperature light Solution turn off the internal LCD display on your laptop make sure vents aren’t blocked, turn off the projector and allow it to cool for one minute Result Embedded video plays correctly lamp turns on Startup...
- Page 22 If you need assistance, visit our website at www.infocus.com/service or call us. Check out our HOW TO section there for additional information on using this projector for home theater or gaming applications. See the Quick Start card for support contact information.
-
Page 23: Using The Remote Control
When disposing of the batteries, be sure to do so in an environmen- tally proper manner. To operate, point the remote at the front of the projector (not at the com- puter). The range of optimum operation is about 15 feet (4.5m). -
Page 24: Using The Audio
Using the audio Using the projector’s speaker To use the projector’s speaker, connect your source to the Audio In Com- puter or Video connectors. To adjust the volume, press the Volume buttons on the keypad or remote. Troubleshooting Audio If you aren’t hearing the audio, check the following: •... -
Page 25: Using The Keypad Buttons
Most buttons are described in detail in other sections, but here is an over- view of their functions: Power–turns the projector on and off (page 10). Auto Image–resets the projector to the source. Presets–cycles through the available preset settings (page 28). -
Page 26: Optimizing Computer Images
(page 31). • Two options, Auto Off and Screen Save Time, are provided to automat- ically shut down the projector after several minutes of inactivity or dis- play a black screen. This helps preserve lamp life (page 30). -
Page 27: Optimizing Video Images
• Turn on Overscan to remove noise on the edges of the image. Customizing the projector You can customize the projector for your specific setup and needs. See page 30 to page 31 for details on these features. • For rear projection, turn Rear Project on in the Setup menu. -
Page 28: Using The Menus
The Advanced Picture menu provides more complex image adjust- ments. • The Setup menu provides set-up type adjustments that are not changed often. • The Status and Service menu provides information about the projector and source. keypad navigation buttons Basic Picture menu... -
Page 29: Basic Picture Menu
TV screens are usually 4:3. HDTV and most DVDs are 16:9. The default is 4:3. Select Auto to have the projector choose the ratio. Choose Native to see the unmodified input with no resizing by the projector. Select 16:9 to watch enhanced widescreen DVDs. -
Page 30: Advanced Picture Menu
Phase: adjusts the horizontal phase of a computer source. Sync Threshold: (progressive signals only) If a hardware device, such as a DVD player, is not syncing properly with the projector, select this option to help it to sync when connected to the projector. -
Page 31: Setup Menu
Overscan: removes noise around the image. • Closed Captions: cycles through caption options. AC Power On: When this feature is on, the projector automatically turns on when electrical power is connected. This allows control of ceiling mounted projectors with a wall power switch. - Page 32 Prevent PC Screen Saver: prevents your computer from going into Screen Save mode. The projector must be connected to the PC via a USB cable for this feature to work. Startup Screen: allows you to display a blank screen instead of the default screen at startup, and when no source is detected.
-
Page 33: Status And Service Menu
Source Info: a read-only display of current source settings. Projector Info: a read-only display of current projector settings. Reset Lamp Hours: resets the lamp hours used counter in the Projector Info menu to zero. Do this only after changing the lamp. -
Page 34: Maintenance
Lightly wipe the cleaning cloth over the lens in a circular motion. Using the security lock The projector has a security lock for use with a PC Guardian Cable Lock System. Refer to the information that came with the lock for instructions on how to use it. -
Page 35: Replacing The Projection Lamp
Replacing the projection lamp The lamp hours used timer in the Projector Info menu counts the number of hours the lamp has been in use. Twenty hours before the lamp life expires, the message “Change lamp” appears on the screen at startup. - Page 36 Install the new lamp module and tighten the screws. Replace the lamp door by sliding it into place and replacing the screw. Plug in the power cord and press the Power button to turn the projector back on. To reset the lamp hour timer, navigate to the Status and Service menu and select Reset Lamp Hours.
- Page 37 9 computer monitor 9 external speakers 23 video device 12 connector panel 4 connectors on projector 7, 8 contacting InFocus 21 Contrast 28 Custom key 25, 30 customer service contact information 21 customizing the projector 26 DVDs 28...
- Page 38 4 security lock 33 Service 32 Service Code 32 Setup menu 30 sharpness 28 shutting down the projector 14 Sources 30 speakers, connecting external 23 Startup Screen 31 Status Indicator Panel 14 S-video connector 13 Sync Threshold 29...
- Page 39 Vertical 29 VESA connection 13 video devices, connecting 13 video optimizing 26 Video Standard 30 Volume button 23 warranty 21 White Peaking 29 zoom 11...
Need help?
Do you have a question about the IN2102 and is the answer not in the manual?
Questions and answers