Hamilton Beach OG02 Assembly And Operation Manual
Hamilton beach type og02 gas grill assembly and operation manual
Hide thumbs
Also See for OG02:
- Assembly & operation manual (84 pages) ,
- Operation manual (84 pages) ,
- Assembly and operation manual (84 pages)
Table of Contents
Advertisement
Quick Links
Download this manual
See also:
Operating Manual
Advertisement
Table of Contents

Subscribe to Our Youtube Channel
Related Manuals for Hamilton Beach OG02


Summary of Contents for Hamilton Beach OG02
-
Page 1: Assembly Instructions
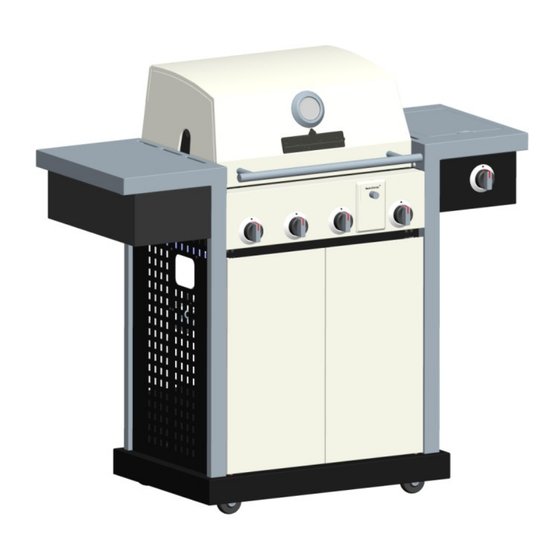
STOP! TO PREVENT DAMAGING YOUR GRILL, READ THIS MANUAL FIRST FOR IMPORTANT UNPACKING AND ASSEMBLY INSTRUCTIONS! Type OG02 Gas Grill Assembly and Operation Manual Consumer Affairs: 1-800-851-8900 FOR OUTDOOR USE ONLY Hamilton Beach Brands, Inc. Glen Allen, Virginia 23060 840232800... -
Page 2: Table Of Contents
TABLE OF CONTENTS BEFORE YOU BEGIN Message to Our Users ........................3 Safety Symbols ..........................3 Installation/Safety Precautions ...................... 4 Propane and Gas Warning ......................4 ASSEMBLY Before the Assembly ........................5 Assembly Steps ........................9 POST-ASSEMBLY Gas Connection ... -
Page 3: Before You Begin
BEFORE YOU BEGIN MESSAGE TO OUR USERS Thank you for your purchase of our Gas Grill. We sincerely wish you will enjoy using our fine products. • Please read this manual in its entirety before using the grill. • Please contact Consumer Affairs if you have any questions. •... -
Page 4: Installation/Safety Precautions
INSTALLATION/SAFETY PRECAUTIONS READ THIS SECTION FIRST BEFORE INSTALLING THE GRILL • This grill is designed to use LP gas only. The regulator supplied by Hamilton Beach must be used. • The installation of this appliance must conform with local codes or, in the absence of local codes, with either the National Fuel Gas Code, ANSI Z223.1/NFPA 54, or CAN/CSA... -
Page 5: Assembly
ASSEMBLY BEFORE THE ASSEMBLY READ AND FOLLOW THE INSTRUCTIONS BELOW TO CORRECTLY UNPACK GRILL PARTS FROM SHIPPING BOX. Step 1: Open shipping box by slicing down its edges with a box cutter. Take out the four legs and bottom shelf. Next remove the door bracket, grease cup and grease cup clip. Take two doors and two side panels out of protective styrofoam as shown in Fig.A, but leave grill head in styrofoam until Step 2. - Page 6 ASSEMBLY BEFORE THE ASSEMBLY Step 2: With the aid of assistant, turn grill head over on its side as shown in Fig. B below, and remove the top styrofoam piece. Lay the styrofoam piece flat on the floor. With the aid of an assistant, lift the grill head out of the bottom styrofoam piece.
- Page 7 ASSEMBLY BEFORE THE ASSEMBLY Step 3: Open grill lid as shown in Fig. D. and take out the small boxes packed within the grill head. Remove all packing materials and remove all remove all parts from boxes as shown in Fig. E. NOTICE: If there is any resistance during the process of opening the lid, it is mostly likely due to the styrofoam shown in Figure D.
- Page 8 SSEMBL Y BEFORE THE ASSEMBLY PLEASE READ AND FOLLOW THESE INSTRUCTIONS CAREFULLY STEP BY STEP Tools Required: • #2 Phillips screwdriver & needlenose pliers (not provided) • The following hardware is provided in the blister pack: M6 x 13 Screw (S.S. 2 pcs) M6 x 13 Screw (28 pcs) M6 Compression Washer (4 pcs) ¢...
-
Page 9: Assembly Steps
ASSEMBLY ASSEMBLY STEPS STEP 1: Bottom Shelf 1. Attach the tank holder to the bottom shelf with two (2) cotter pins as shown in Fig.1a. 2. Attach the casters to the bottom shelf with sixteen (16) M6 x 13 screws as shown in Fig.1b. 3. - Page 10 ASSEMBLY ASSEMBLY STEPS STEP 2: Left Panel 1. To attach left panel, align left leg holes with holes on left panel (marked “L”) as shown in Fig.2. 2. Attach left-front leg (marked “Left Front”) and left-back leg (marked “Left Back”) to left panel with eight (8) M5 x 10 screws as shown in Fig.2.
- Page 11 ASSEMBLY ASSEMBLY STEPS STEP 4: Side Panel 1. Align side panel leg holes with holes on each side of the bottom shelf as shown in Fig.4. 2. Attach left and right panels to the sides of the bottom shelf with six (6) M6 x 13 screws as shown in Fig.4.
- Page 12 ASSEMBLY ASSEMBLY STEPS STEP 5: Back Panel 1. Attach back panel to the bottom shelf with two (2) M6 x 13 screws as shown in Fig.5a. 2. Attach back panel to the left- and right-side panels with four (4) M5 x 10 screws as shown in Fig.5a.
- Page 13 ASSEMBLY ASSEMBLY STEPS STEP 6: Door Bracket 1. Align door bracket holes with holes on front legs. Attach bracket to the front legs with four (4) M5 x 15 screws as shown in Fig.6. NOTE: Attach the bracket so that the magnets are at the bottom. Fig.6...
- Page 14 ASSEMBLY ASSEMBLY STEPS STEP 7: Grill Head to Cart NOTE: This step requires two people to lift and position grill head onto cart. 1. Remove the tie wraps securing regulator hose to underside of grill head. Pull hose and igniter wire out to side of grill head.
- Page 15 ASSEBLY ASSEMBLY STEPS STEP 8: Doors 1. Attach toolbox bracket to back of right door with four (4) M4 x 10 screws as shown in Fig.8a, then attach three (3) M4 x 12 screws to back of right door without fully inserting the screws and hang the toolbox onto the screws as shown in Fig.8b.
- Page 16 ASSEMBLY ASSEMBLY STEPS STEP 9: Left-Side Shelf 1. Attach left side shelf support and left side shelf wall to the left side shelf with five (5) M5 x 10 screws from up to down as shown in Fig.9a. Remove two (2) M6 x 13 Screws pre-assembled to towel bar ends, and use them to attach towel bar to left side shelf wall.
- Page 17 ASSEMBLY STEPS STEP 10: Right-Side Shelf 1. Attach right side shelf support and right side shelf wall to the right side shelf with five(5) M5 x 10 screws from up to down as shown in Fig.10a. 2. Hang shelf onto right front and right back legs as shown in Fig.10b. 3.
- Page 18 ASSEMBL ASSEMBLY STEPS STEP 11: Side Burner 1. Unscrew and remove two front screws holding side burner in place as shown in Fig.11a. 2. Loosen side burner in side shelf and take it out from the top of side burner hole as shown in Fig.11b. 3.
- Page 19 ASSEMBLY STEPS STEP 11: Side Burner 8. Reattach side burner to side burner shelf with the 2 previously removed screws as shown in Fig.11j. 9. Push control knob onto side burner valve stem as shown in Fig.11k. 10. Insert the small tip of the side burner wire into the socket of side burner shown in Fig.11l and Fig.11m.
- Page 20 ASSEMBLY STEPS STEP 12: Cooking Grates 1. Place heat diffusers over burners by inserting tabs into slots in front as shown in Fig.12b and back of the firebox as shown in Fig.12c. 2. Place cooking grates onto grate rests as shown in Fig.12a. 3.
- Page 21 ASSEMBLY ASSEMBLY STEPS STEP 13: Grease Cup 1. Take out the grease accumulate panel from the fire box, ensure the convex face is down and the drip cup hole is on left side of grease accumulate panel (when viewed from the rear) to ensure it will hold grease and put it back as shown in Fig.13a.
- Page 22 ASSEMBLY ASSEMBLY STEPS STEP 14: Gas Tank Holder 1. Place LP tank into hole in bottom shelf with tank collar opening facing to the front as shown. Raise tank holder to hold LP tank securely in place as shown in Fig.14. STEP 15: Lock Casters Fig.14 1.
-
Page 23: Post-Assembly
POST-ASSEMBLY GAS CONNECTION ONLY USE THE REGULATOR AND HOSE ASSEMBLY PROVIDED WITH THIS GRILL. REPLACEMENT PRESSURE REGULATORS AND HOSE ASSEMBLIES MUST BE THOSE SUPPLIED BY THE MANUFACTURER. This is an LP (Liquefied Petroleum Gas) configured grill. Do not attempt to use a natural gas supply unless the grill has been reconfigured for natural gas use. - Page 24 POST-ASSEMBLY GAS CONNECTION CONNECT THE REGULATOR TO THE LP TANK - VERY IMPORTANT: • THE REGULATOR SHALL NOT BE IN A LOCATION THAT WILL ATTAIN A TEMPERATURE ABOVE 140 °F (60°C) . • THE REGULATOR SHALL INCORPORATE A PRESSURE RELIEF VALVE OR OVERPRESSURE DEVICE.
- Page 25 POST-ASSEMBLY GAS CONNECTION • Never insert any foreign objects into the valve outlet. It may damage the valve and cause a leak. Leaking gas may result in fire, explosion, heavy body injury, or even death. • Do not connect this grill to the self-contained LP gas system of a motor home or camper trailer. •...
-
Page 26: Leak Testing
POST-ASSEMBLY LEAK TESTING GENERAL • Although all gas connections on the grill are leak-tested at the factory prior to shipment, a complete gas tightness check must be performed at the installation site due to possible mishandling in shipment or excessive pressure unknowingly being applied to the unit. Periodically check the whole system for leaks or immediately check if the smell of gas is detected. -
Page 27: Final Installation Checklist
POST-ASSEMBLY FINAL INSTALLATION CHECKLIST At least 36" (91-cm) clearance must be maintained from combustible constructions to the □ sides and back of the grill. There is no combustible construction material over the grill. □ All internal packaging is removed. □ Burners are sitting properly on orifices. - Page 28 POST-ASSEMBLY TO LIGHT THE MAIN BURNERS BY MATCH: If the burner will not light after several attempts, the burner can be match-lit. Tools: Match holder (hanging under right-side shelf) Usage: 1. Read instructions before lighting. 2. Open the lid and remove the cooking grids during lighting. 3.
-
Page 29: Operating Instruction
POST-ASSEMBLY OPERATING INSTRUCTIONS • Clean the grill often. A grease fire that may damage the grill may occur if the grill has not been cleaned frequently. See “Cleaning” in “Care and Maintenance” section for instructions. • NEVER leave the grill unattended while using. •... -
Page 30: Operating Instructions
POST-ASSEMBL OPERATING INSTRUCTIONS GENERAL USE OF THE GRILL: The grill burners encompass the entire cooking area and are side-ported to minimize blockage from falling grease and debris. Above the burners are porcelain-coated heat diffusers. The igniter knobs are located on the valve panel. Follow the lighting instructions printed on the control panel or in this manual. -
Page 31: Safety Tips
SAFETY TIPS SAFETY TIPS: 1. Always check for leaks after every LP tank change. 2. Always check for leaks before each use. 3. Use long barbeque tools to avoid burns. 4. Check all gas supply fittings for leaks before each use. It is handy to keep a spray bottle of soapy water near the shut-off valve of the gas supply line. -
Page 32: Spider And Insect Warning
POST-ASSEMBLY CARE AND MAINTENANCE CLEANING COOKING AREA CLEANING The easiest way to clean the grill is to clean it immediately after turning off the flame when cooking is completed. Wear a barbeque mitt to protect your hand from the heat and steam. Dip a brass bristle barbeque brush in tap water and scrub the hot grill. -
Page 33: Troubleshooting
POST-ASSEMBLY TROUBLESHOOTING BEFORE CALLING FOR SERVICE: Please check the following problems/solutions before contacting our service center. PROBLEM POSSIBLE CAUSE SOLUTION Burner will not light Propane tank is empty Refill or replace propane tank after turning and Igniter deposited with Use clean swab and alcohol to pushing the knobs cooking residues clean... -
Page 34: Food Safety
POST-ASSEMBLY FOOD SAFETY 1. Always follow the following tips to enjoy safe and healthy outdoor grilling. 2. Always use hot, soapy water to wash hands, surfaces, and utensils after processing raw meat. 3. Always separate raw meat from cooked foods to avoid cross-contamination. 4. - Page 35 LIMITED WARRANTY This warranty applies to products purchased in the U.S. and Canada. This is the only express warranty for this product and is in lieu of any other warranty or condition. This product is warranted to be free from defects in material and workmanship for a period of five (5) years for the burners and one (1) year for all other parts from the date of original purchase.
Need help?
Do you have a question about the OG02 and is the answer not in the manual?
Questions and answers