Pioneer AppRadio SPH-DA110 Operation Manual
Appradio
Hide thumbs
Also See for AppRadio SPH-DA110:
- Operation manual (118 pages) ,
- Installation manual (48 pages) ,
- User manual (36 pages)

Related Manuals for Pioneer AppRadio SPH-DA110


Summary of Contents for Pioneer AppRadio SPH-DA110
- Page 1 Operation Manual SPH-DA110 AppRadio Be sure to read Important Information for the User first! Important Information for the User includes important information that you must understand before using this product. English...
-
Page 2: Table Of Contents
Contents Thank you for buying this Pioneer product. Please read through these instructions so you will know how to oper- ate your model properly. After you have finished reading the instructions, keep this document in a safe place for future reference. Introduction Playing iPod music and video Manual overview ......... - Page 3 Contents Using hands-free phoning ₋ Setting the rear output ......49 Starting procedure ........38 ₋ Setting the RCA output ......49 Reading the screen ........38 ₋ Setting the FM tuning step ......49 Using the touch panel keys ..... 38 ₋ RDS setting ..........50 ₋...
-
Page 4: Introduction
Chapter Introduction • Touch panel keys that are available on the Manual overview screen are described in bold in brackets [ ]: • Before using this product, be sure to e.g.) read Important Information for the Tap [Radio] on the Home screen. User (a separate manual), which • Extra information, alternatives and other contains warnings, cautions, and other... -
Page 5: Iphone / Ipod Compatibility
Chapter Introduction • iPhone 4 iPhone / iPod compatibility • iPhone 3GS This product supports only the following iPhone models and iPhone software versions. iPod with Lightning connector Others may not work correctly. Made for • iPod touch 5th generation • iPhone 5: iOS 6.0 • iPhone 5 • iPhone 4S: iOS 6.0... -
Page 6: To Ensure Safe Driving
Chapter Introduction To ensure safe driving Certain functions (such as viewing of app based visual content and certain touch panel key operations) offered by this product could be dangerous and/or unlawful if used while driving. To prevent such functions from being used while the vehicle is in motion, there is an interlock system that senses when the hand- brake is set. -
Page 7: About Appradio
Chapter About AppRadio Features Checking part names and functions Listening to the radio You can listen to the radio using this product. Playing iPod music and video You can play and operate audio sources and video sources with the iPhone connected. Viewing/operating mobile device applica- tions With the App Mode, you can view the screen... -
Page 8: Connecting And Disconnecting Mobile Devices
Chapter About AppRadio 5 Back button (for Android devices and Connecting and disconnecting MirrorLink devices) mobile devices • Press the Back button to return the pre- vious screen. The Back button is availa- ble while running the AppRadio app or WARNING other supported applications. - Page 9 Chapter About AppRadio p When you make hands-free phoning or use Connect your iPhone with Lightning your iPhone with Lightning connector as a connector Bluetooth audio device, you must make the Using the following cable and adapter enables Bluetooth connection, but do not have to you to connect your iPhone to this product.
- Page 10 Chapter About AppRadio p When you make hands-free phoning or use Disconnecting your iPhone your Android device as a Bluetooth audio Pull out the iPhone cable after check- device, you must make the Bluetooth con- ing that no data is being accessed. nection, but do not have to make the wired connection.
-
Page 11: Available Sources And Conditions
Chapter About AppRadio Available sources and conditions Connect your MirrorLink device The available sources varies according to con- Using the supplied cable for MirrorLink en- ditions as follows. ables you to connect your MirrorLink device to this product. Ü For connecting MirrorLink device, refer to Sources Conditions Radio... -
Page 12: Basic Operation
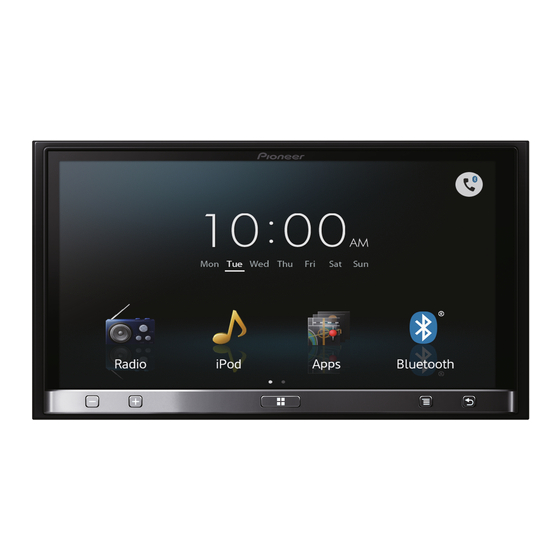
Chapter Basic operation Home screen Using the touch panel keys Page one The Home screen is the main screen that al- lows access to your entertainment sources, apps, settings and more. Reading the screen Page one Radio Displays the radio source screen. - Page 13 Chapter Basic operation Page two Appears when your Android device is connected via the separately sold App Connectivity Kit and processing the Bluetooth connection. Appears when your Android device is connected via the separately sold App Connectivity Kit and Bluetooth wireless connection (SPP) is established.
-
Page 14: Touch Panel Keys Common To Each Function
Chapter Basic operation Touch panel keys common to Audio source control each function When you press the Home button twice, the audio source control keys will be displayed The touch panel keys for operations common on-screen. Using these keys, you can operate to each function are described below. - Page 15 Chapter Basic operation The icon state changes as follows. Icons Conditions MIX ON Appears when the audio sourc- es are mixed. MIX OFF Appears when there is no mixa- ble source. When the icon is tapped, the switching list and the volume controller appear on the screen.
-
Page 16: Using The Radio
Chapter Using the radio STEREO indicator Starting procedure Shows that the frequency selected is being broadcast in stereo. 1 Press the Home button to display the Signal level indicator Home screen. Shows the signal strength of the selected 2 Tap [Radio] on the Home screen. -
Page 17: Using The Functions
Chapter Using the radio Lowers frequencies in one-step incre- Recalling broadcast frequencies ments. Holds down the key and the tuner Tap any frequency on the preset chan- will scan frequencies until a broadcast nel keys. strong enough for good reception is found. ... -
Page 18: Rds Functions
Chapter Using the radio RDS functions Setting the volume for traffic announce- ments The functions related to RDS (Radio Data Sys- tem) are available only in areas with FM sta- Use the Volume (+/–) button to adjust tions broadcasting RDS signals. Even if this the TA volume when a traffic announce- product is receiving an RDS station, not all ment begins. - Page 19 Chapter Using the radio p If no station is broadcasting the type of TRFC indicator programme you searched for, “Not Found” Indicator Meaning is displayed for about four seconds and The information interruption is turned then the tuner returns to the original sta- ON, and currently receiving data.
-
Page 20: Playing Ipod Music And Video
Chapter Playing iPod music and video [iPod] source is enabled only when an iPod or Reading the screen iPhone with 30-pin connector is connected to Music this product. When an iPhone with Lightning connector is connected, [iPod] is disabled. Please use the CarMediaPlayer to play music ... -
Page 21: Using The Touch Panel Keys
Chapter Playing iPod music and video Video • : Artist list Displays a list of all artists saved in the connected iPod. • : Album list Displays a list of all albums saved in the connected iPod. • : Genre list Displays a list of all genres saved in the connected iPod. -
Page 22: Using The Functions
Chapter Playing iPod music and video Using the functions Video Narrowing down song (episode) or video sources with the list Tapping an item on a list allows you to search for song (episode) or video sources and play them in your iPod. ... -
Page 23: Random Play (Shuffle)
Chapter Playing iPod music and video Category lists (for music): Random play (shuffle) • Playlists This function shuffles songs, albums or vide- • Artists os and plays them in random order. • Albums • Songs • Podcasts Tapping changes the setting as follows: •... -
Page 24: Changing The Wide Screen Mode
Chapter Playing iPod music and video 4 Tap the first letter of the title of the song/video you are looking for. While searching, touch panel key operation is not available. To refine the search with a different letter, tap [Cancel]. 5 Tap the title of the list that you want to play. -
Page 25: Viewing/Operating Mobile Device Applications
Chapter Viewing/operating mobile device applications Using Apps/MirrorLink AppRadio Mode source When you connect a mobile device with the AppRadio Mode compatible applications This product provides the AppRadio Mode, (such as AppRadio app) installed, you can the MirrorLink mode, and the App Mode for control applications for the mobile device di- viewing and operating the mobile device ap- rectly on this product (AppRadio Mode). - Page 26 Chapter Viewing/operating mobile device applications 3 Tap [Apps] on the Home screen. 2 Press the Home button to display the Home screen. 3 Tap [Apps] on the Home screen. Apps in the AppRadio Mode (iPhone) The application startup message appears and Apps in the AppRadio Mode (Android) the AppRadio app launches, then the Applica- tion menu screen appears.
-
Page 27: Mirrorlink Mode
Chapter Viewing/operating mobile device applications p Some applications may not launch depend- MirrorLink mode ing on the state of the connected device. In When you connect a MirrorLink device with that case, launch the application according the compatible applications installed, you can to the application startup message. -
Page 28: App Mode
Chapter Viewing/operating mobile device applications App Mode App Mode for iPhone with 30-pin connector When a mobile device is wired to this prod- uct, you can view the screen image currently In the App Mode, you can view the screen displayed on the mobile device (iPhone with image of the App Mode compatible applica- Lightning connector, Android device) or the... -
Page 29: Registering And Connecting A Bluetooth Device
Chapter Registering and connecting a Bluetooth device If your devices feature Bluetooth technology, p If you try to register more than three devic- this product can be connected to your devices es, the system will ask you to select one of wirelessly. - Page 30 Chapter Registering and connecting a Bluetooth device 4 Tap [Connection] on the “Bluetooth 7 Tap the Bluetooth device name you Connection Menu”. want to register. p If a PIN code input is required, enter a PIN code. (The default PIN code is “0000”.) p If you tap , the system starts searching for Bluetooth devices waiting for connec-...
-
Page 31: Pairing From Your Bluetooth Devices
Chapter Registering and connecting a Bluetooth device Pairing from your Bluetooth devic- Deleting a registered device When you have already registered three You can register a Bluetooth device by setting Bluetooth devices and you want to add this product to standby mode and requesting another one, you must first delete one of the connection from the Bluetooth device. -
Page 32: Connecting A Registered Bluetooth Device Manually
Chapter Registering and connecting a Bluetooth device 4 Tap for the registered device you 2 Tap on the Home screen. want to delete. Ü For details, refer to Home screen on page The phone menu screen appears. 3 Tap on the phone menu. The message “Delete OK?”... -
Page 33: Setting The Bluetooth Auto Connect Function
Chapter Registering and connecting a Bluetooth device Setting the Bluetooth auto Disconnecting a Bluetooth device connect function If this function is set on, a connection be- 1 Tap on the Home screen. tween your Bluetooth device and this product Ü For details, refer to Home screen on page will take place automatically as soon as the two devices are less than a few metres apart. -
Page 34: Switching Product Visibility
Chapter Registering and connecting a Bluetooth device Switching product visibility Changing a PIN code This function sets whether or not to make this When connecting your Bluetooth device to product visible to the other device. Initially, this product via Bluetooth wireless this function is set to “On”. -
Page 35: Displaying Bluetooth Device Address
Chapter Registering and connecting a Bluetooth device 4 Enter an arbitrary PIN code (up to 8 Displaying Bluetooth device digits). address This product displays its Bluetooth device address. 1 Tap on the Home screen. Ü For details, refer to Home screen on page The phone menu screen appears. -
Page 36: Using The Bluetooth Audio Player
Chapter Using the Bluetooth audio player You can control the Bluetooth connection of Reading the screen the audio device that supports Advanced Audio Distribution Profile (A2DP) or A2DP with Audio/Video Remote Control Profile (AVRCP), to operate the audio source. To connect using the Bluetooth function, you must first use the audio device to pair this product with the device. -
Page 37: Using The Touch Panel Keys
Chapter Using the Bluetooth audio player Using the touch panel keys Tapping the key skips to the start of the next song. Tapping the key once skips to the start of the current song. Tapping the key twice quickly will skip to the previ- ous song. -
Page 38: Starting Procedure
Chapter Chapter Using hands-free phoning Using hands-free phoning Using the touch panel keys CAUTION For your safety, avoid talking on the phone as much as possible while driving. You can control the Bluetooth connection of the mobile device, and make a call using the incoming or outgoing call histories, trans- ferred phone book, or by dialling. -
Page 39: Adjusting The Phone Volume
Chapter Chapter Using hands-free phoning Using hands-free phoning Adjusting the phone volume Calling a number in the phone book You can select and call a contact from the During the hands-free phoning, you can ad- phone book entries transferred to this prod- just the phone volume using the Volume uct. -
Page 40: Selecting A Number Using Alphabet Search Mode
Chapter Chapter Using hands-free phoning Using hands-free phoning 4 Tap the list to display the phone num- Selecting a number using alphabet ber list of the selected entry. search mode The details screen of the phone book appears. If a lot of numbers are registered in the phone 5 Tap the phone number you want to dial. -
Page 41: Answering An Incoming Call
Chapter Chapter Using hands-free phoning Using hands-free phoning Answering an incoming call Using advanced functions This product informs you that it is receiving a Answering a call automatically call by displaying a message and producing a You can enable or disable auto answer for ring sound. -
Page 42: Using The Preset Dial Lists
Chapter Chapter Using hands-free phoning Using hands-free phoning 2 Tap [Yes] to invert the names. Using the preset dial lists The order of all first and last names is inverted. 1 Tap The “Preset Dial” list appears. Setting the private mode 2 Tap one of preset dial keys to select the During a conversation, you can switch to pri- desired phone number. -
Page 43: Using The Voice Recognition Function (For Iphone)
Chapter Chapter Using hands-free phoning Using hands-free phoning Using the voice recognition Registration and connection function (for iPhone) • Mobile device operations vary depending on the type of mobile device. Refer to the You can use the voice recognition function of instruction manual that came with your iPhone. -
Page 44: The Received Call History And The Dialled Number History
Chapter Chapter Using hands-free phoning Using hands-free phoning The received call history and the dialled number history • Calls made or editing performed only on your mobile device will not be applied to the dialled number history or phone book in this product. -
Page 45: Customising Preferences
Chapter Customising preferences Ü For details, refer to Setting the rear output Customising the audio on page 49. settings 3 Tap to adjust front/rear speaker The audio settings cannot be set when balance. the source is set to “ OFF ”. Each time you tap , the front/rear 1 Press the Home button to display the... - Page 46 Chapter Customising preferences Adjusting the 5-band graphic equaliser Equaliser curve You can adjust the level of each band for the S.Bass (Super Bass) is a curve in which only low- equaliser curves. pitched sound is boosted. p A separate “Custom1” curve can be creat- Powerful (default) is a curve in which low-pitched and ed for each source.
-
Page 47: Adjusting Loudness
Chapter Customising preferences 5 Tap next to “Level” to adjust Adjusting loudness the output level. Loudness compensates for deficiencies in the “+6” to “–24” is displayed as the level is in- low- and high-sound ranges at low volume. creased or decreased. 1 Display the “Audio”... -
Page 48: Adjusting Source Levels
Chapter Customising preferences Customising the system Adjusting source levels settings “Source Level Adjuster” lets you adjust the volume level of each source to prevent radical changes in volume when switching between 1 Press the Home button to display the the sources. Home screen. -
Page 49: Setting The Rear Output
Chapter Customising preferences • iPhone (Digital AV) (default): Setting the RCA output When an iPhone with Lightning connec- This product’s preout (RCA rear output or sub- tor will be connected, select “iPhone woofer output) can be used for a full-range (Digital AV)”. -
Page 50: Rds Setting
Chapter Customising preferences 2 Tap [FM Step]. Selecting alternative frequencies Each time you tap [FM Step] will switch the When the tuner cannot get a good reception, FM tuning step between “50kHz” and this product automatically searches for a dif- “100kHz”... -
Page 51: Selecting The System Language
Chapter Customising preferences Selecting the system language Setting the keyboard layout The system language can be selected from You can select the keyboard layout displayed eighteen languages. on this product for text input in the AppRadio If text information such as the title name, art- Mode. -
Page 52: Switching The Ever Scroll Function
Chapter Customising preferences Switching the ever scroll function Updating Bluetooth connection software If a character string is too long for the speci- fied frame, the string scrolls automatically to This function is used to update this product display the full text. with the latest software. -
Page 53: Setting Safe Mode
Chapter Customising preferences p To cancel the rear view mode, tap [Rear Setting safe mode View] again. For safety reasons, you can limit the functions p Tapping the screen while displaying the that are available while your vehicle is in mo- rear view screen returns to the current tion. -
Page 54: Setting The Video Signal
Chapter Customising preferences Setting the video signal You can select the suitable video signal setting for your rear view camera. p As this function is initially set to “Auto”, the product will automatically adjust the video signal setting. However, the screen may turn black or im- ages may not be displayed properly when 5 Tap any of the following touch panel “Auto”... -
Page 55: Setting The Clock Mode
Chapter Customising preferences 6 Tap to adjust the selected item. Selecting the background display Each time you tap the level of the se- You can change the audio source screen lected item increases or decreases. background and Home screen background. If you want to switch the adjustment item, 1 Display the “System”... -
Page 56: Checking The Connections Of Leads
Chapter Customising preferences 3 Back Signal Checking the connections of leads When the gearstick is shifted to “R”, the Check that leads are properly connected be- signal switches to “High” or “Low”. (One tween this product and the vehicle. Please al- of these is displayed depending on the ve- so check whether they are connected in the hicle.) -
Page 57: Updating The Firmware Version
Chapter Customising preferences Customising the favourites Updating the firmware version menu You can update the firmware version of this product by using the USB memory device con- You can register the desired menu items on nected. the “Favorites” screen. Registering your fa- p Before updating, check your firmware vourite menu items allows you to quickly jump version and prepare the firmware update... -
Page 58: Removing Menu Items
Chapter Customising preferences 3 Tap [Settings] on the Home screen. Turning off the screen The setting menu screen appears. You can turn off the backlight of the LCD 4 Touch the tab on the left edge and/or screen. scroll the bar on the right edge to display 1 Press the Home button to display the the desired menu item. -
Page 59: Appendix Troubleshooting
Appendix Appendix Troubleshooting If you have problems operating this product, refer to this section. The most common problems are listed below, along with likely causes and solutions. If a solution to your problem cannot be found here, contact your dealer or the nearest authorised Pioneer service facility. Problems with this product Symptom Cause... - Page 60 Appendix Appendix Symptom Cause Action (Reference) The display is very dim. Picture quality adjustment of the dis- Adjust the picture quality. (Page 54) play is not correct. No sounds are produced from an The volume level is low. Adjust the volume level. audio source.
- Page 61 Appendix Appendix Problems with AppRadio Mode screen Symptom Cause Action (Reference) A black screen is displayed. While operating an application, the Press the Home button and display application was ended on the mobile the Home screen. device side. The mobile device OS may be Stop the vehicle in a safe place and waiting for screen operation.
-
Page 62: Positioning Technology
Appendix Appendix • In some driving conditions, signals from Positioning technology GPS satellites may not reach your vehicle. Positioning by GPS In this case, it is impossible for the system to use GPS positioning. The Global Positioning System (GPS) uses a network of satellites orbiting the Earth. - Page 63 Appendix Appendix • If you make a slight turn. • If the road has a series of hairpin bends. • If there is a parallel road. • If there is a loop or similar road configura- tion. • If there is another road very nearby, such as in the case of an elevated motorway.
- Page 64 Appendix Appendix • If you enter or exit a multi-storey car park or • When you drive around a roundabout. similar structure using a spiral ramp. • When starting driving immediately after starting the engine. • If your vehicle is turned on a turntable or similar structure.
-
Page 65: Setting List
Appendix Appendix Page Setting list Background The customisable settings of this product are System Reset listed below. For details about changing each setting, refer to the page for that item. Connection Status App launch assist Audio settings Firmware Version Infomation Firmware Update Page Fader/Balance... - Page 66 PIONEER CORPORATION 1-1, Shin-ogura, Saiwai-ku, Kawasaki-shi, Kanagawa 212-0031, JAPAN PIONEER EUROPE NV Haven 1087, Keetberglaan 1, B-9120 Melsele, Belgium/Belgique TEL: (0) 3/570.05.11 PIONEER ELECTRONICS AUSTRALIA PTY. LTD. 5 Arco Lane, Heatherton, Victoria, 3202, Australia TEL: (03) 9586-6300 PIONEER ELECTRONICS (USA) INC. P.O.
Need help?
Do you have a question about the AppRadio SPH-DA110 and is the answer not in the manual?
Questions and answers